
The DynamicPDF Client libraries make using the DynamicPDF API a breeze. We have Node.js, .NET, Java, PHP, and Go client libraries. But sometimes, you might want to call the DynamicPDF API directly as a REST call to your project without using any coding.
In this blog post, we use the .bubble.io API to call the dlex-layout endpoint directly as a REST call with no coding.
The instructions below, although particular to bubble.io also apply to other online no-code platforms such as Retool, WaveMaker, Betty Blocks, DronaHQ, and others.
bubble.io
The bubble.io allows developer to create interactive websites and APIs using no coding. To use bubble.io register for free account.
This post does not provide a bubble.io introduction or discuss integrating your plugin into an app, only how to create the plugin. For using plugins, refer to the Bubble.io documentation.
Also, if you do not have a DynamicPDF API account, register for a free account here. Both offer free accounts and allow you to upgrade as needed seamlessly. Refer to the numerous examples and documentation (Getting Started).
Refer to the bubble.io documentation for complete documentation on creating and using an API; here, we illustrate using the Add another call button to add a call to your API.
Creating a New Plugin
The first step in creating a new plugin is to navigate to the Plugins page and create a new one (figure 1).
- Click on the Plugins tab to be taken to the Plugins screen.
- Click the Create a plugin button to create a new plugin.
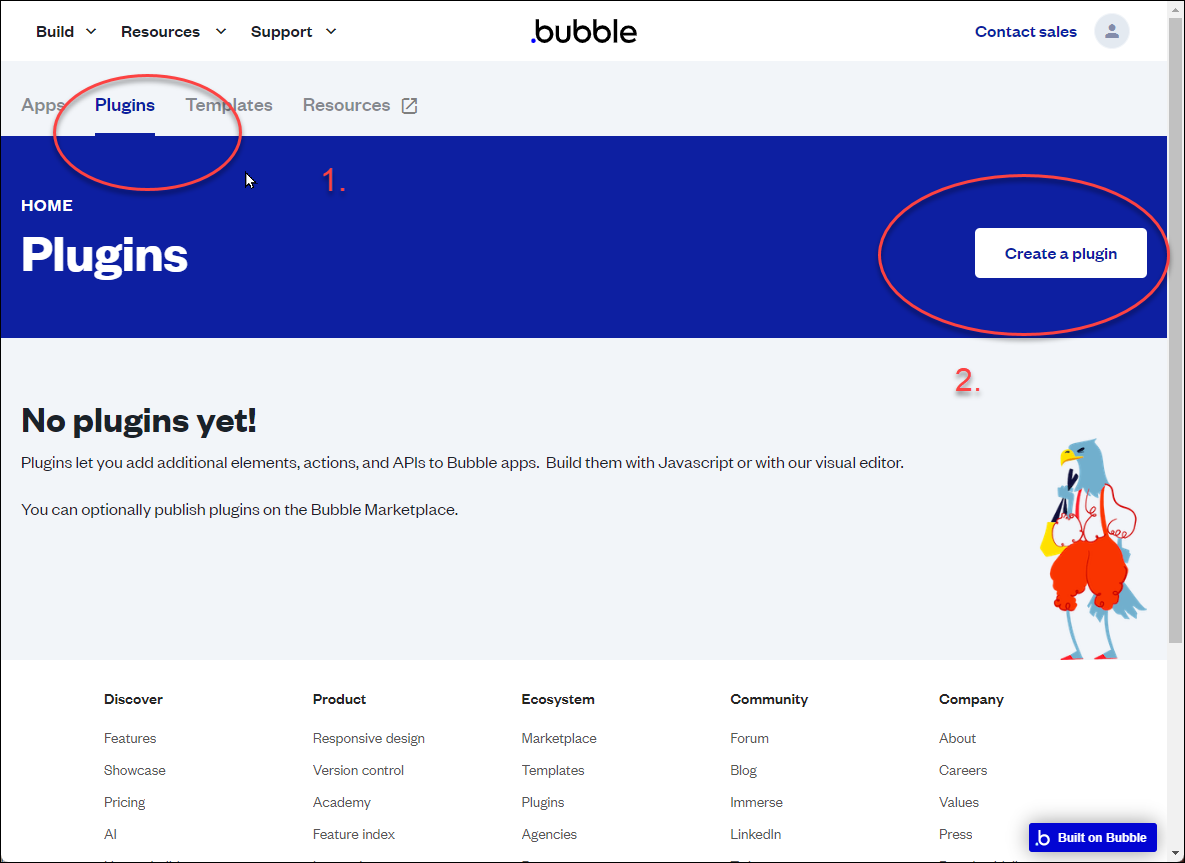
Figure 1. Creating a new plugin.
- Name the new plugin
DynamicPDF Endpoint Examplethen click Create plugin.
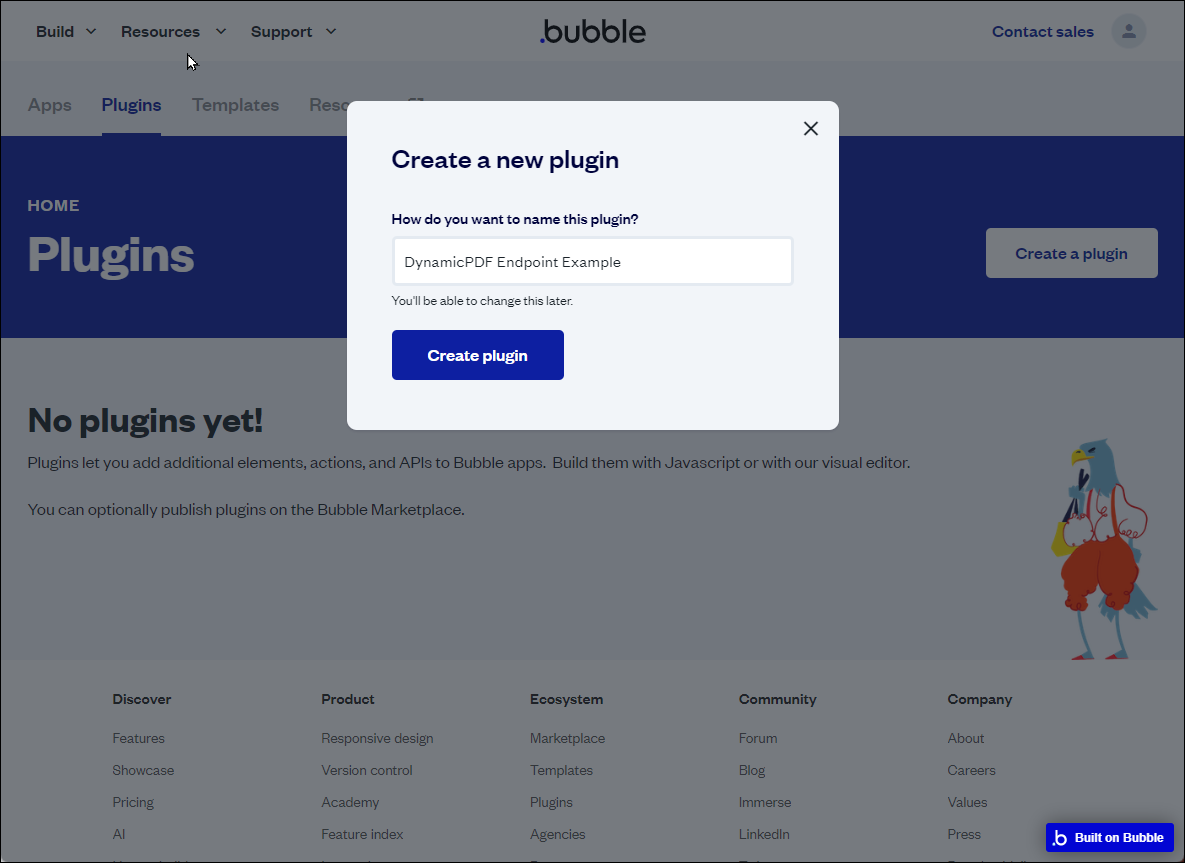
Figure 2. Naming the plugin.
Creating the Plugin
After initially creating a new plugin it takes you to the details screen for creating the plugin (figure 3).
- Add an image as your logo. I chose the DynamicPDF CloudAPI logo.
- Add an endpoint description to the Description field.
- Select a category for the plugin (I chose
Technical).
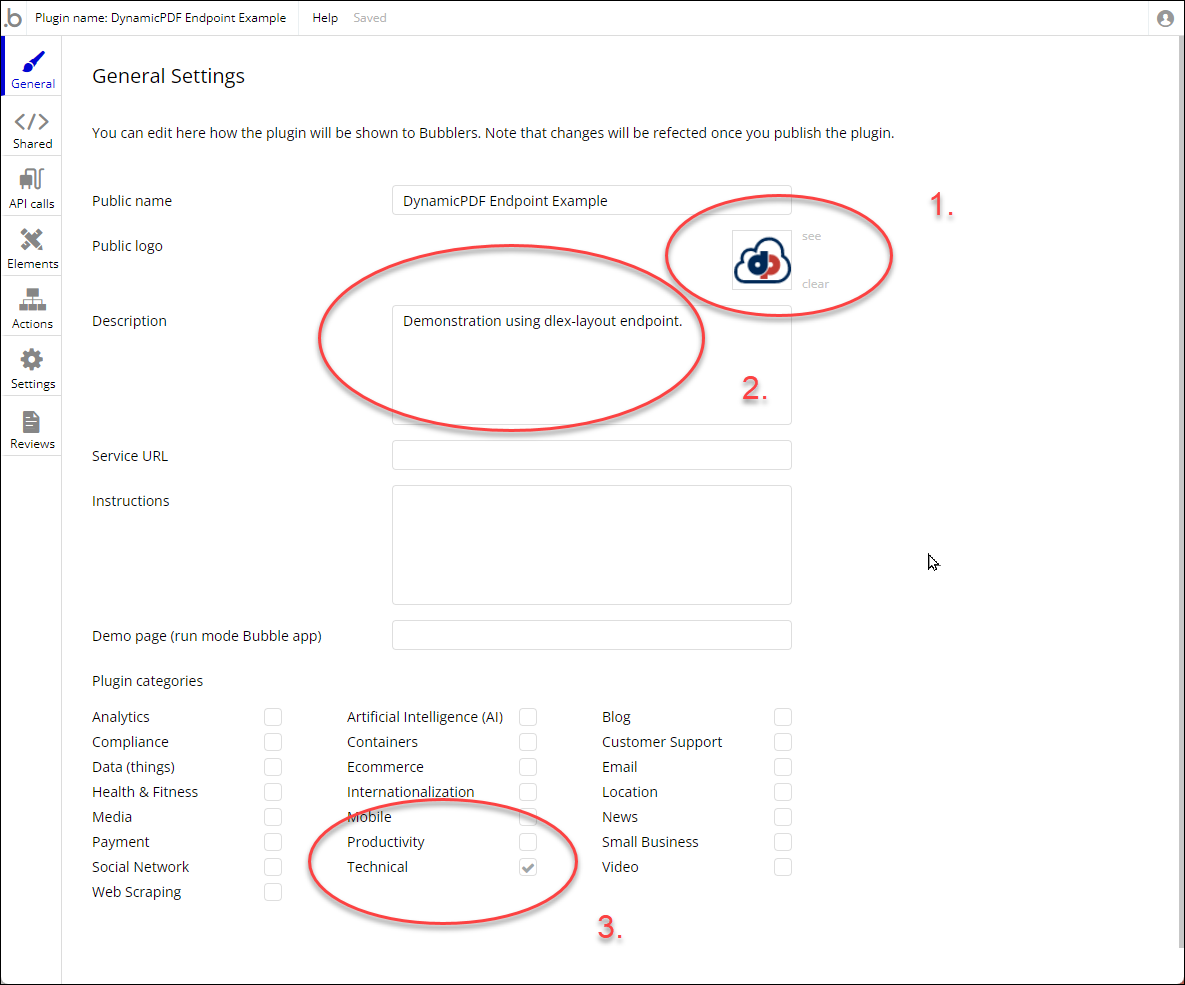
Figure 3. Describing the plugin.
Plugin API Calls
After describing the plugin you create the plugin details by completing the Plugin API Calls tab (figure 4).
- Select the API calls tab to be taken to the Plugin API Calls screen.
- Assign a name to the API Name.
- Select Add another call to expand and show the fields needed to define the API call.

Figure 4. Creating the Call.
After selecting Add another call, the screen adds more fields to enter the call's details (figure 5).
- Assign a name for the call (here
dlex-layout-call). SelectDatafrom the Use as dropdown and selectFilefrom the Data type dropdown. - Select
POSTand add the URL to the REST call (https:://api.dynamicpdf.com/v1.0/dlex-layout) . - Click Add header to add a new header.
- Assign
Authorizationas the Key and writeBearerfor the value.
Now you must get the authorization key from your DynamicPDF account.
- Go to your DynamicPDF CloudAPI account and select Apps and API Keys.
- Copy your API key by clicking [copy].
- Paste the value to the field after
Bearer, the complete value isBearer *your api key value*.
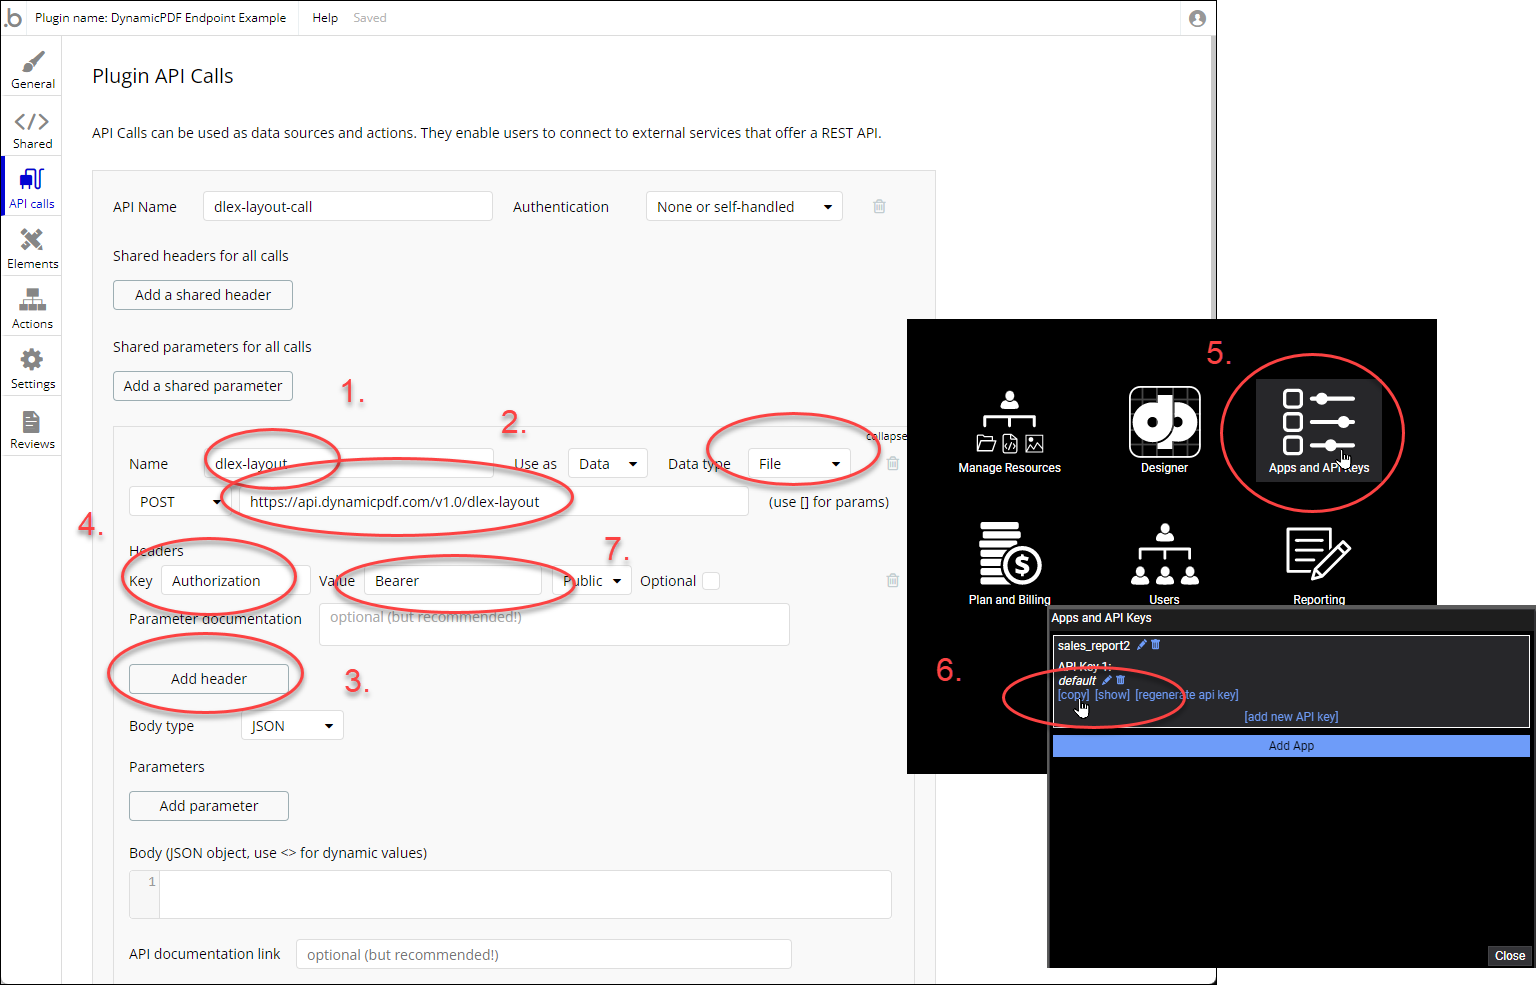
Figure 5. Add your API key as a header parameter.
After creating a header and adding your API key, you create a form field for the path to your DLEX file.
Here the DLEX file is in your DynamicPDF Cloud Storage and you use the relative path in DynamicPDF CloudAPI.
- Click Add parameter to create a new parameter.
- Select
Form-dataas the Body type. - Assign
DlexPathas the Key. - Navigate to your DynamicPDF account and select Manage Resources.
- Navigate to the
dlex-layoutfolder in thesamplesfolder, highlight the file path, right-click, and select Copy File Path to copy the file path to your clipboard. - Paste the value for the parameter in the Value field.
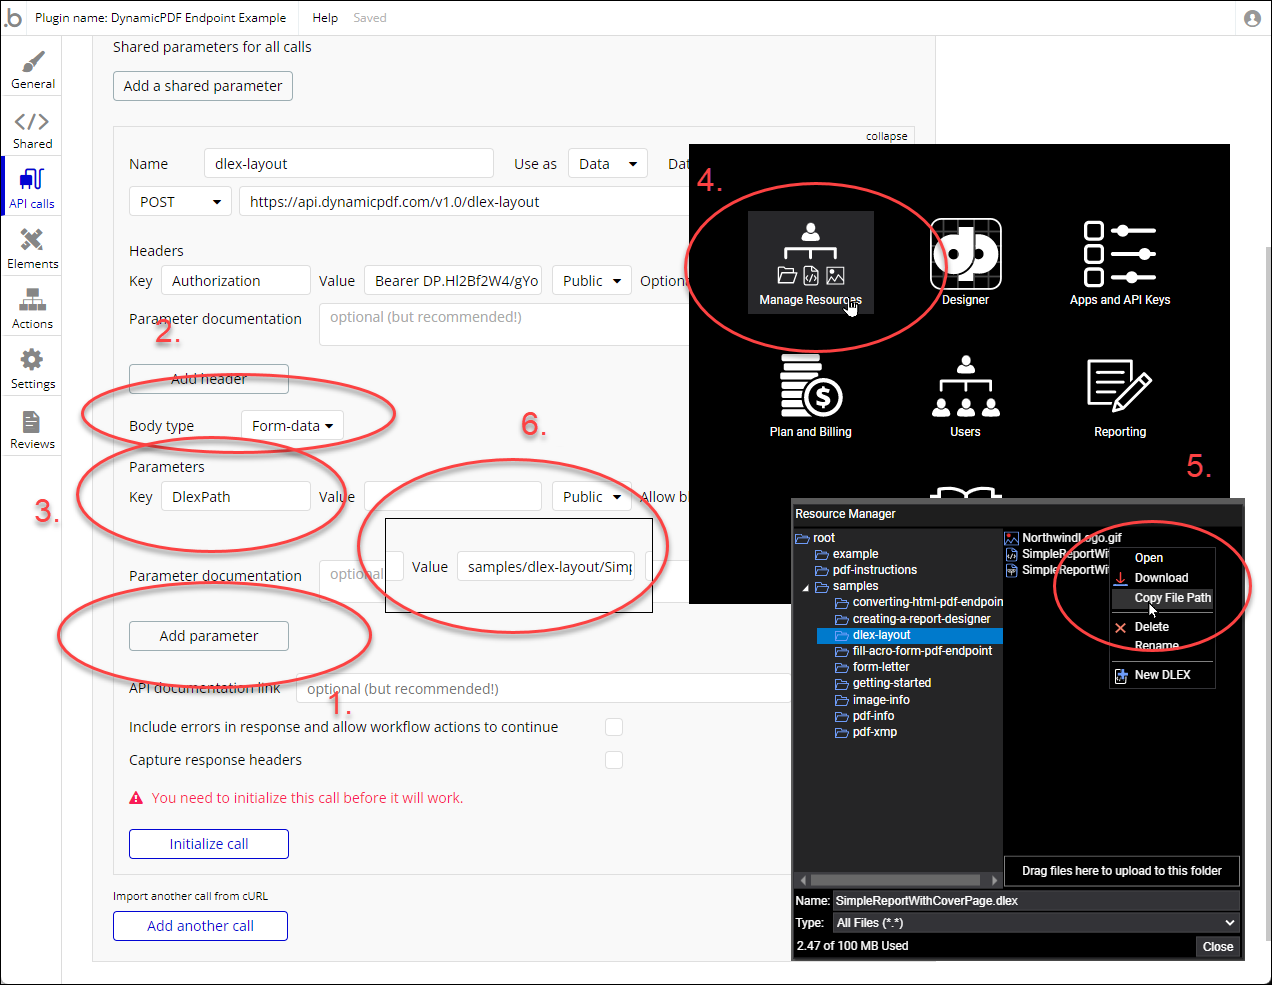
Figure 6. Adding the DlexPath to the call.
After adding the API key and the DlexPath, add the path to the layout data (figure 7).
You layout data is your organization's private data, although nothing prevents you from storing it in the DynamicPDF CloudAPI's Cloud Storage, here we envision it is stored in your local system.
- Click Add parameter to add another parameter.
- Assign
LayoutDataas the Key. - Check the Send file checkbox.
- Click Upload to open a file dialog.
- Select the file to upload the layout data (SimpleReportWithCoverPage.json).
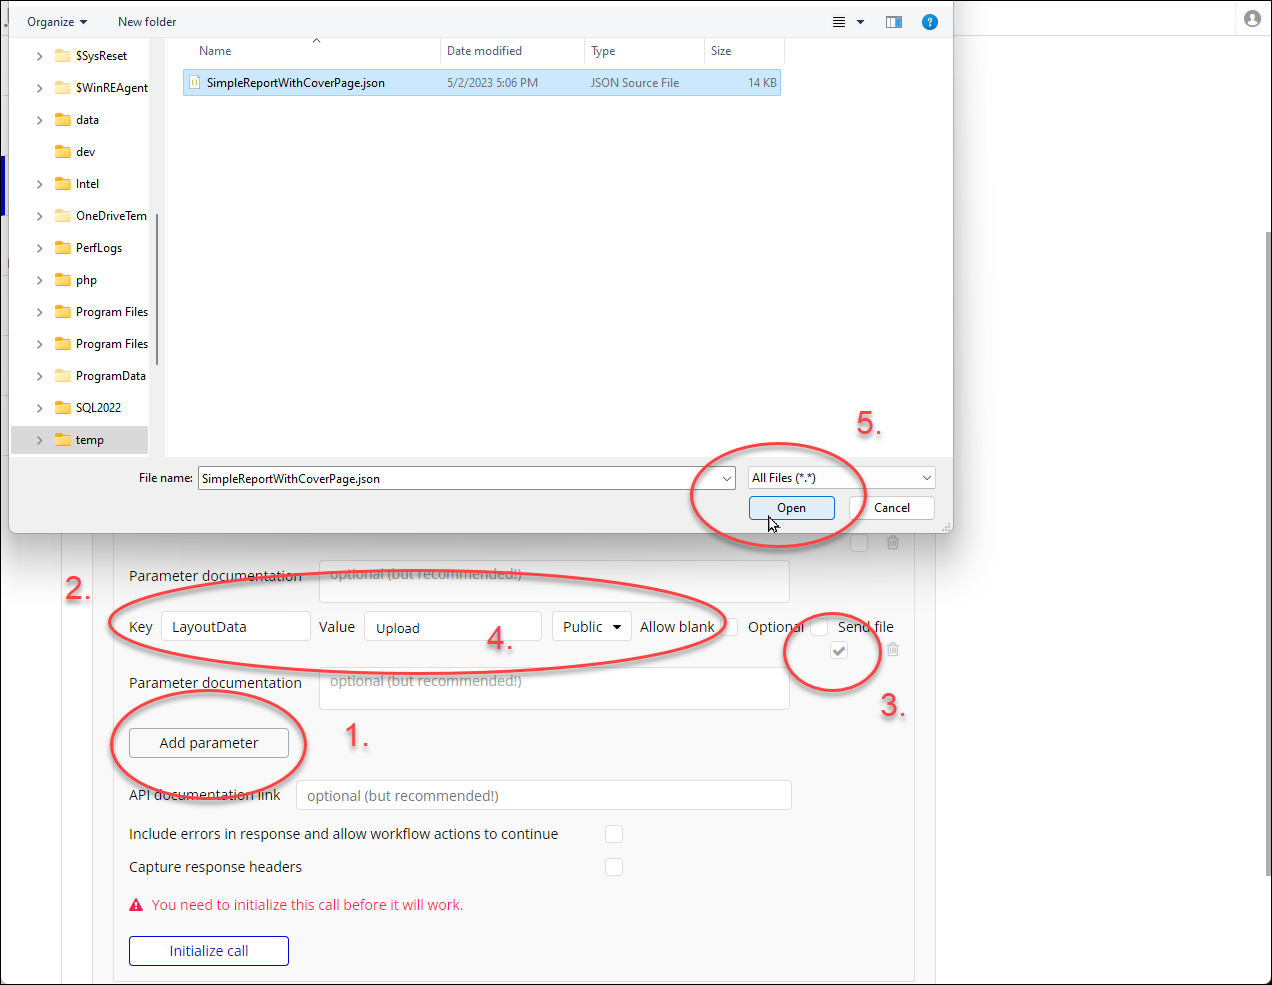
Figure 7. Adding the LayoutData to the call.
- Click Reinitialize call to reinitialize it.
- Click to preview the call.

Figure 8. Initializing and previewing the API call.
After clicking the preview link, your newly created API calls the dlex-layout endpoint and opens the created PDF in a new browser tab (figure 9).
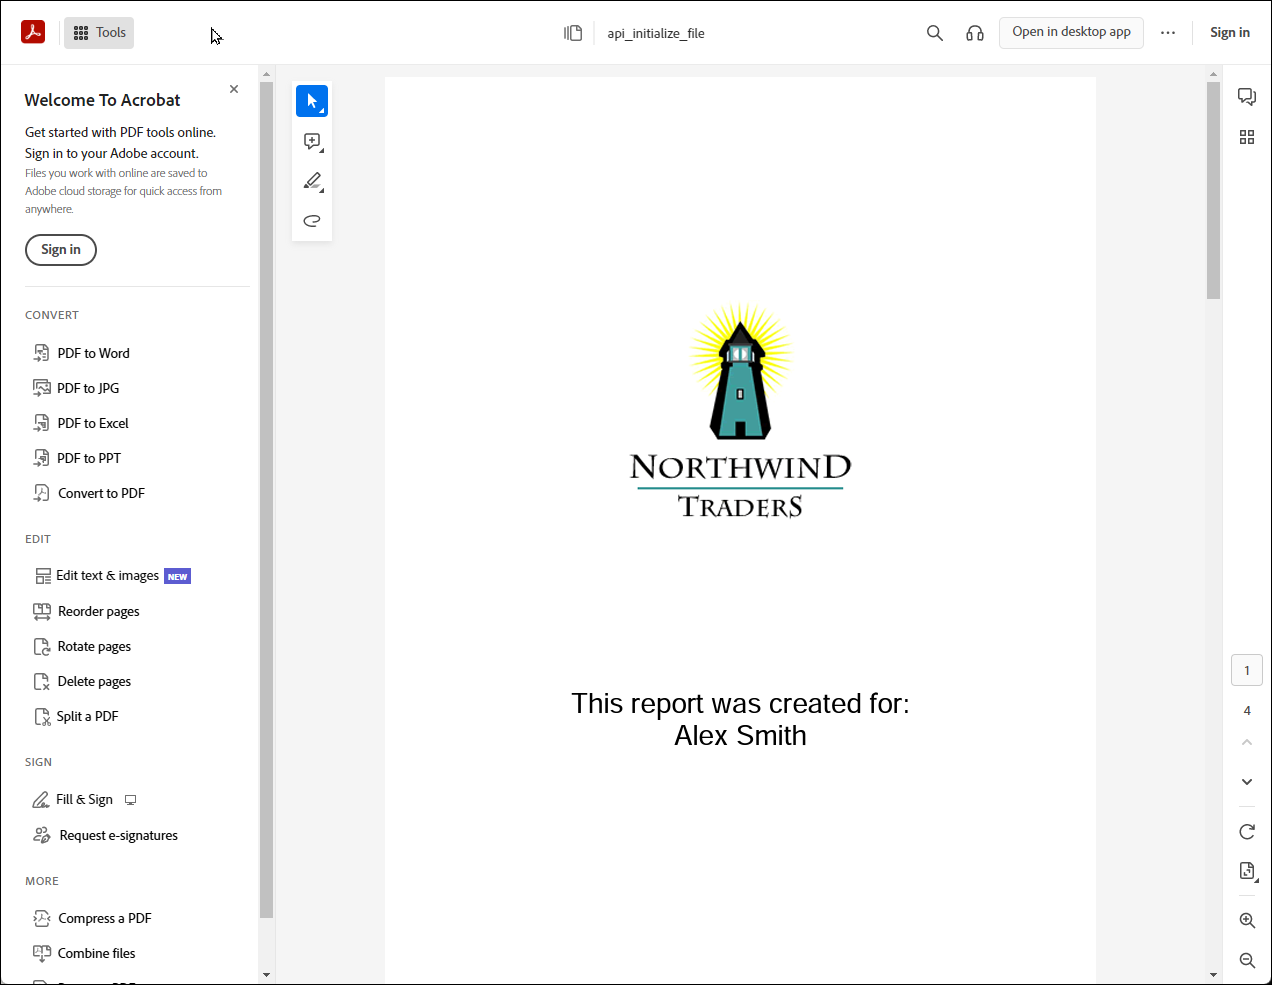
Figure 9. Previewing the dlex-layout API call's resultant PDF.
Conclusion
Upon clicking the Plugins tab, you will see your newly created API listed (figure 10). You can edit the API and when satisfied, you can register it so that others can use the API or you can use it privately in your own applications. Refer to the bubble.io documentation for more information on using your API.

Figure 10. Your newly created plugin.
Although using the DynamicPDF CloudAPI with one of it's client libraries is the most robust way to use the CloudAPI, it is also easily integrated into one of the available codeless development tools available on the web.
![]()