Exploring the File Manager and Fonts
In this tutorial you explore the File Manager. The tutorial familiarizes you with steps needed for working with the File Manager when working with DynamicPDF Designer or when using any of the numerous DynamicPDF API REST endpoints.
Portal
Upon logging into the DynamicPDF API you are first presented with the Portal. The Portal is where you can manage resources, obtain API keys, manage users, manage billing, and manage reporting.
File Manager
Use the File Manager for managing your resources in your DynamicPDF API cloud storage. Let's illustrate using the File Manager by using files from the Getting Started tutorial.
Samples Folder
In the DynamicPDF API tutorials, you are asked to use numerous resources. All resources are available from your cloud storage space using the File Manager. Tutorial files are available in the samples folder. You should already have a samples folder, but if not, create one by right-clicking and then creating the folder. Let's add the getting-started folder to samples if you do not already have this folder in cloud storage.
- Select Resources then Files to open the File Manager.
- Click the Add Samples button to open the Add Samples dialog.
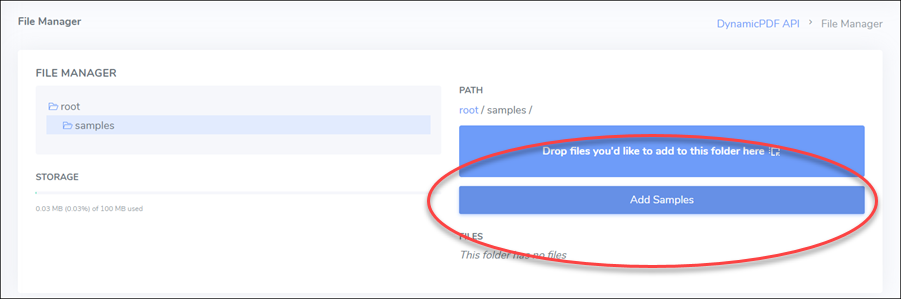
- Select the Getting Started project to add it to your cloud storage space.

After selecting the Getting Started project you will see the folder and its resources in the File Manager.

Now that we have downloaded the resources, let's use the File Manager to manipulate these files.
Download a Resource
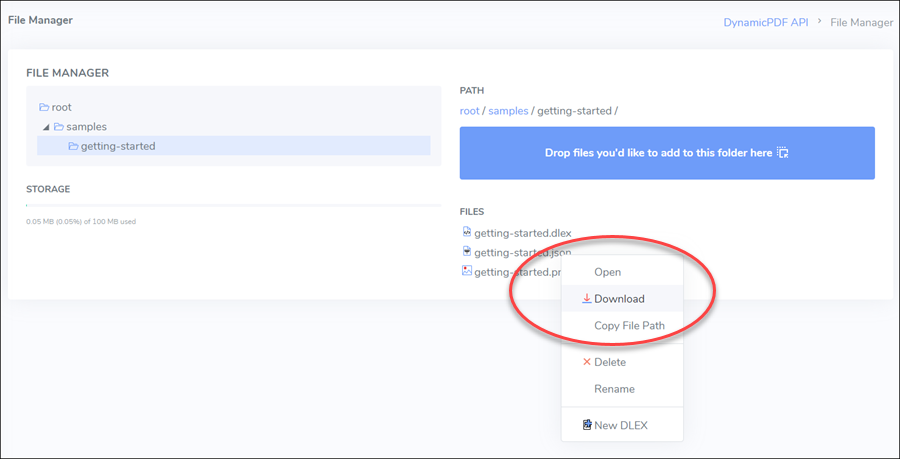
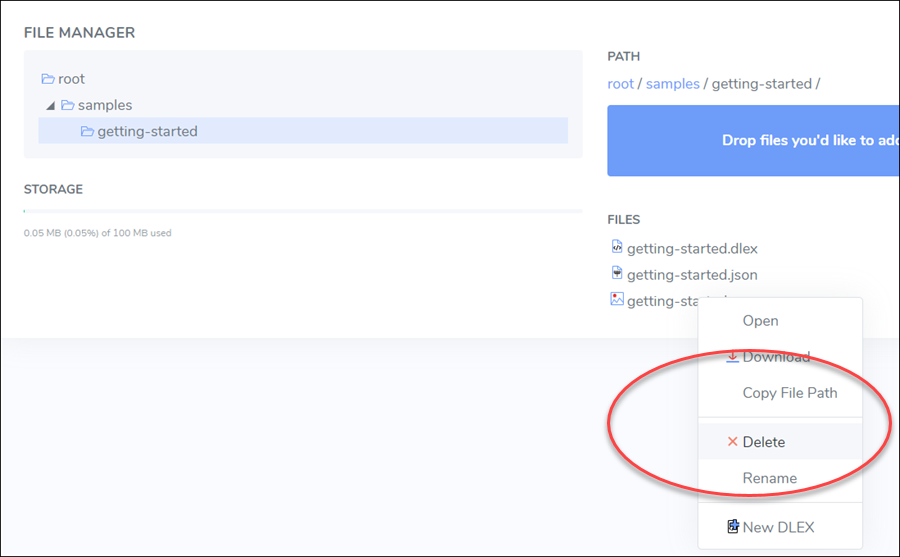
- Right click on any of the files and note the context menu allows you to open, download, copy a file path, delete, or rename a resource.
- In the
getting-startedfolder, right click ongetting-started.jsonand select Download and the file is downloaded to your local filesystem.
Obtain a Resource Path
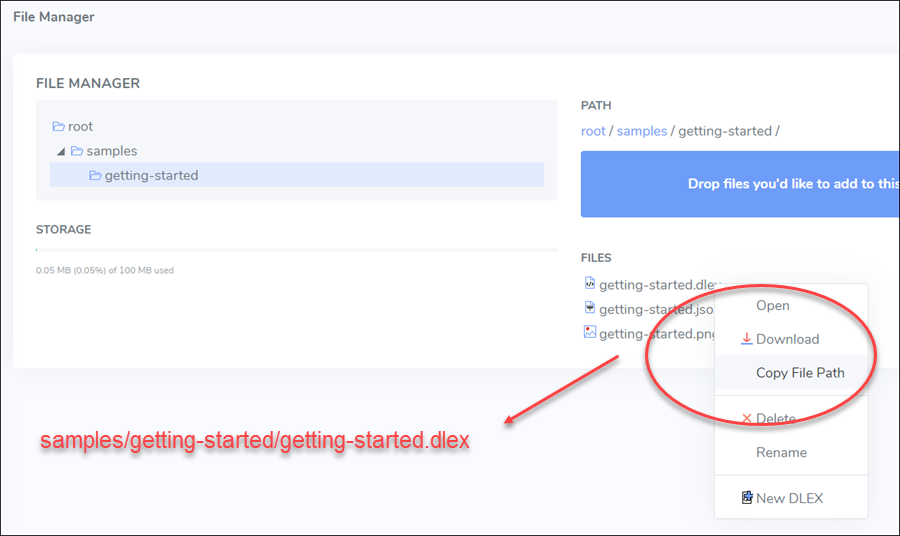
- In the
getting-startedfolder, right click ongetting-started.dlexand select Copy File Path.

- Open a text-editor and paste the file path from your clipboard to view the copied file path. The file path is the path to the resource in your cloud storage space. You will use the cloud storage relative path often when working with resources used by the REST endpoints or Designer.
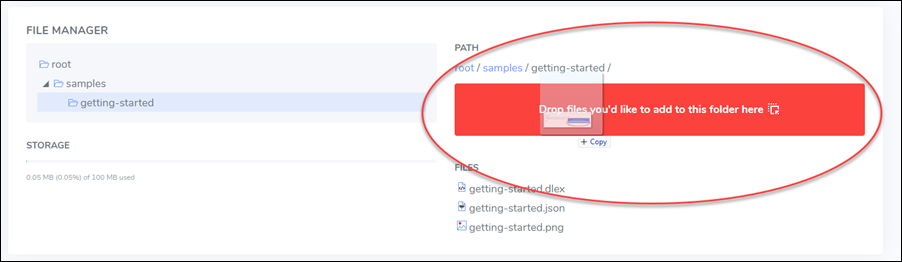
Add a Resource
- Select a small file from your local filesystem.
- Drag the file to the Drop files you'd like to add to this folder here button and the file is uploaded to cloud storage.
Delete a Resource
- Right click on the uploaded file and select Delete to delete the file you just uploaded from cloud storage.
Create New DLEX
When creating a new PDF, you will probably wish to use Designer to create and edit dynamic PDF reports. This context-menu choice creates a simple DLEX file.

- Right-click and from the context-menu, select New DLEX
- Enter the name, click Create and the file is created.
- Double-click on the newly created file and it takes you to Designer.
- Close Designer and return to the File Manager.
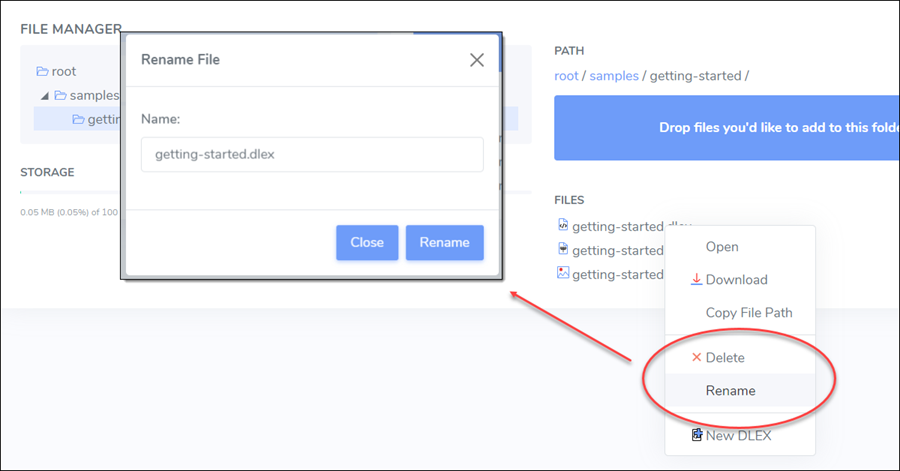
Rename a File
- Right-click on the newly created DLEX file and select Rename.
- Rename the file and the name change is reflected in the File Manager.
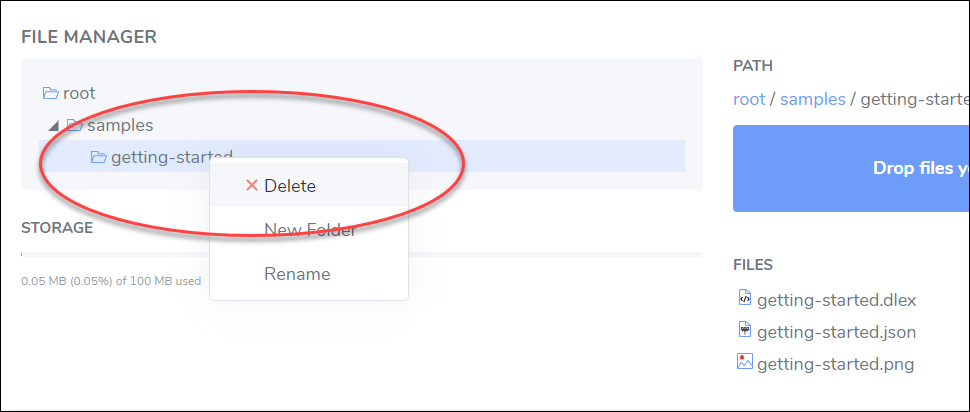
Delete a Folder
- Right-click on the
getting-startedfolder and delete the folder and its content.
Global Fonts
You can also add fonts to your DynamicPDF API account that can be used globally in all your applications.
- Add the
Getting-Startedsample back to cloud storage. - Select
Filesfrom the Portal menu and the Global Fonts panel appears.

- Drag and drop some fonts from you local file system to the Drop fonts you'd like to add globally here button.
- The fonts are then added to your cloud storage space and usable in all your DynamicPDF applications.

- Now open
getting-started.dlexin Designer. - Select title and then open the Fonts dialog in the properties pane.

- Select
Added(Global)from the dialog and the fonts added globally appear. - Select
Perpetua.

- Run the report and notice the title's font is now
Perpetua.

Typing the font's name in the Font property uses intellisense to display a list of available fonts.

Further Information
You will work with files in cloud storage using the File Manager. For more information on the File Manager, refer to the relevant Users Guide section.
![]()