Designer - Quick Tour
In this tutorial, you learn DynamicPDF Designer's major features by reviewing a sample DLEX report.
You must have a DynamicPDF API account before completing the steps in this tutorial.
After learning how to create a DLEX file, you then learn how to use that DLEX file with the DynamicPDF API to download that PDF using the dlex-layout REST endpoint. An explanation is purposely left brief to emphasize how quickly and easily you can get up and running using Designer. For a more detailed explanation, refer to the many tutorials provided or to the online documentation.
The primary goal here is for you to get up and running quickly after reviewing the significant features Designer provides for creating professional appearing PDF reports.
Start Designer
- Open Designer if not already opened.

Figure 1. Open Designer using the Portal menu option.
Open DLEX File
- Open File Explorer if not already opened.
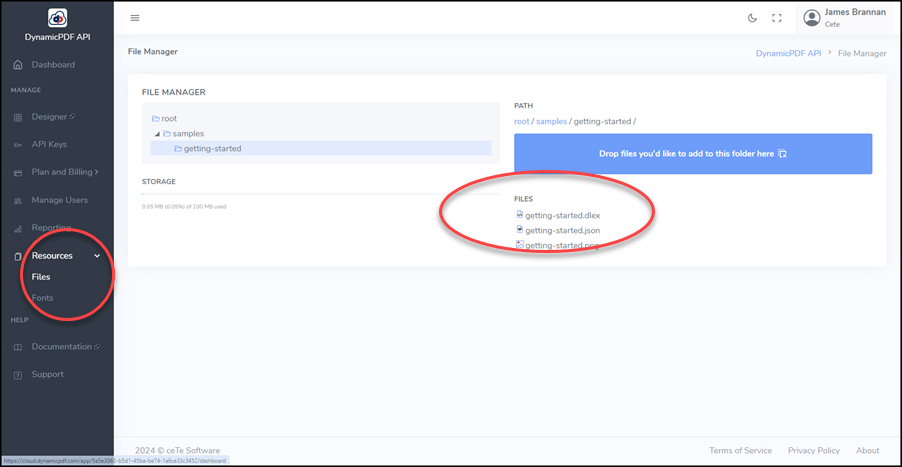
Figure 2. The File Explorer in DynamicPDF Designer.
- Open the file named
getting-started.dlexto load the DLEX file into Designer.
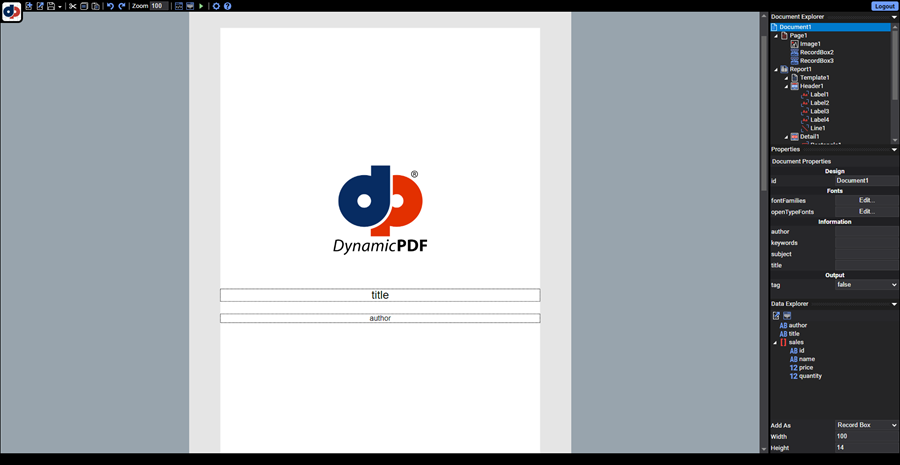
Figure 3. Designer with getting-started.dlex opened.
Load JSON Data
- Open the Layout Data Editor.

Figure 4. Select the Edit Layout Data button to open the Layout Data Editor.
- Open the File Explorer and select the
getting-started.jsonfile.
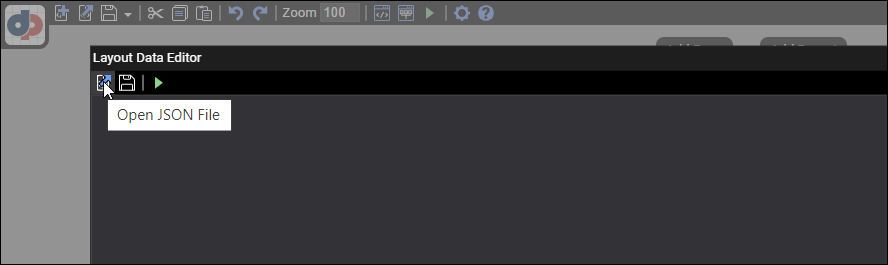
Figure 5. Select Open JSON File to open the File Explorer.
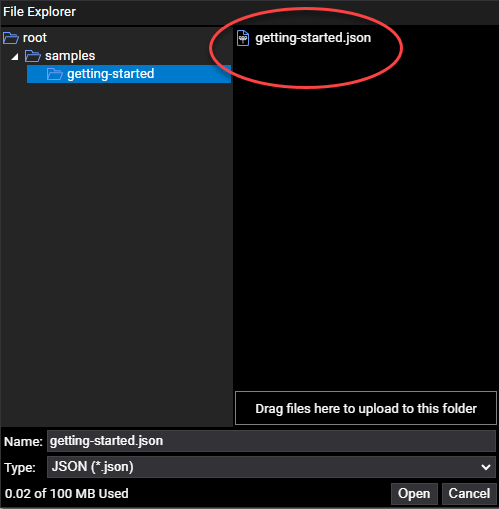
Figure 6. Open the JSON file in File Explorer.
- Review the JSON data and close the Layout Data Editor.
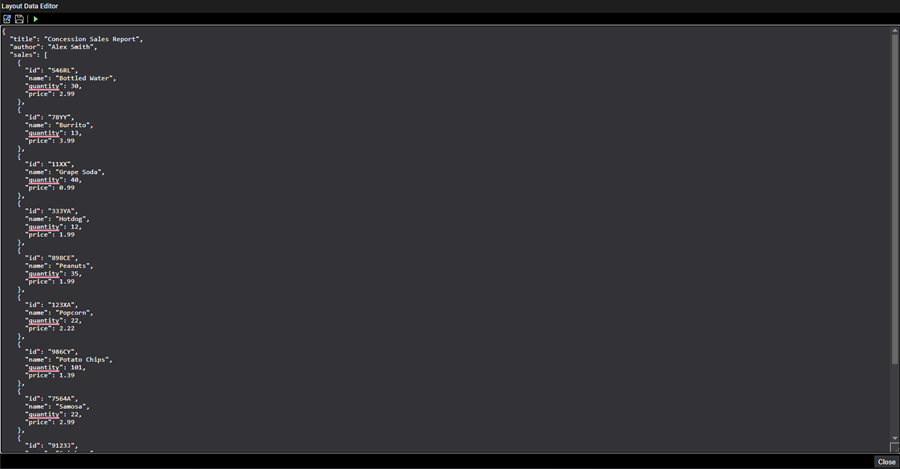
Figure 7. The JSON data opened in the Layout Data Editor.
Review Page
- Select the page in the Document Window or Properties Window to display the page's properties.
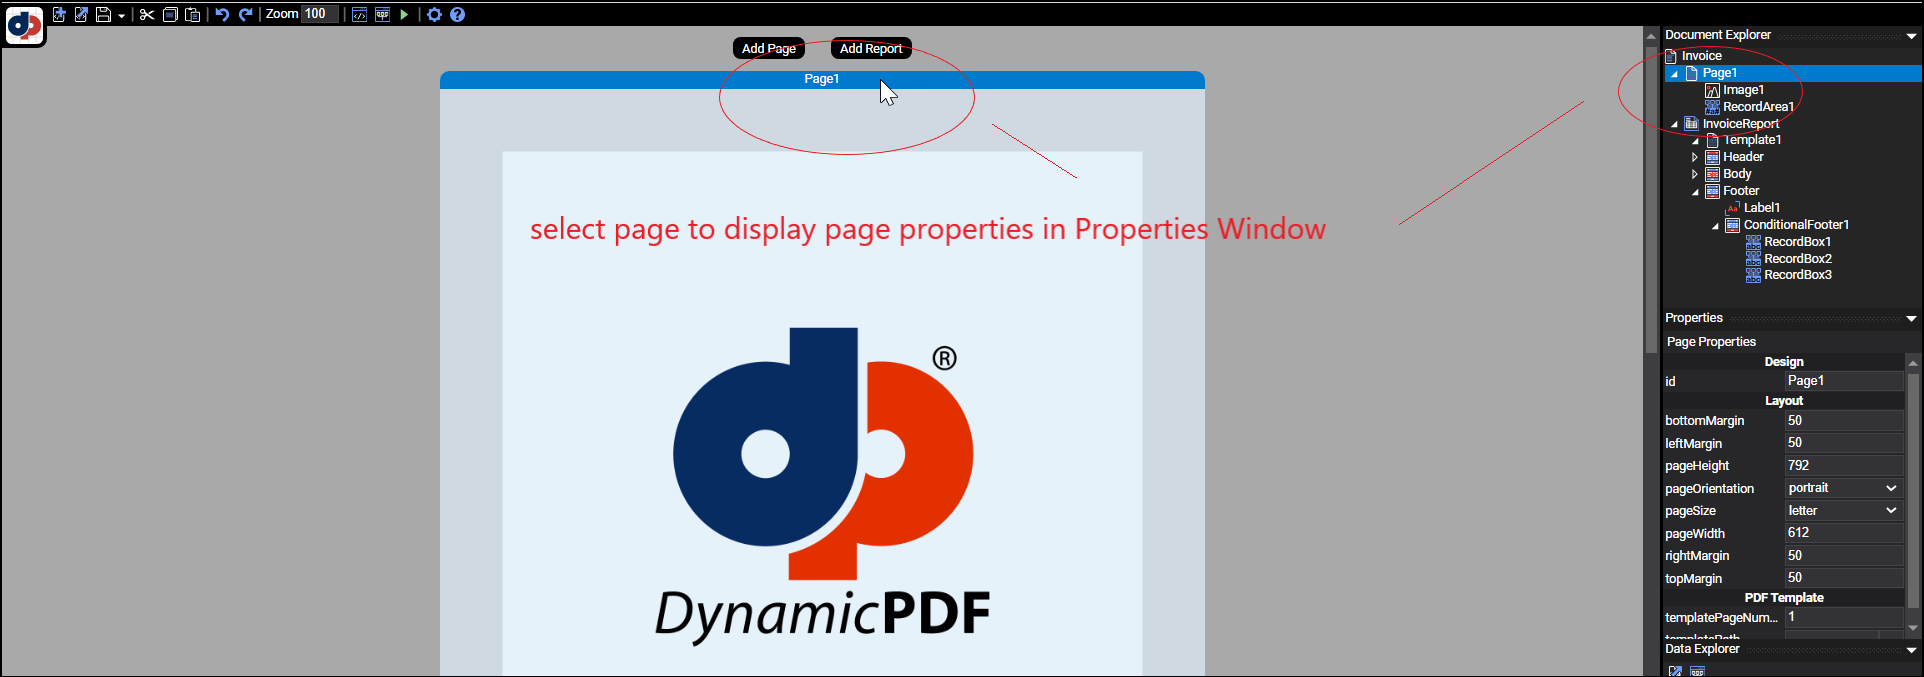
Figure 8. Display a page's properties by selecting page in the Document Window or Properties Window.
Image Element
- Select the image and notice the image is an Image element.
- Also notice the image's layout properties in the Image Properties Explorer and the image's path property in the Resource Explorer.
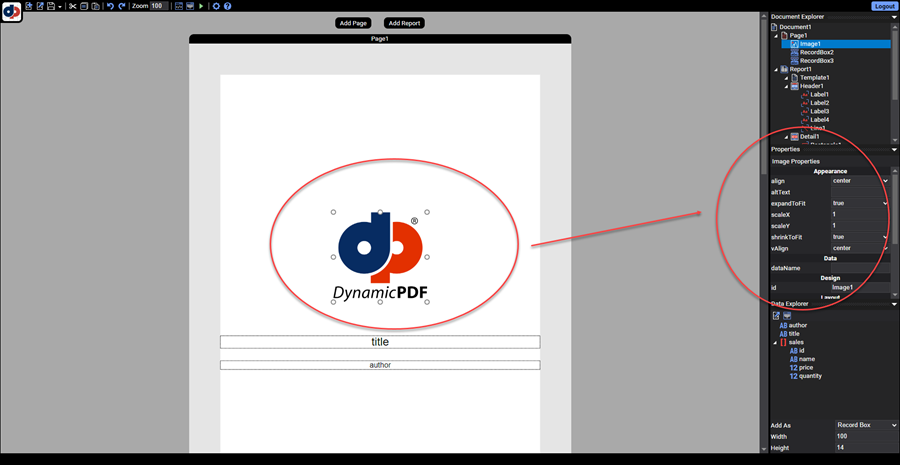
Figure 9. An Image element added to the page.
RecordArea Element
- Select the area containing text and you see it is a RecordArea element that has the text
Report Created For:and the dataValue property that contains theCreatedForfield from the JSON document.
RecordArea elements use a "ColdFusion style" syntax of pound signs to embed data elements in text.
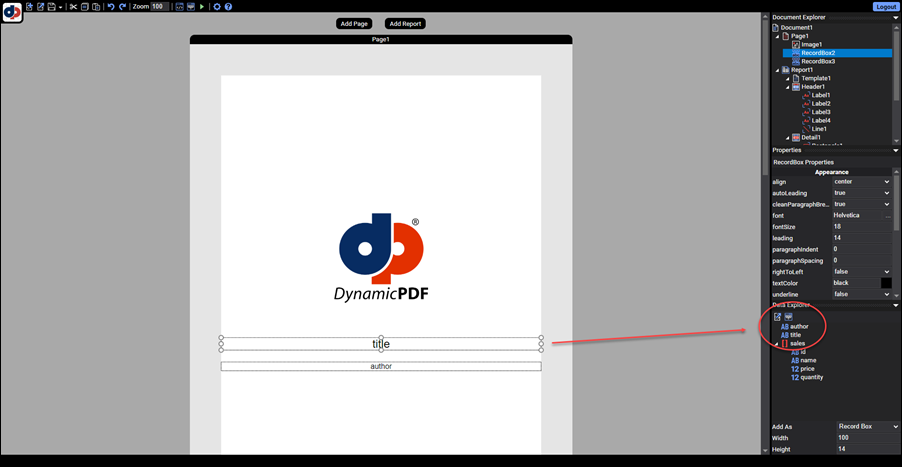
Figure 10. A RecordArea element added to the page.
Click anywhere in the Document Window to display a context menu containing elements to add to your DLEX document.

- Open the JSON data and note the JSON document's fields. A page can only contain top-level, non-repeating JSON fields. The
CreatedForfield is a top-level JSON field as are the other fields in the following code snippet from the JSON document in thegetting-started.jsonfile (only relevant fields included in snippet).
{
  "title": "Concession Sales Report",
  "author": "Alex Smith",
  "sales": [
    {
      "id": "546RL",
      "name": "Bottled Water",
      "quantity": 30,
      "price": 2.99
    },
    {
      "id": "78YY",
      "name": "Burrito",
      "quantity": 13,
      "price": 3.99
    },
    {
      "id": "11XX",
      "name": "Grape Soda",
      "quantity": 40,
      "price": 0.99
    },
If unfamiliar with JSON, refer to the excellent introduction by W3Schools (https://www.w3schools.com/js/js_json_intro.asp).
Review Report
- Scroll to the report and select the report named InvoiceReport to display the report's properties in the Property Window.
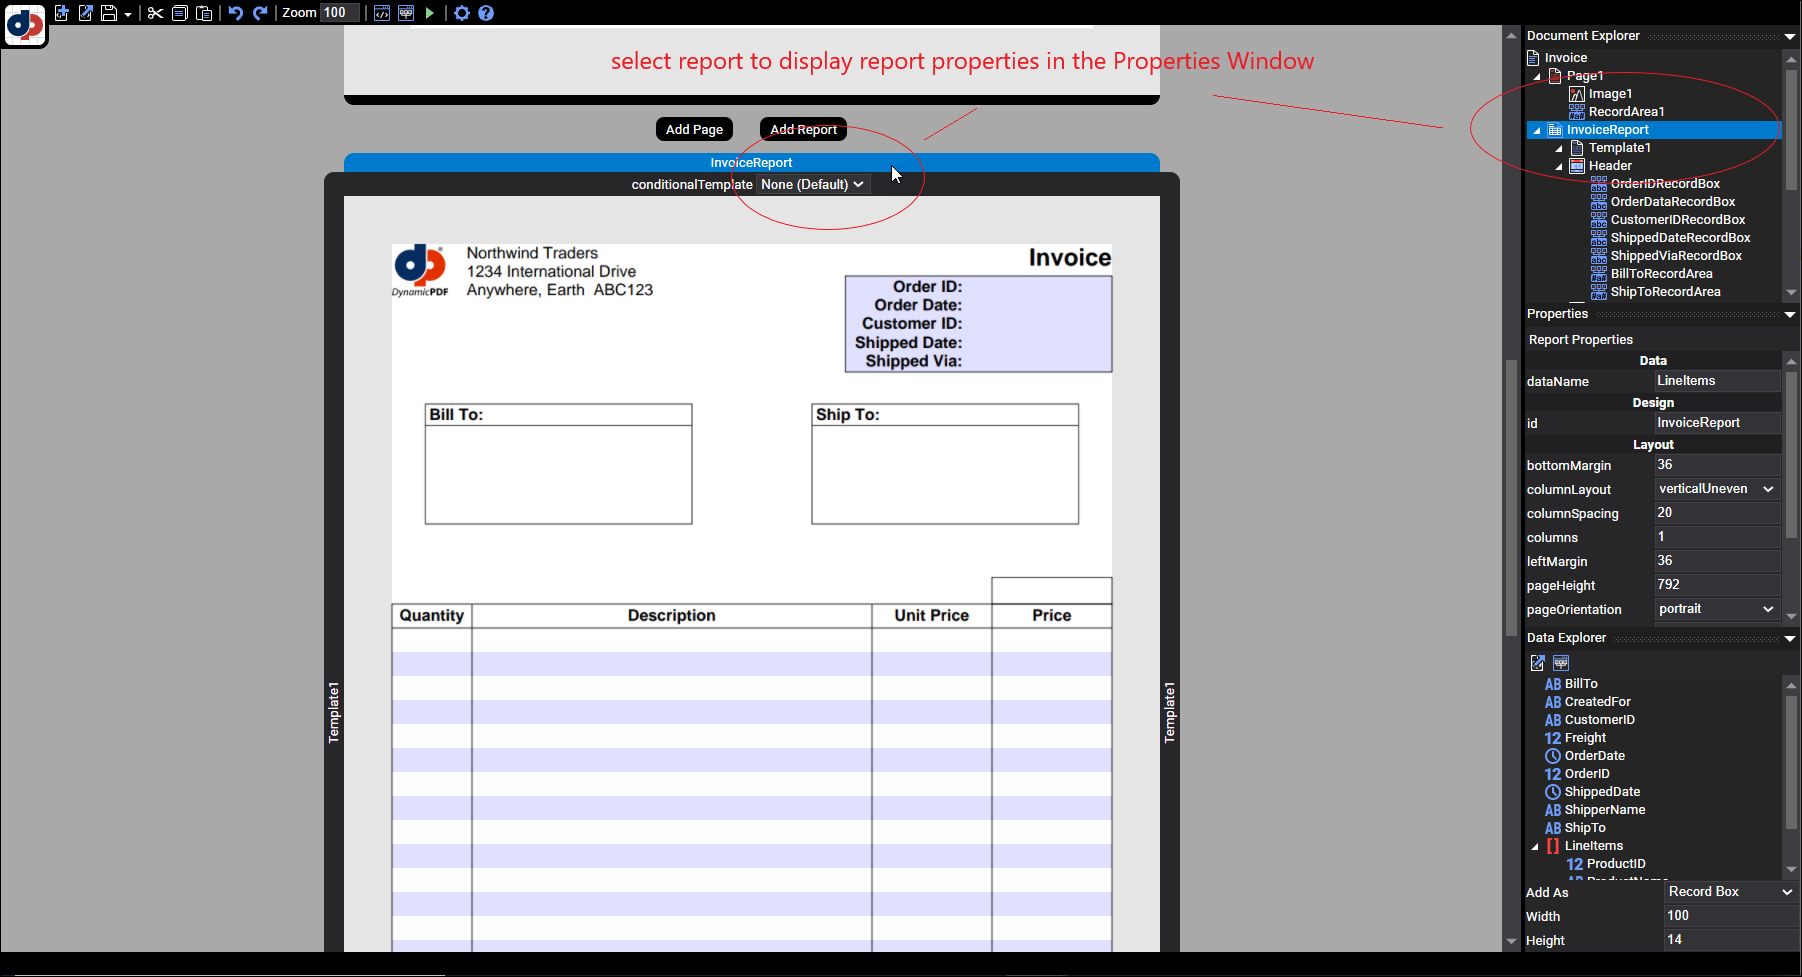
Figure 11. Display a report's properties by selecting the report in the Document Window or in the Properties Window.
- Notice the report's dataName property value is
LineItems, which corresponds to theLineItemsarray in the JSON document.
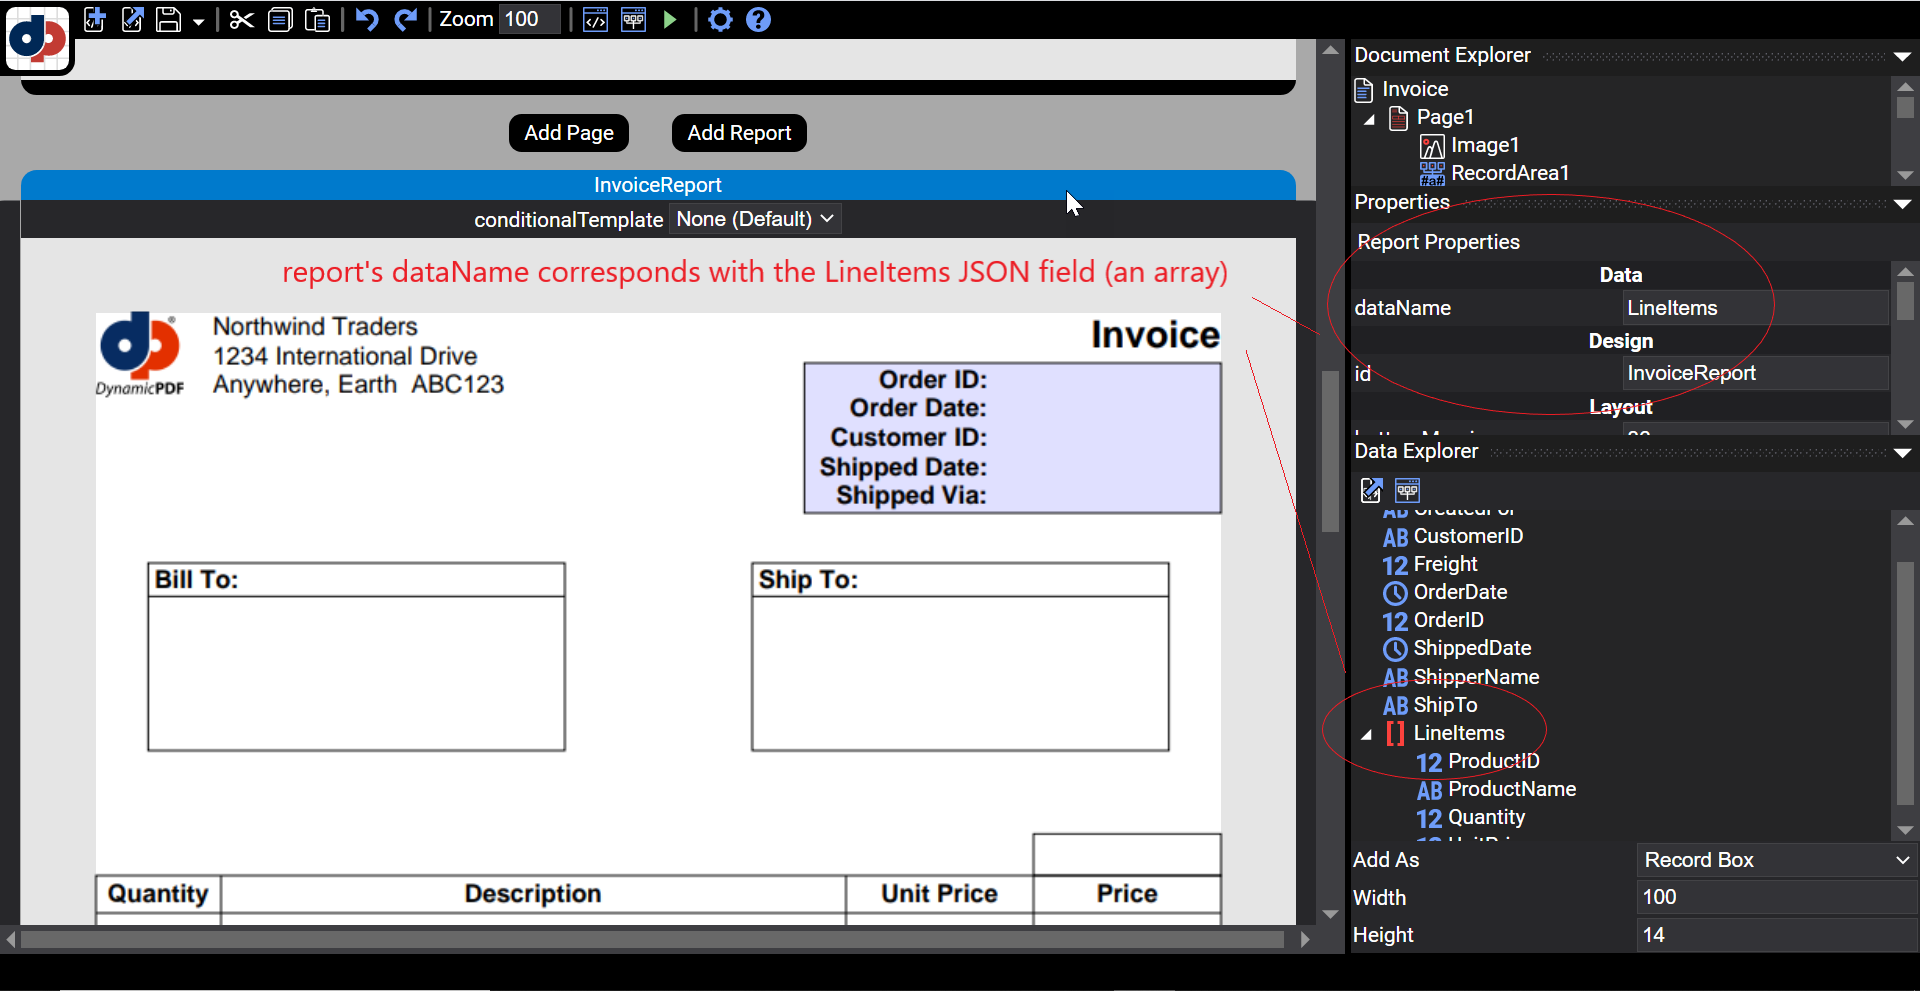
Figure 12. The report's dataName corresponds to an array in a JSON Document.
- Open the JSON data and note the
LineItemsarray in the JSON document. A report is the repeating data (a top-level array) in a JSON document. The array must be named and at the JSON document's top-level (only relevant fields included and array elements limited to two for brevity).
{
  "LineItems": [
    {
      "ProductID": 2,
      "Quantity": 24,
      "ProductName": "Chang",
      "UnitPrice": 19
    },
    {
      "ProductID": 3,
      "Quantity": 4,
      "ProductName": "Aniseed Syrup",
      "UnitPrice": 10
    }
  ]
}
Template
- Select the template named Template1 to display the template's properties in the Properties Window.
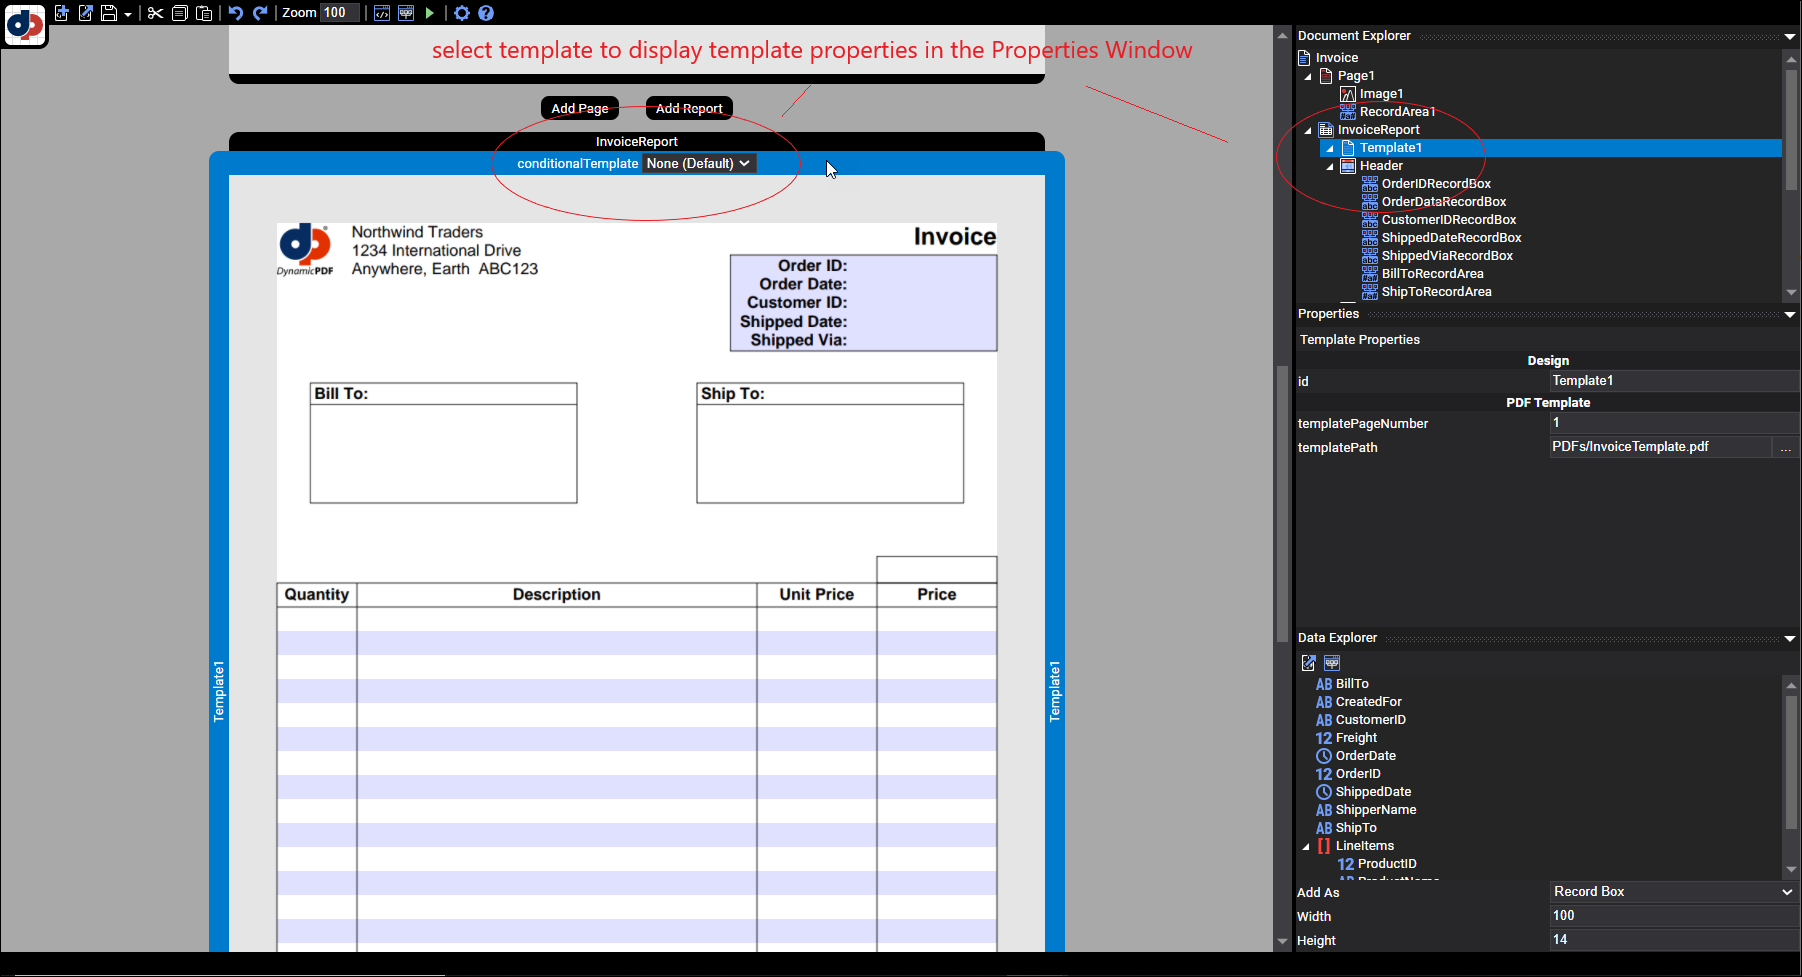
Figure 13. Display a template's properties by selecting the template in the Document Window or in the Properties Window.
- Notice the template was loaded into the DLEX through the templatePath in the PDF Template Explorer.
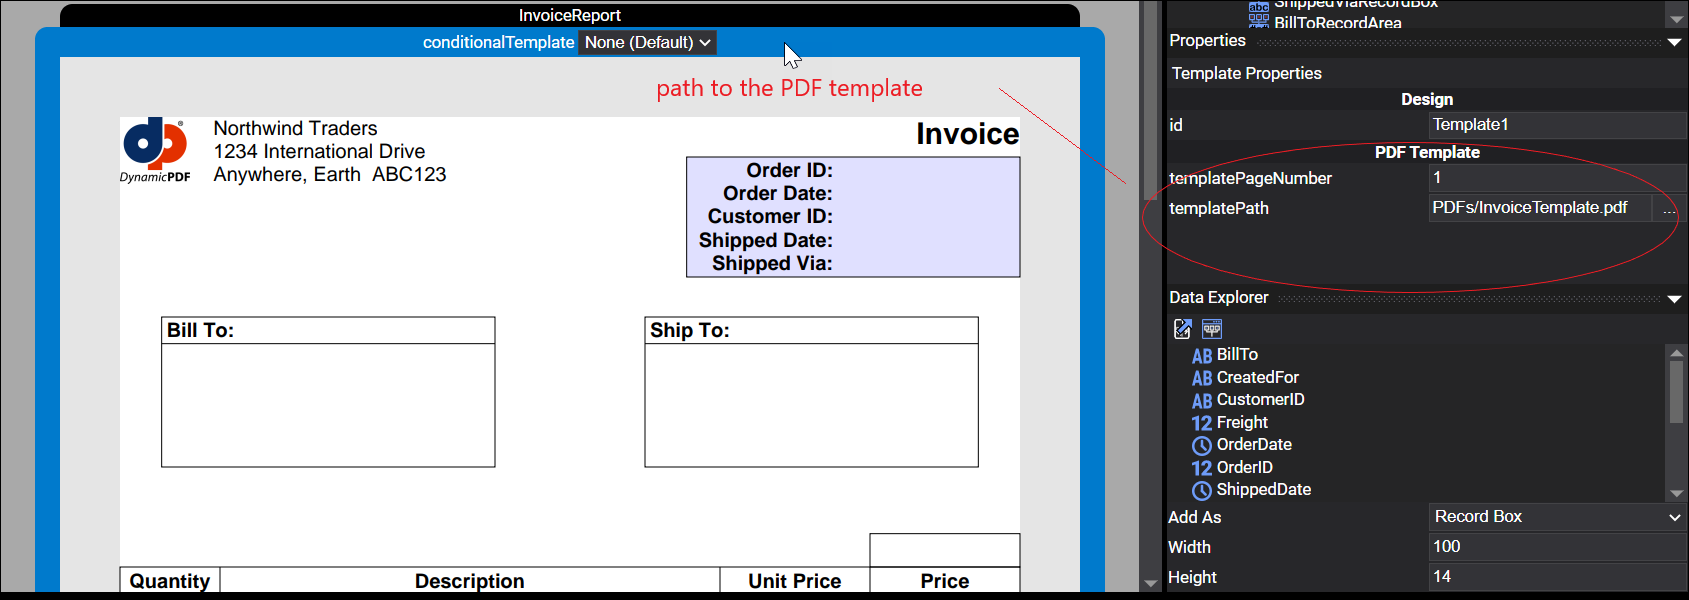
Figure 14. The InvoiceTemplate.pdf is loaded into the templatePath property to display the PDF as a template.
- Scroll to the report to view the template in the report's header, body, and footer sections. Notice the dimensions of the template were manually resized to match the template's sections.
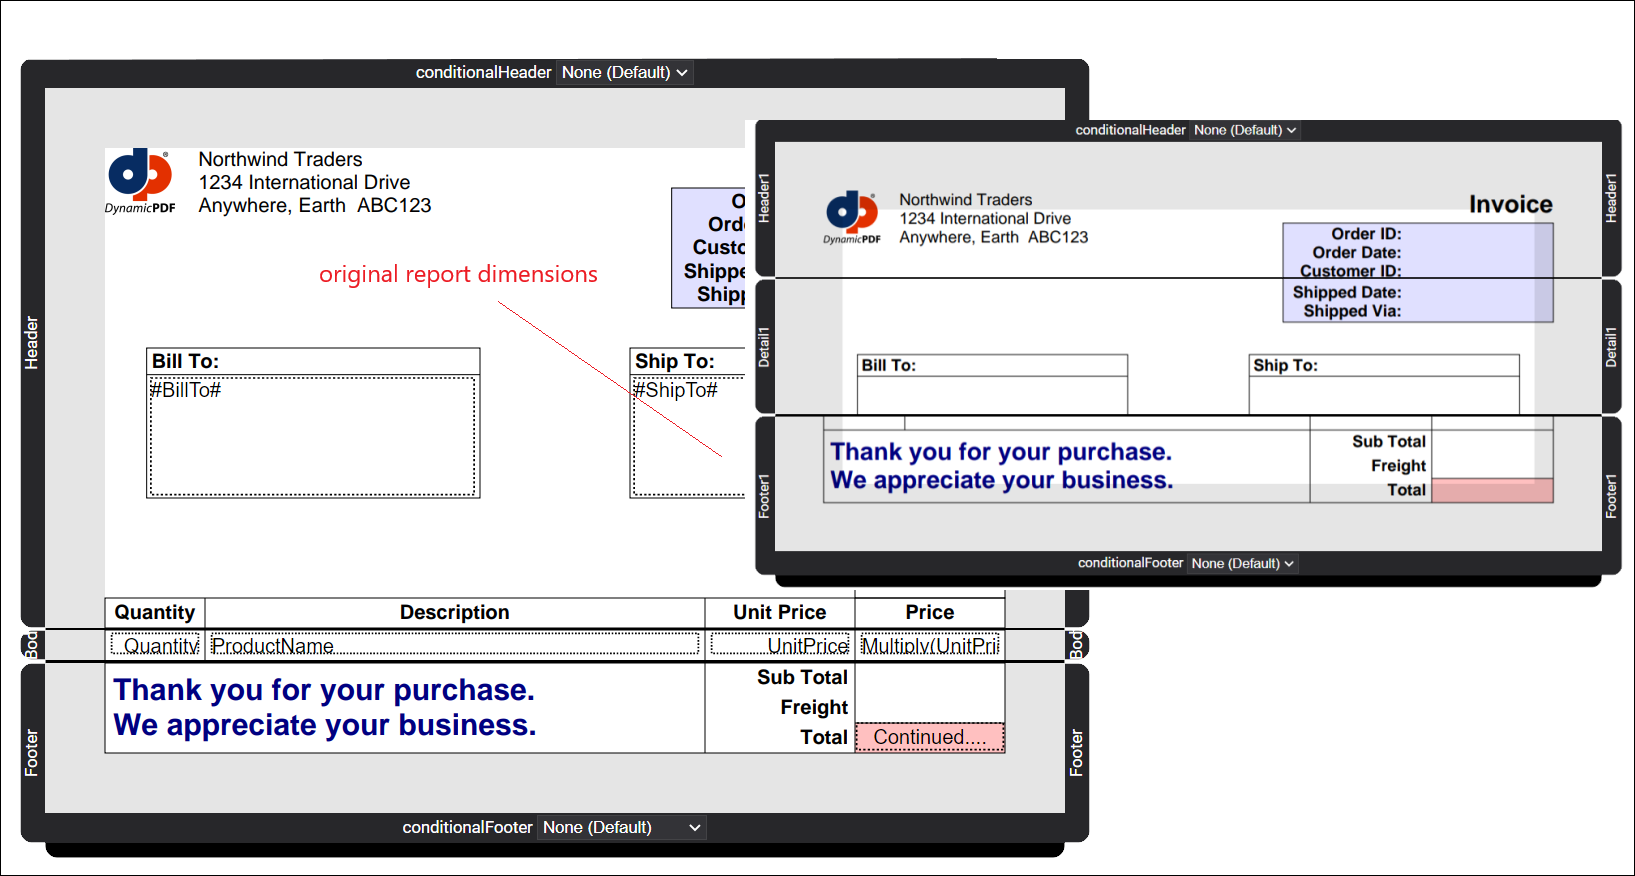
Figure 15. A template's sections should match the dimensions of the report's sections.
Report Header
- Select the report's header to display the header's properties in the Properties Window.

Figure 16. Display a header's properties by selecting the header in the Document Window or in the Properties Window.
- Notice the header's elements consist of RecordBox elements and RecordArea elements.
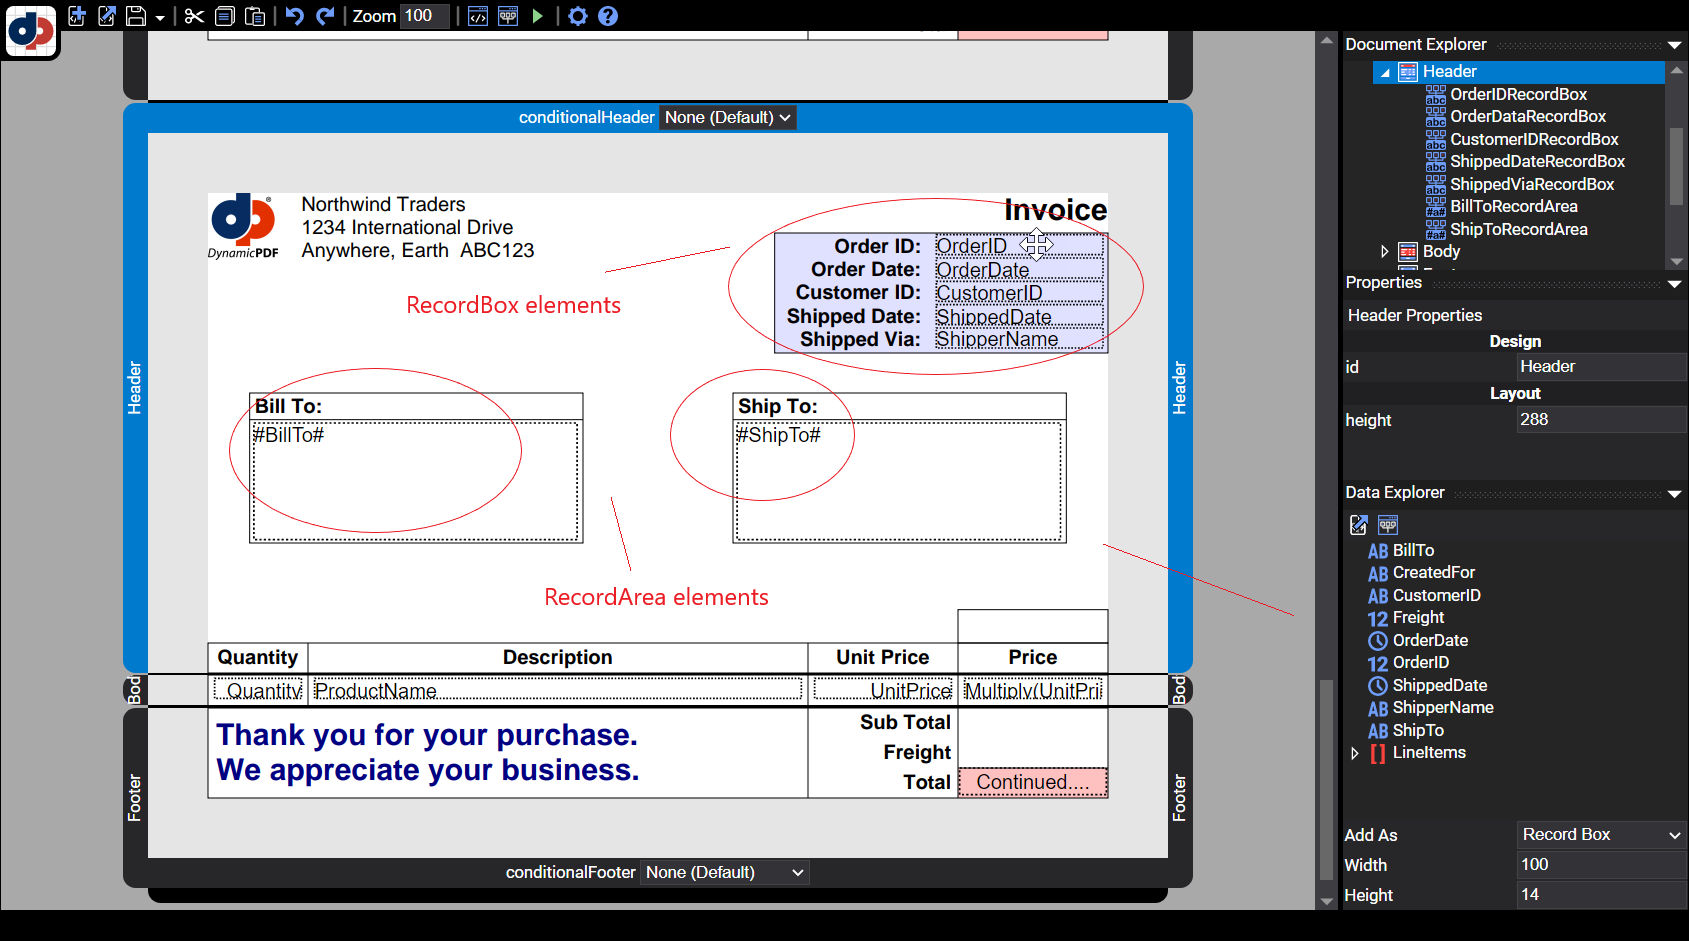
Figure 17. Top-level fields from the JSON data added to the header.
Report Body
- Select the report's body to display the body's properties in the Property Window.
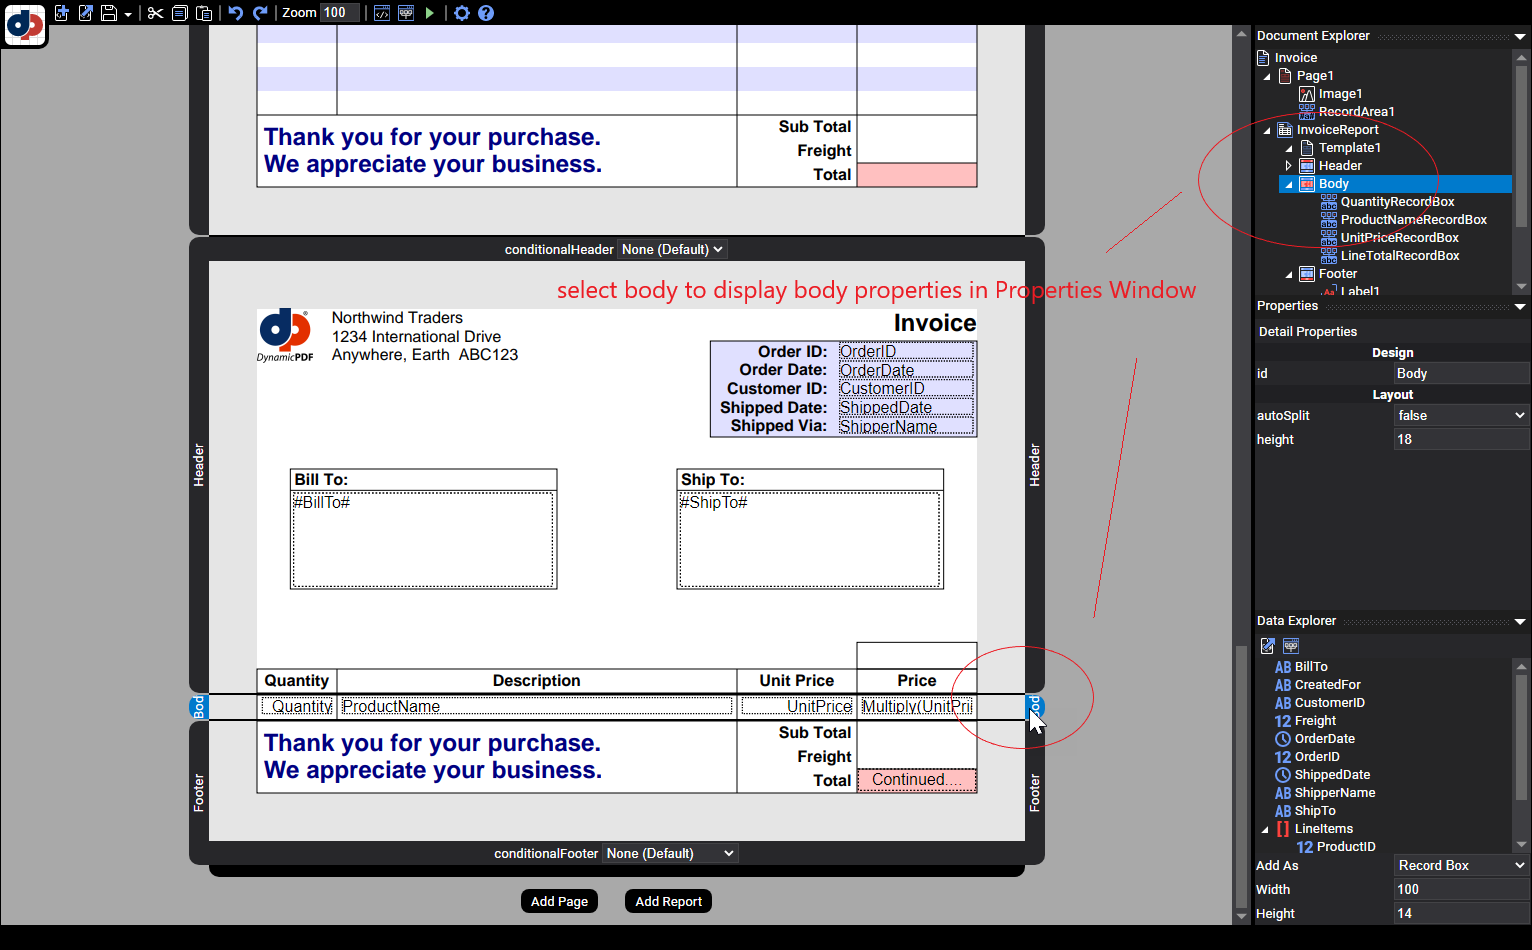
Figure 18. Display a body's properties by selecting the body in the Document Window or in the Properties Window.
- Select the RecordBox with the LineTotalRecordBox id and notice that the dataName property value is an expression that multiplies the
UnitPriceandQuantityfields from the JSON document. Also notice the dataFormat property formats the value as a monetary value.
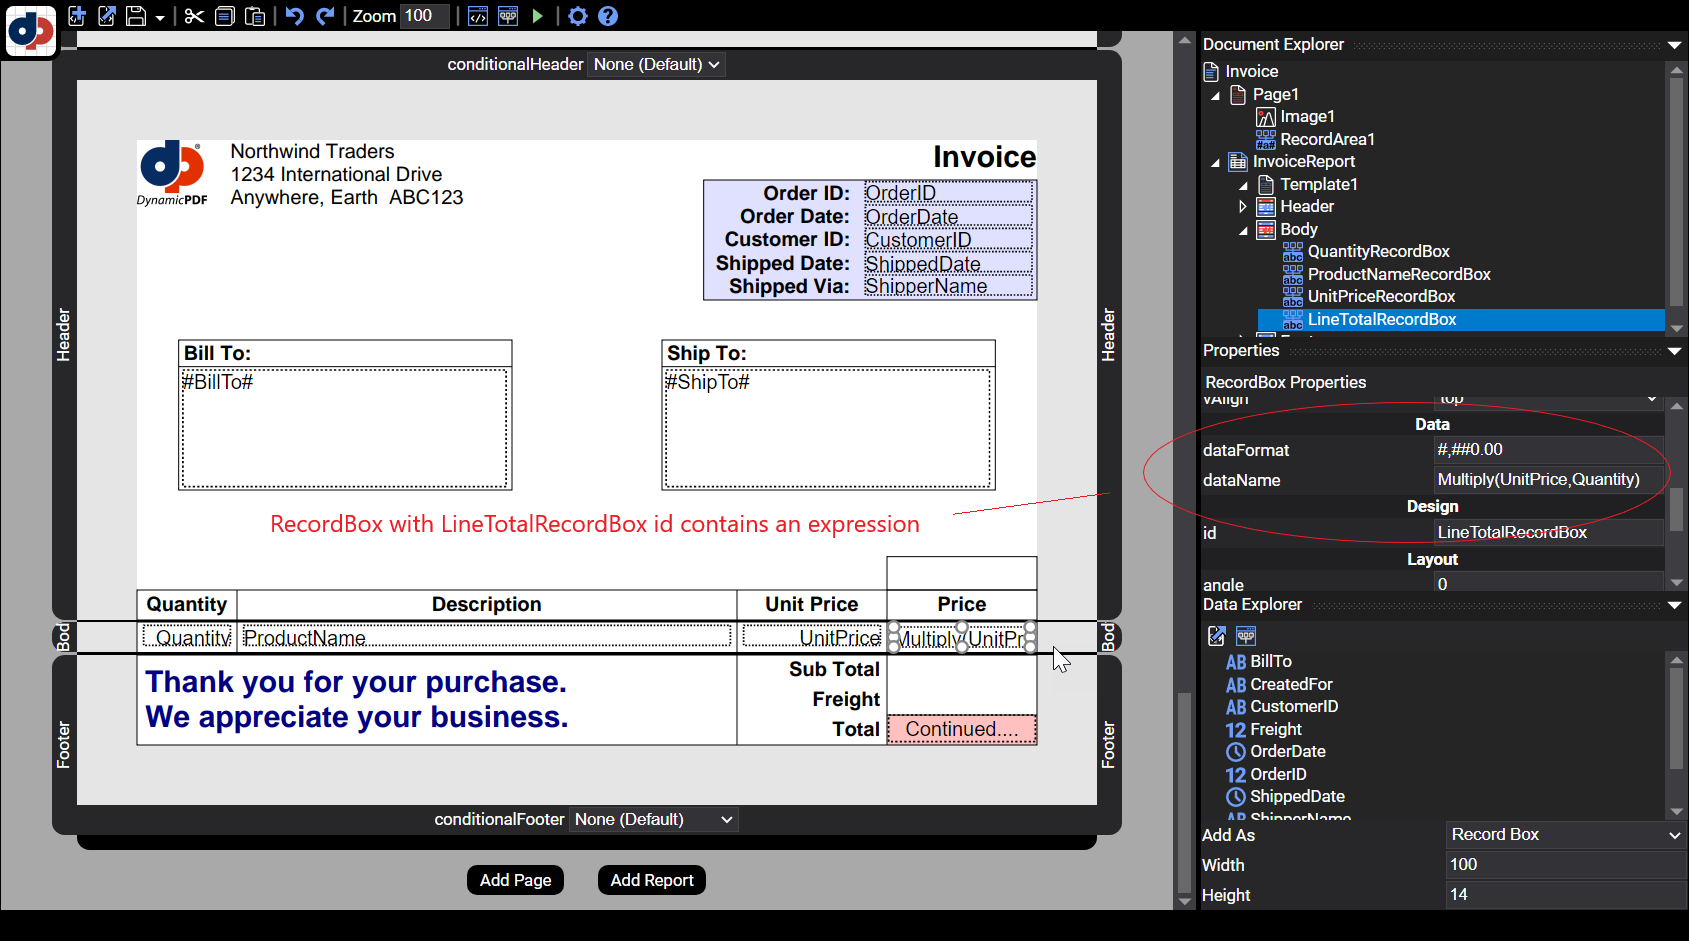
Figure 19. RecordBox elements added to the report's body.
Report Footer
- Select the report's footer to display the footer's properties in the Properties Window.
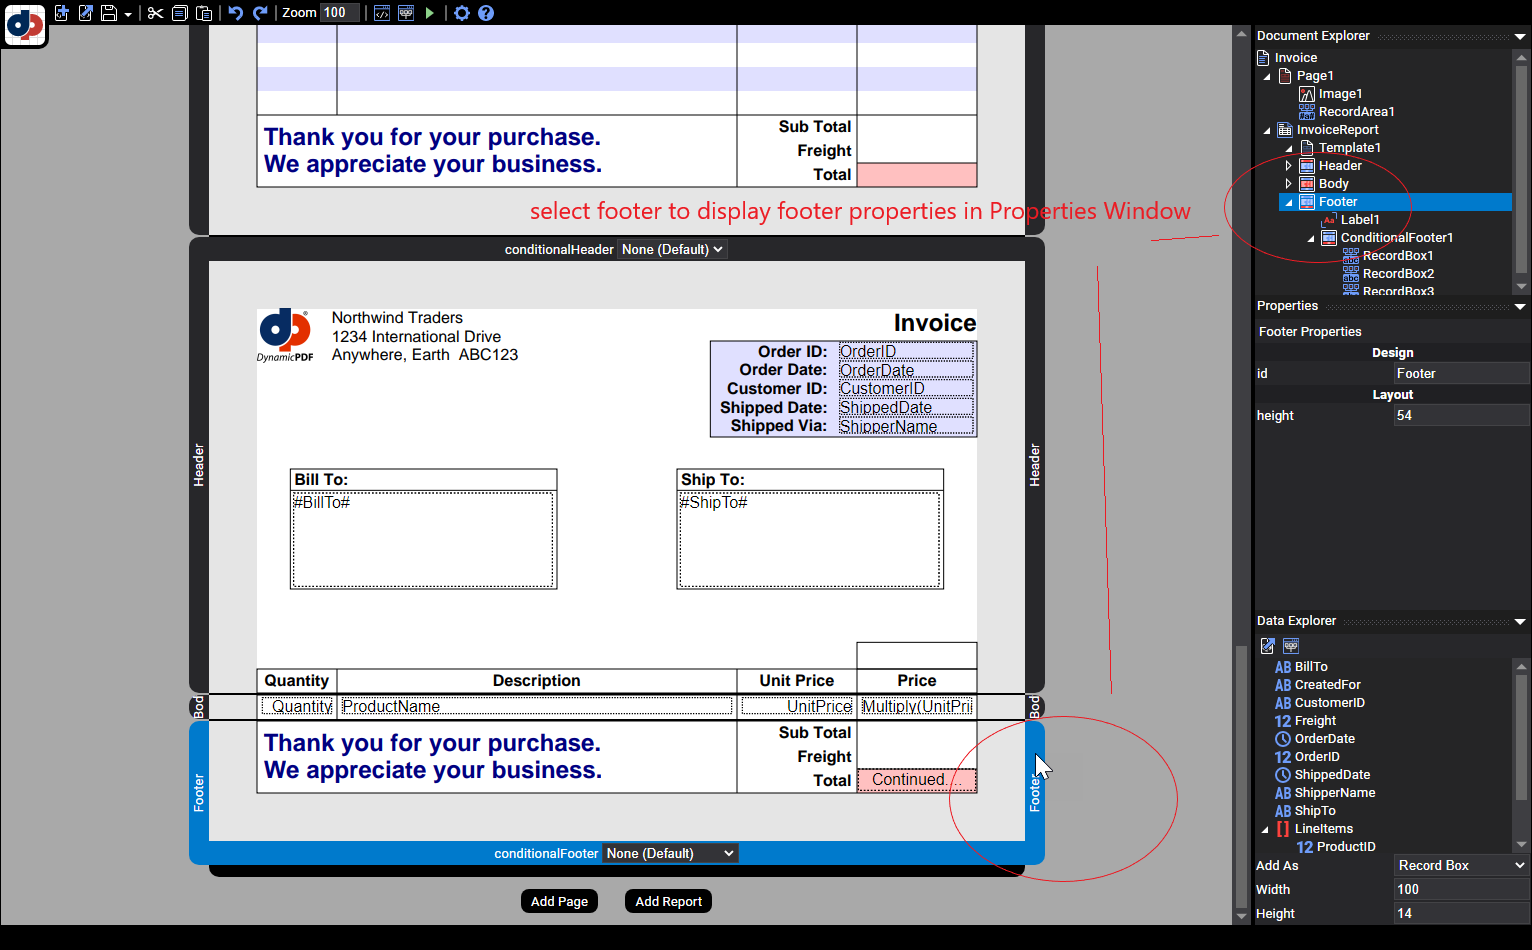
Figure 20. Display a footer's properties by selecting the footer in the Document Window or in the Properties Window.
- Notice the
Totalin the footer contains a Label element. This is because by default, the footer is repeated for each page of data. Instead we wish to only display values on the last page's footer. To display a different footer for only the last page of data, we must specify a conditional footer.
Conditional Footer
- Select ConditionalFooter1 to display the conditional footer in the Document Window and to display the conditional footer's properties in the Properties Window.
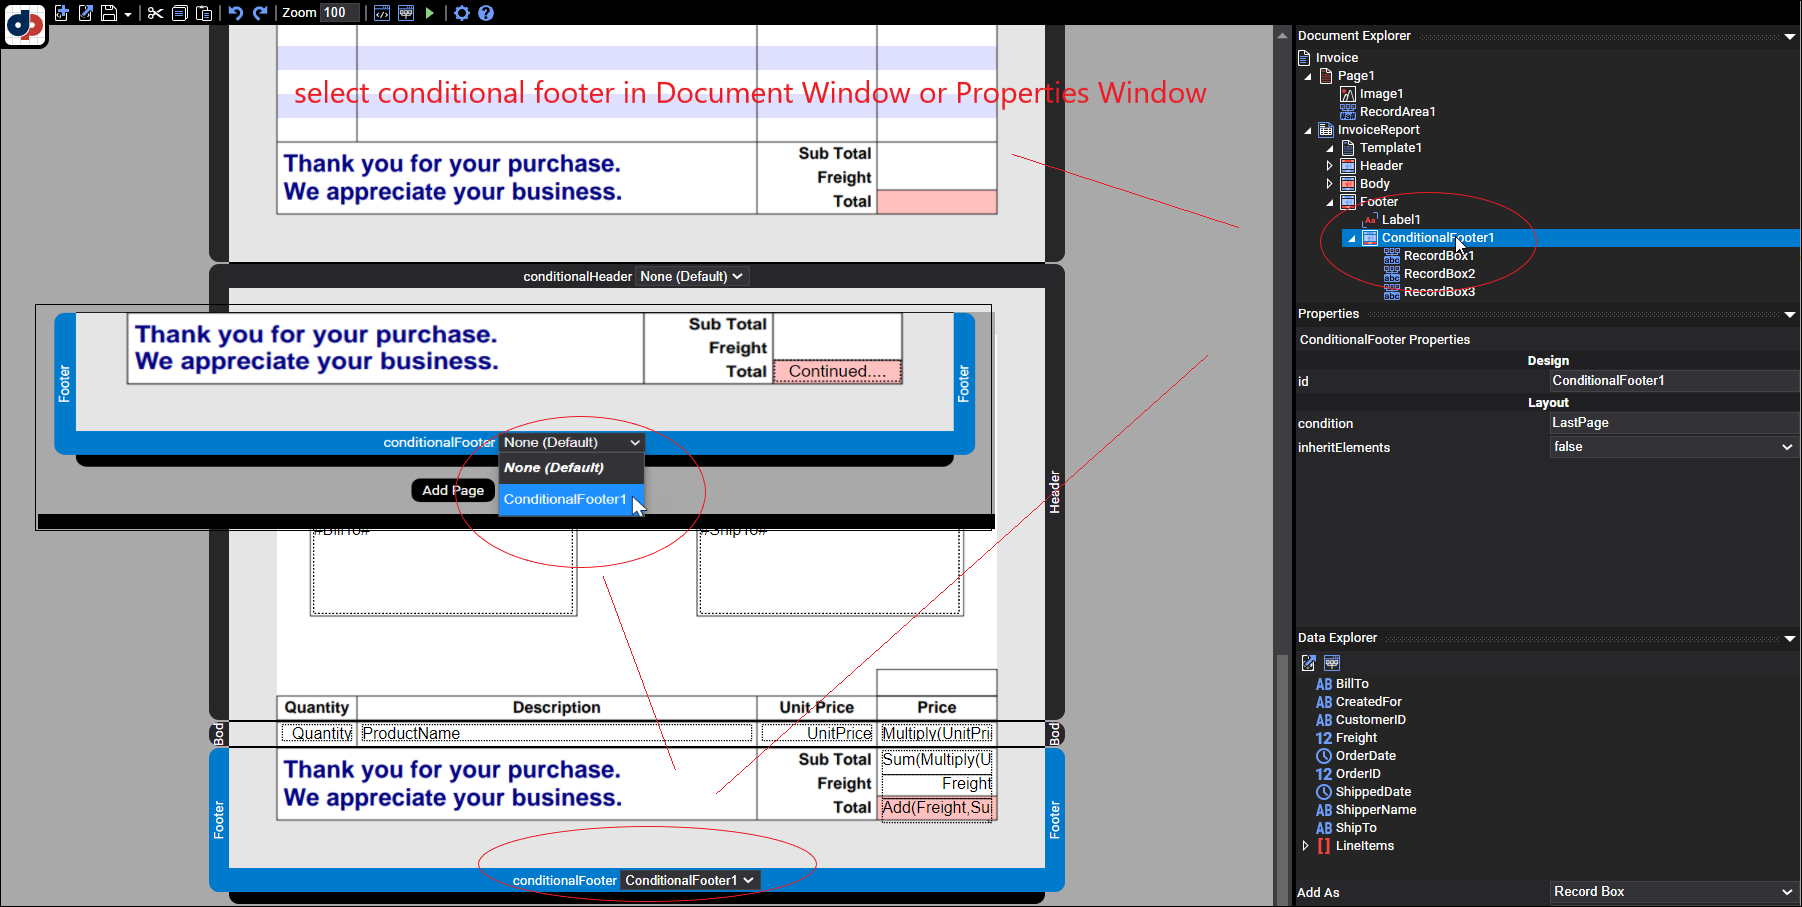
Figure 21. Select the conditional footer to display the footer's totals.
Create a conditional footer by right-clicking the footer and selecting Add Conditional Footer from the context menu.
- Select the RecordBox element that contains the subtotal and note that it contains an expression:
Sum(Multiply(UnitPrice, Quantity))that multipliesUnitPriceandQuantityfor each record and then sums the total. - Select the RecordBox element that contains the total and you see that it adds
Freightand then sum from the subtotal. Notice you must enter the complete expression and cannot use the results from a previous expression in a new expression.
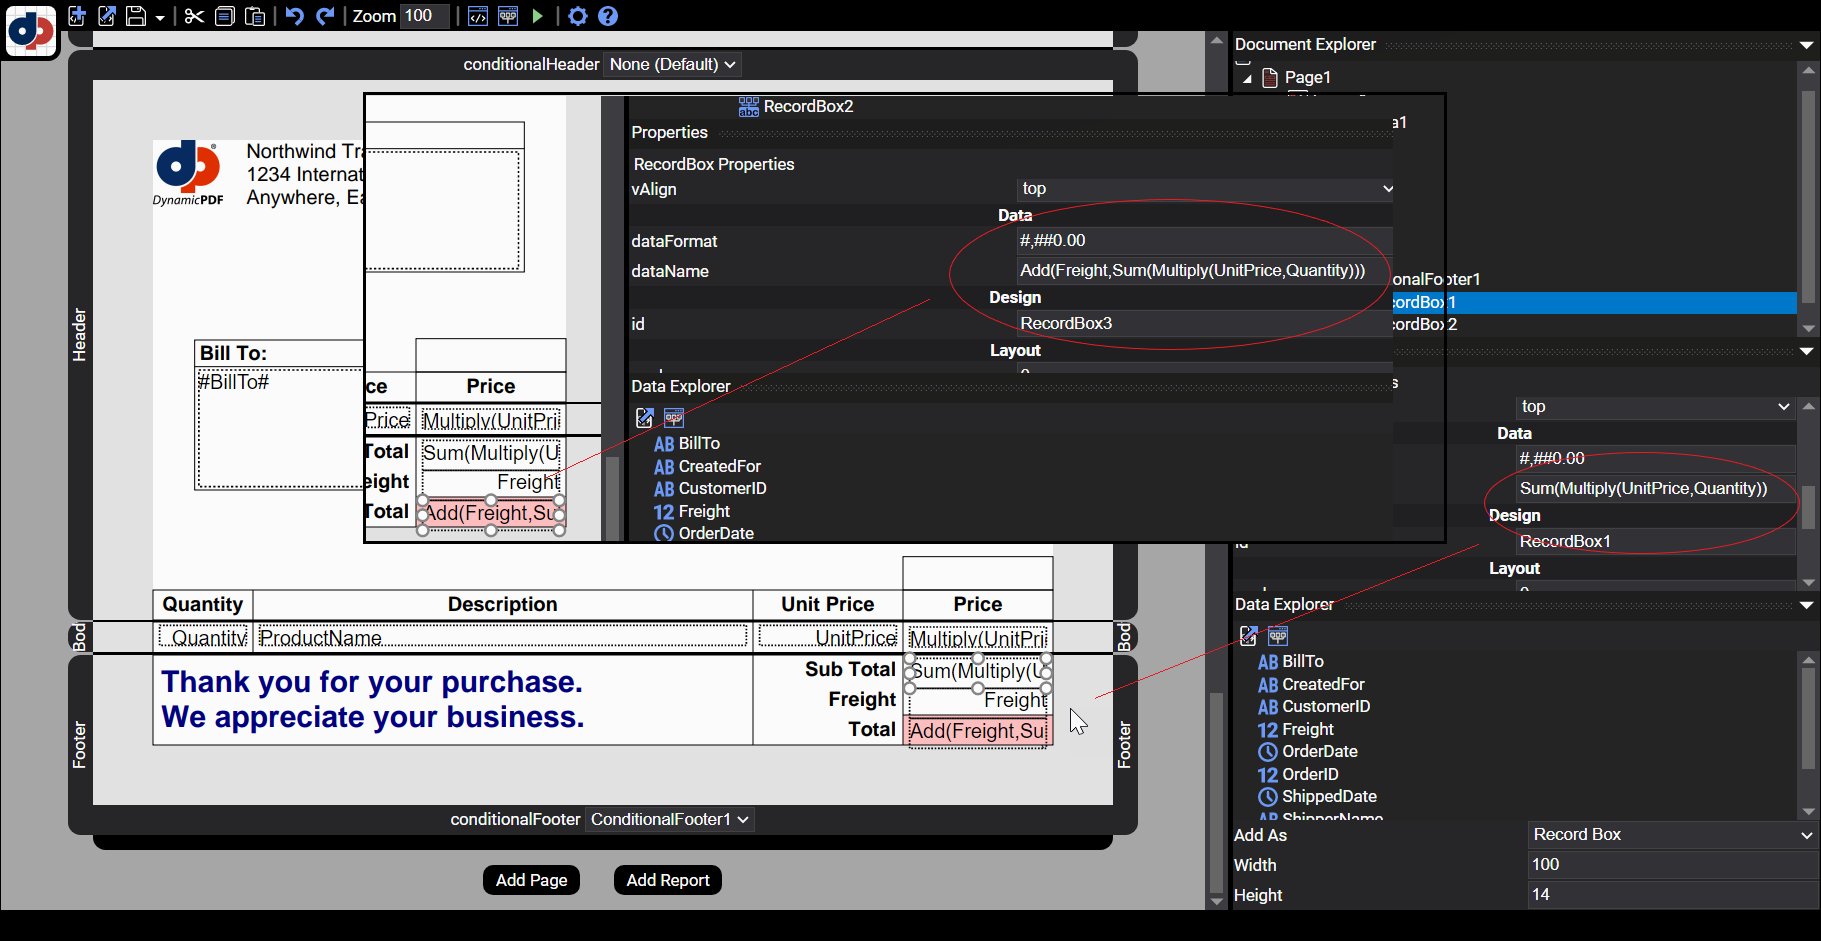
Figure 22. The conditional footer contains two expressions to create report totals.
An expression cannot contain a previous expression's results; it must contain the original expression.
// incorrect: Sum(LineTotalRecordBox)
// correct: Sum(Multiply(UnitPrice,Quantity))
Generate PDF
- Select Run Report (the green arrow) to generate the PDF document.
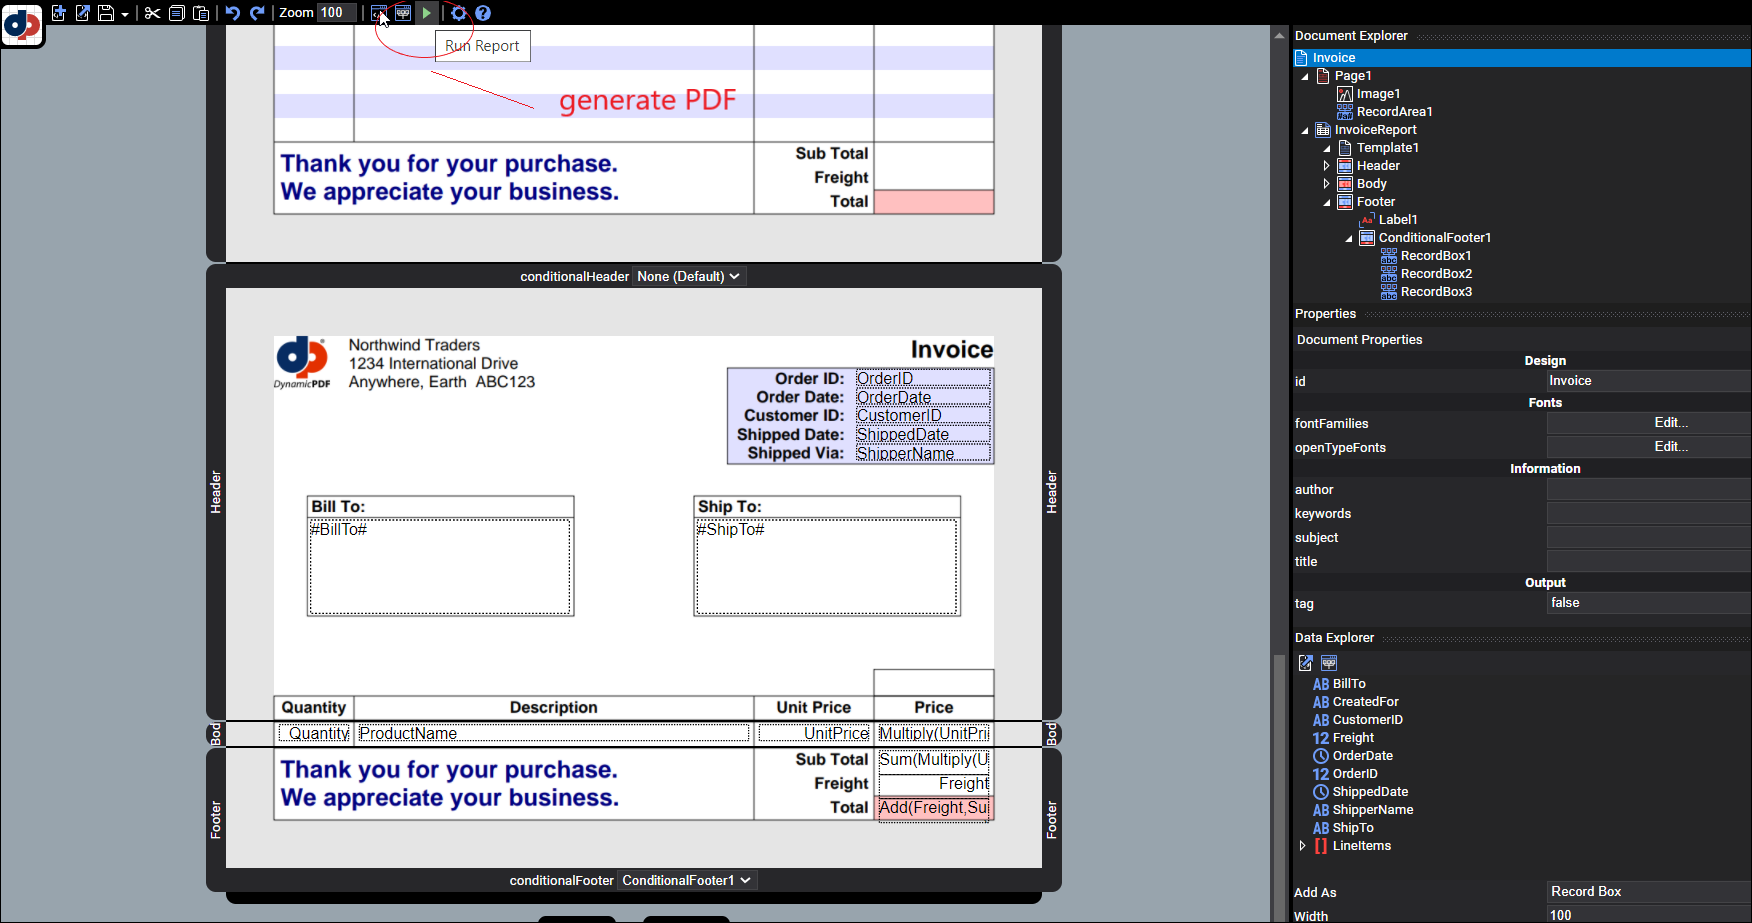
Figure 23. Generate the PDF by selecting Run Report (green arrow).
- Review the first page of the PDF and note that it generated the cover-page.
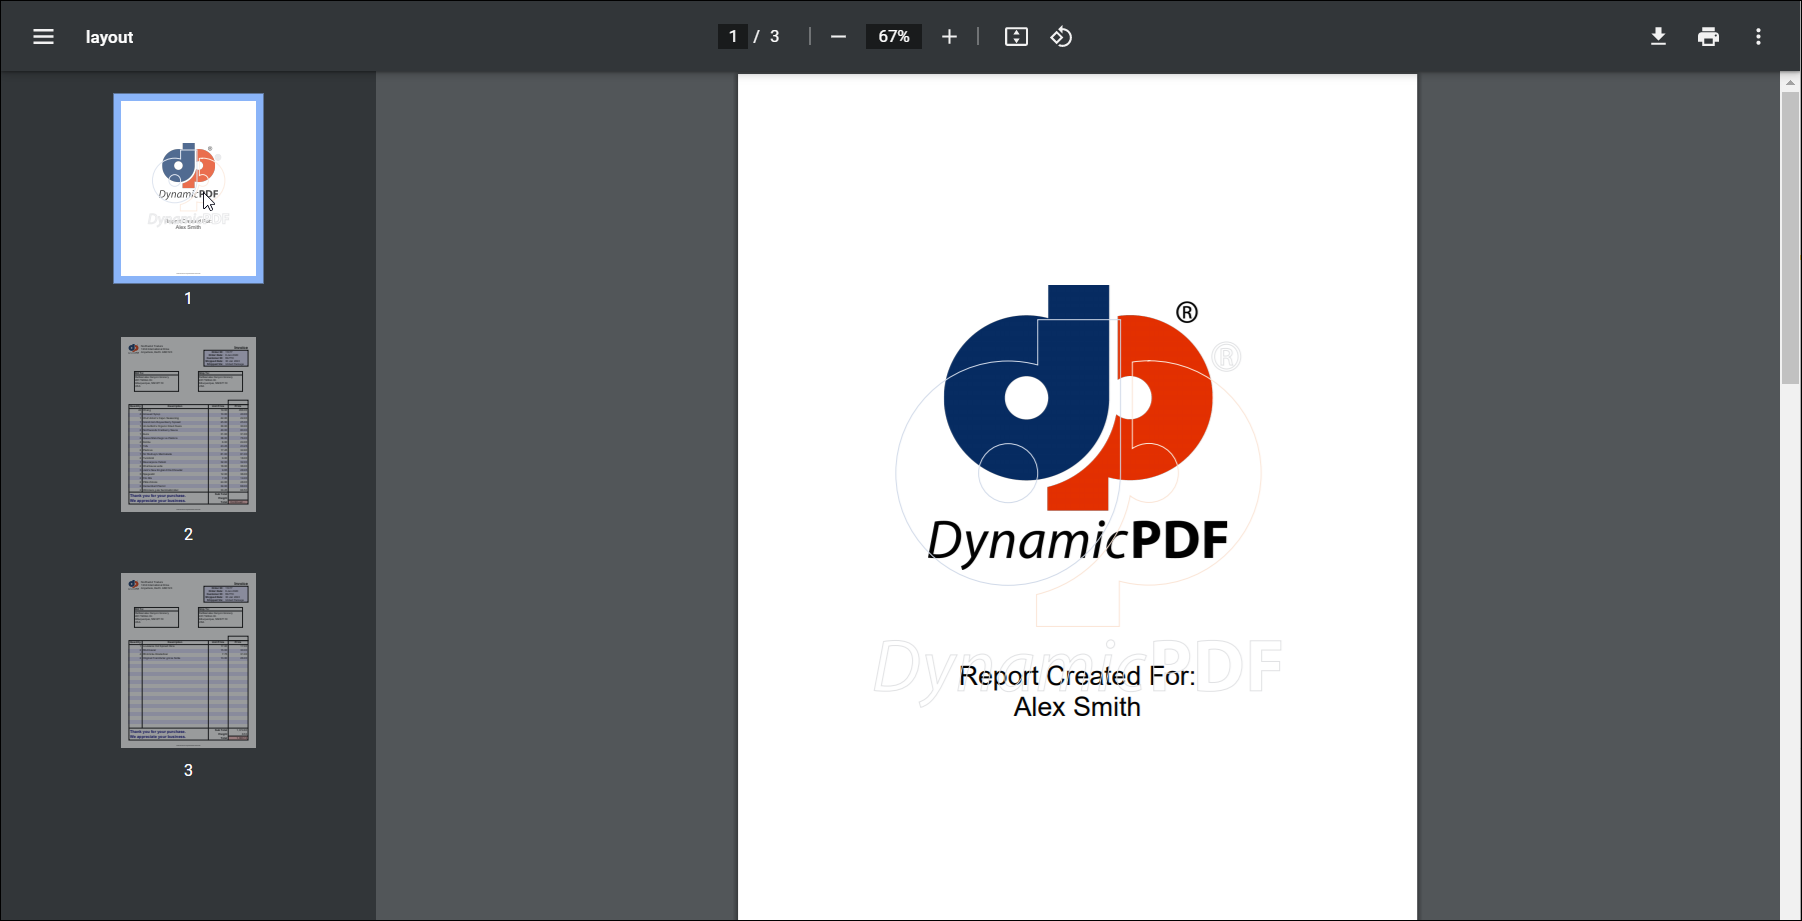
Figure 24. The PDF's cover page.
- Scroll down and note the first page of the report does not include the
subtotal,freight,ortotalvalues.
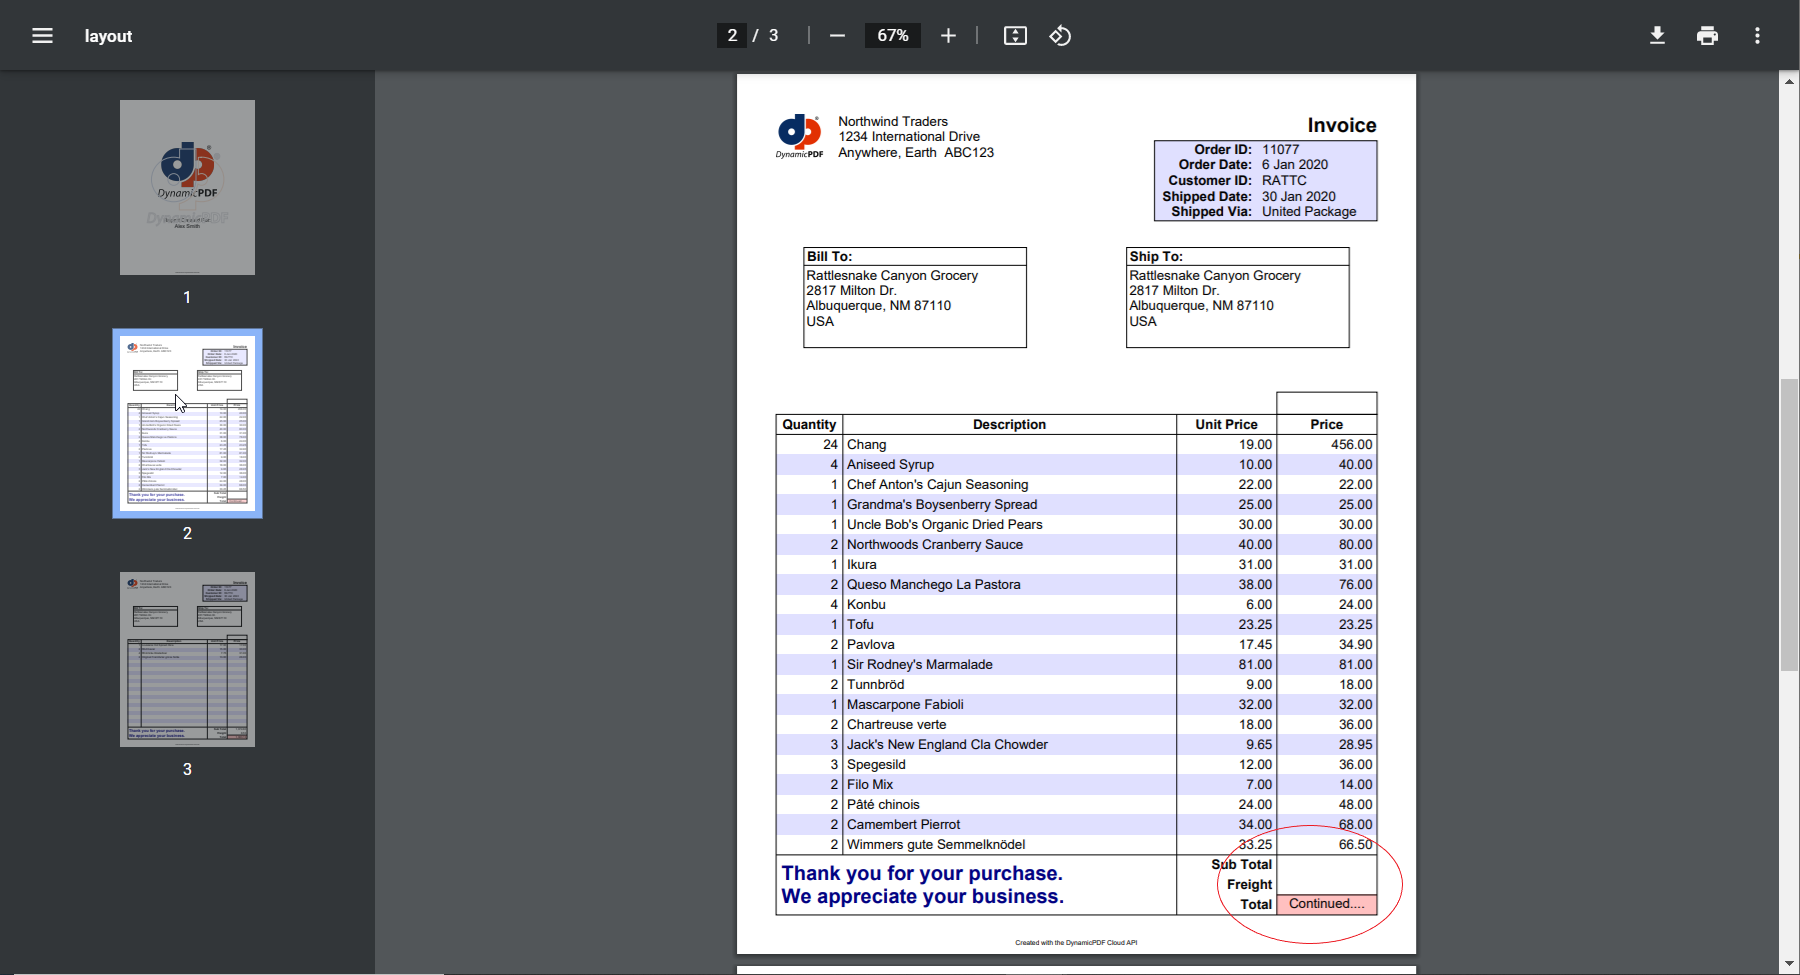
Figure 25. The first page of the PDF report.
- Scroll to the last page and you see the
subtotal,freight, andtotalvalues.
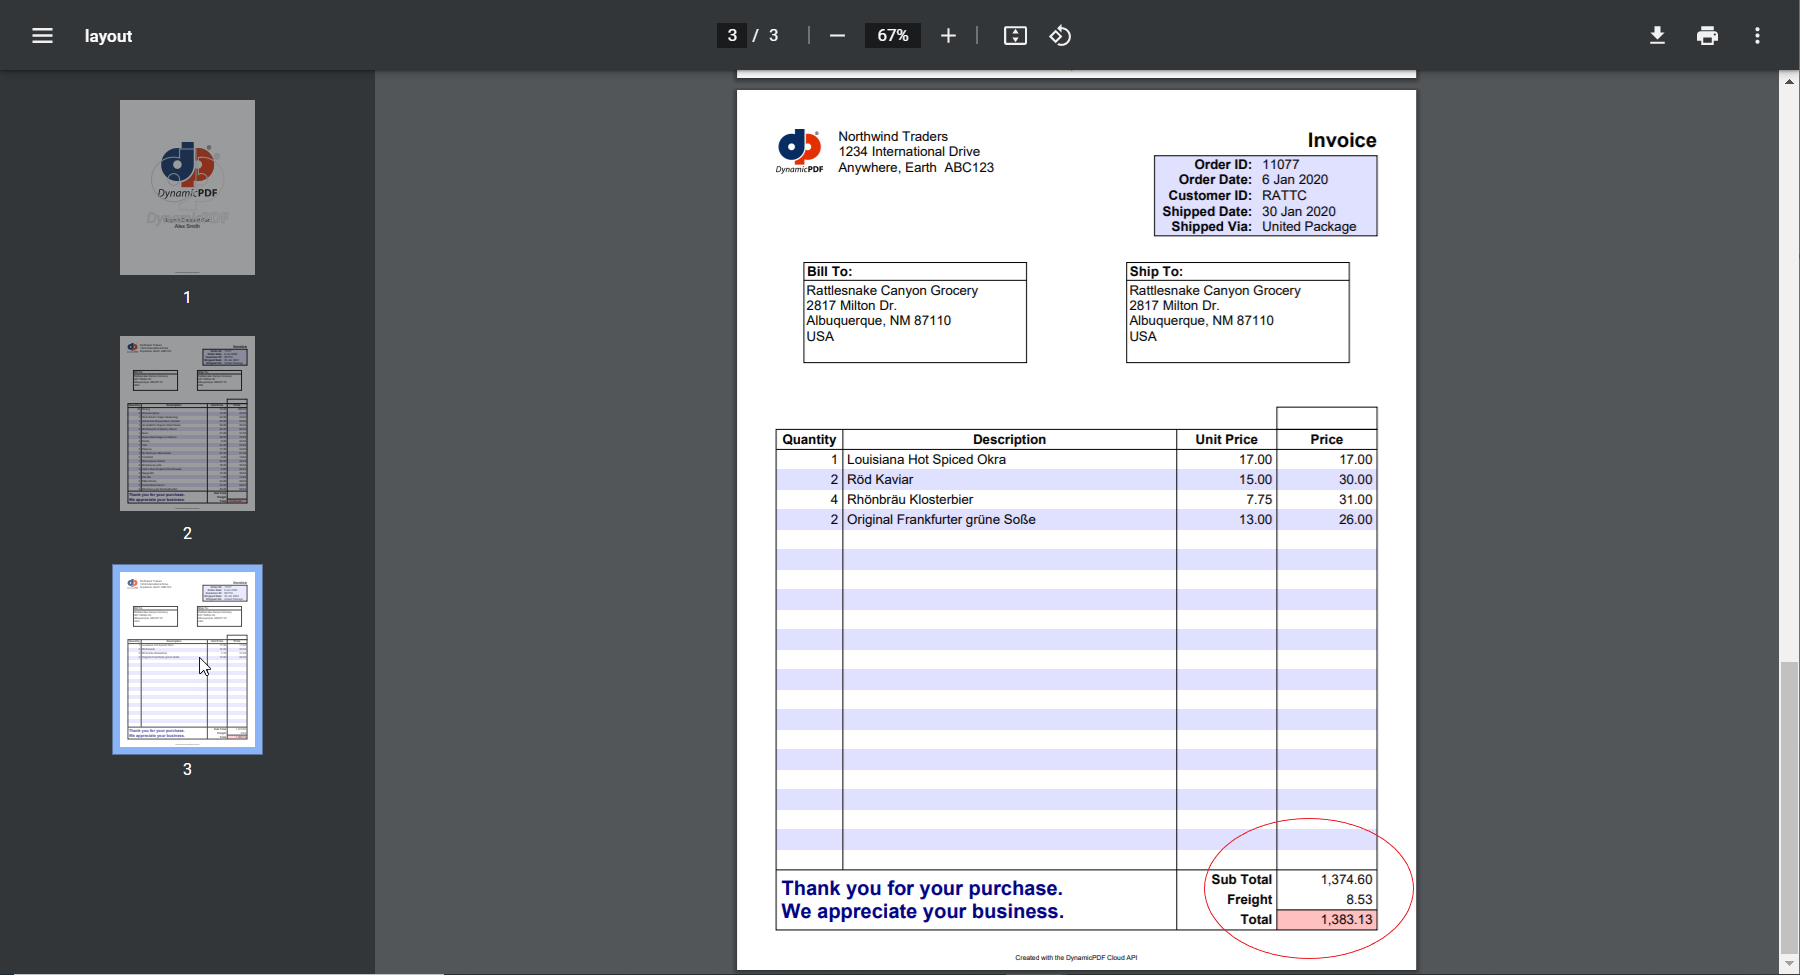
Figure 26. The second page of the PDF report with included totals.
Using CloudAPI with DLEX
After creating a DLEX file you can then use it from your own applications as a REST endpoint.
Portal
- Select the Portal to open the Portal.
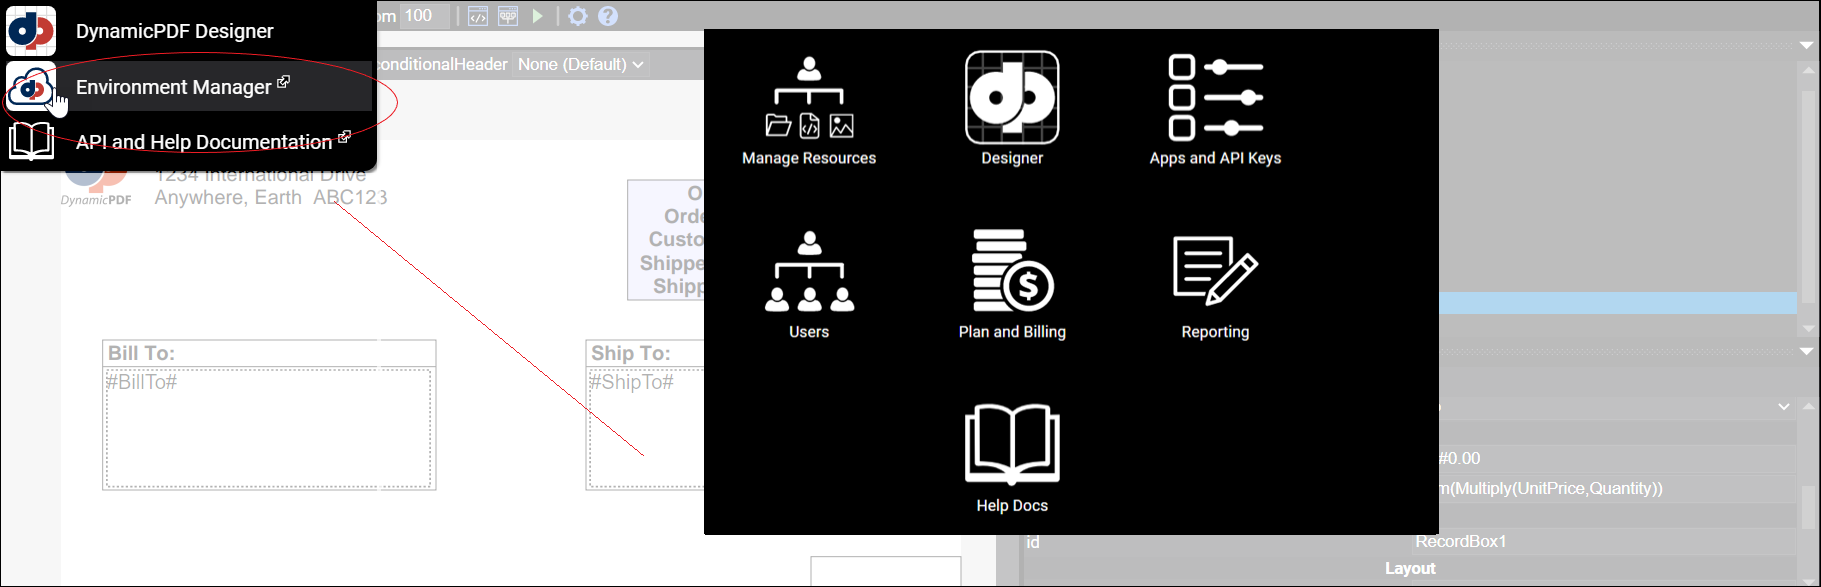
Figure 27. Select Portal to display the Portal.
Get Application Key
- Select Apps and API Keys.
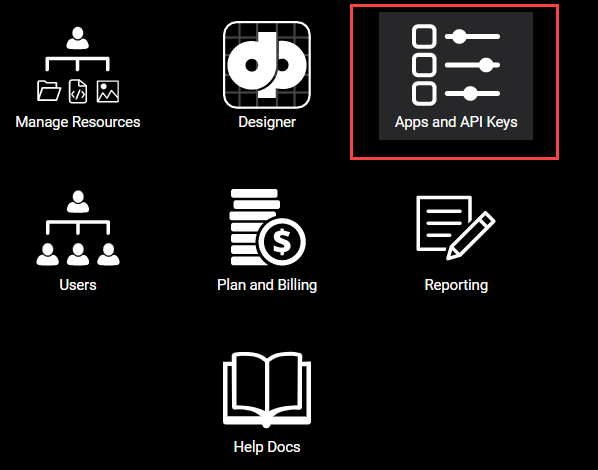
Figure 28. The Apps and API Keys button in the Portal.
- From the Apps Manager select show to show the API Key. Select copy to copy the key to your clipboard.
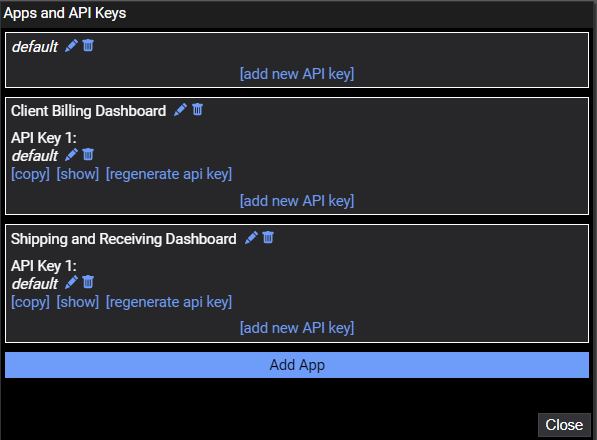
Figure 29. Select show to show the API key and select copy to copy the API key to your clipboard.
Get DLEX Path
- Close Apps and API Keys and select Manage Resources to open the File Manager.
- Right-click on the
Invoice.dlexfile and select Copy File Path from the context menu. This copies the file path to your clipboard.
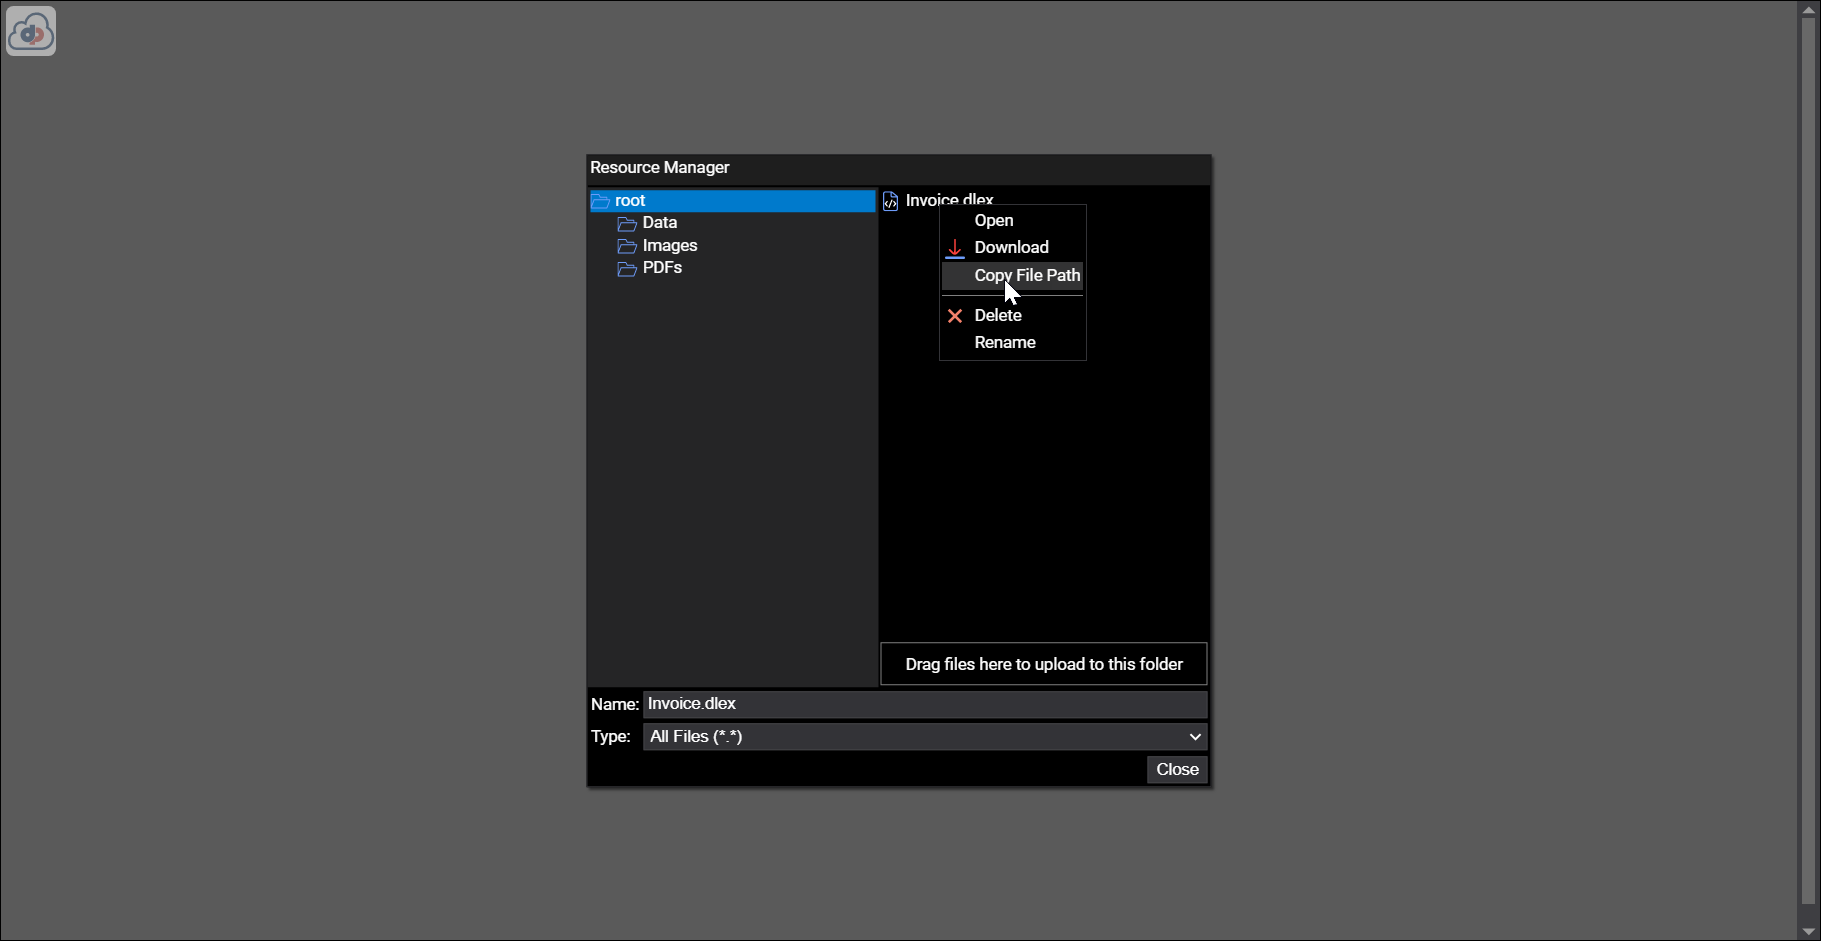
Figure 30. Copying the file path to the DLEX file to your clipboard.
- Right-click on
InvoiceData.jsonand select Download from the context menu to download the file to your local computer.
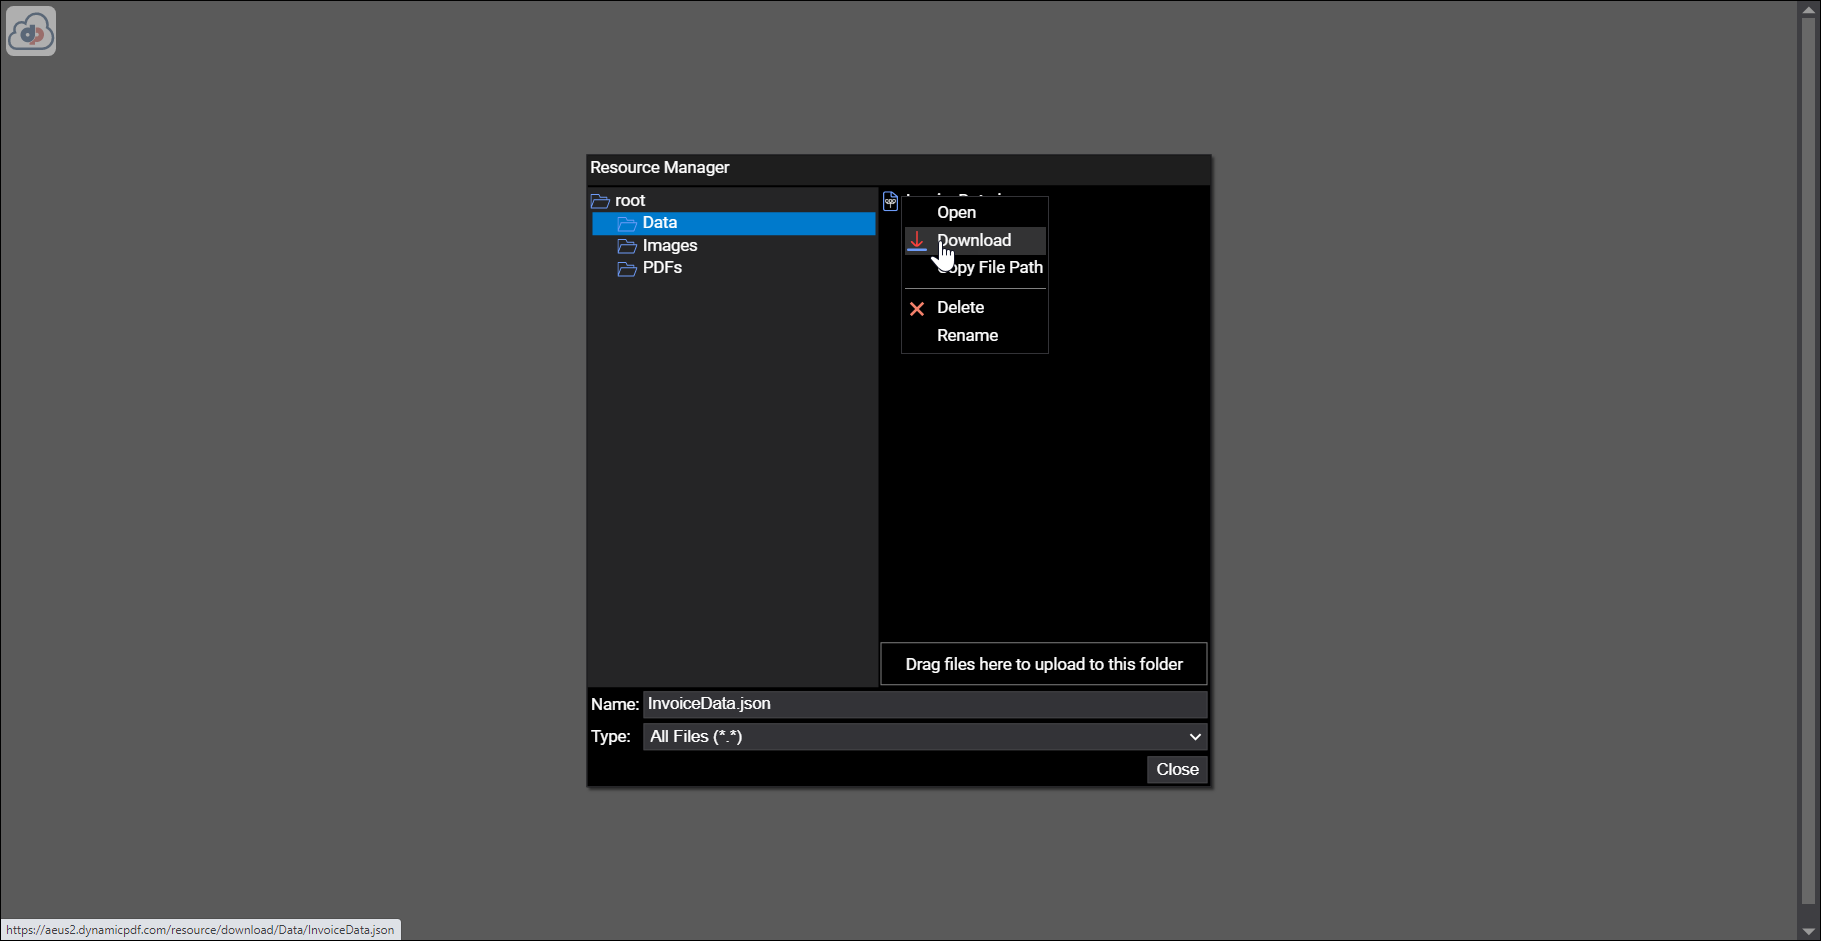
Figure 31. Downloading the JSON data file to you local computer.
- After gathering the required values, you need to create a POST command. Let's use cURL followed by Postman.
| Rest Endpoint | https://aeus2.dynamicpdf.com/api/v1.0/dlex-layout |
| HTTP Method | POST |
| Form Fields | DlexPath, LayoutData |
| Header Fields | Authorization |
The Authorization header's value is pre-fixed by the text "Bearer" followed by one space.
Authorization: Bearer DP.xxx-api-key-xxx
Send cURL Command
- If using Windows, then open the Command Prompt and use the three values copied in the last few steps to create the following cURL command.
curl -H "Authorization:Bearer DP.xxx-api-key-xxx"
-F DlexPath=Invoice.dlex -F LayoutData=@C:/holding/InvoiceData.json
https://aeus2.dynamicpdf.com/api/v1.0/dlex-layout -o Invoice.pdf
- Execute the cURL command and the PDF is downloaded to you computer.
Use Postman
- If familiar with Postman, then open Postman and create the following POST command. Add the POST request and then add the API Key to the Header as a parameter named
Authorization. Note the addition of the "Bearer" text before the key.
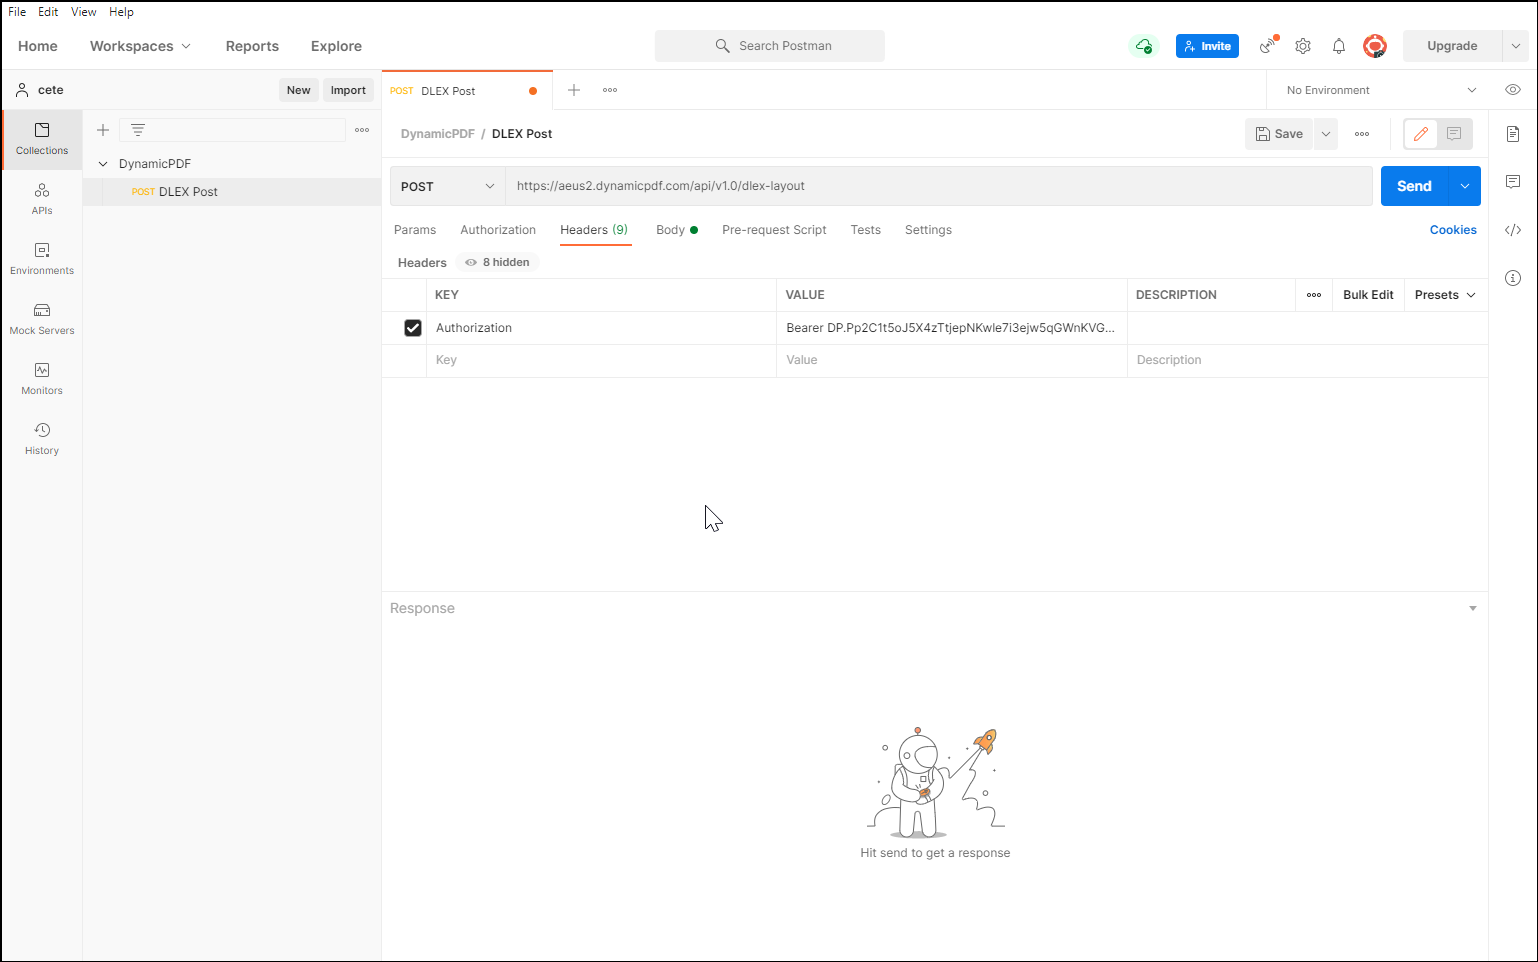
Figure 32. Adding header parameter to a POST request.
- Add the
DlexPathas a form-field parameter to Postman. Then addLayoutDataas a File parameter and select the path to the JSON data.
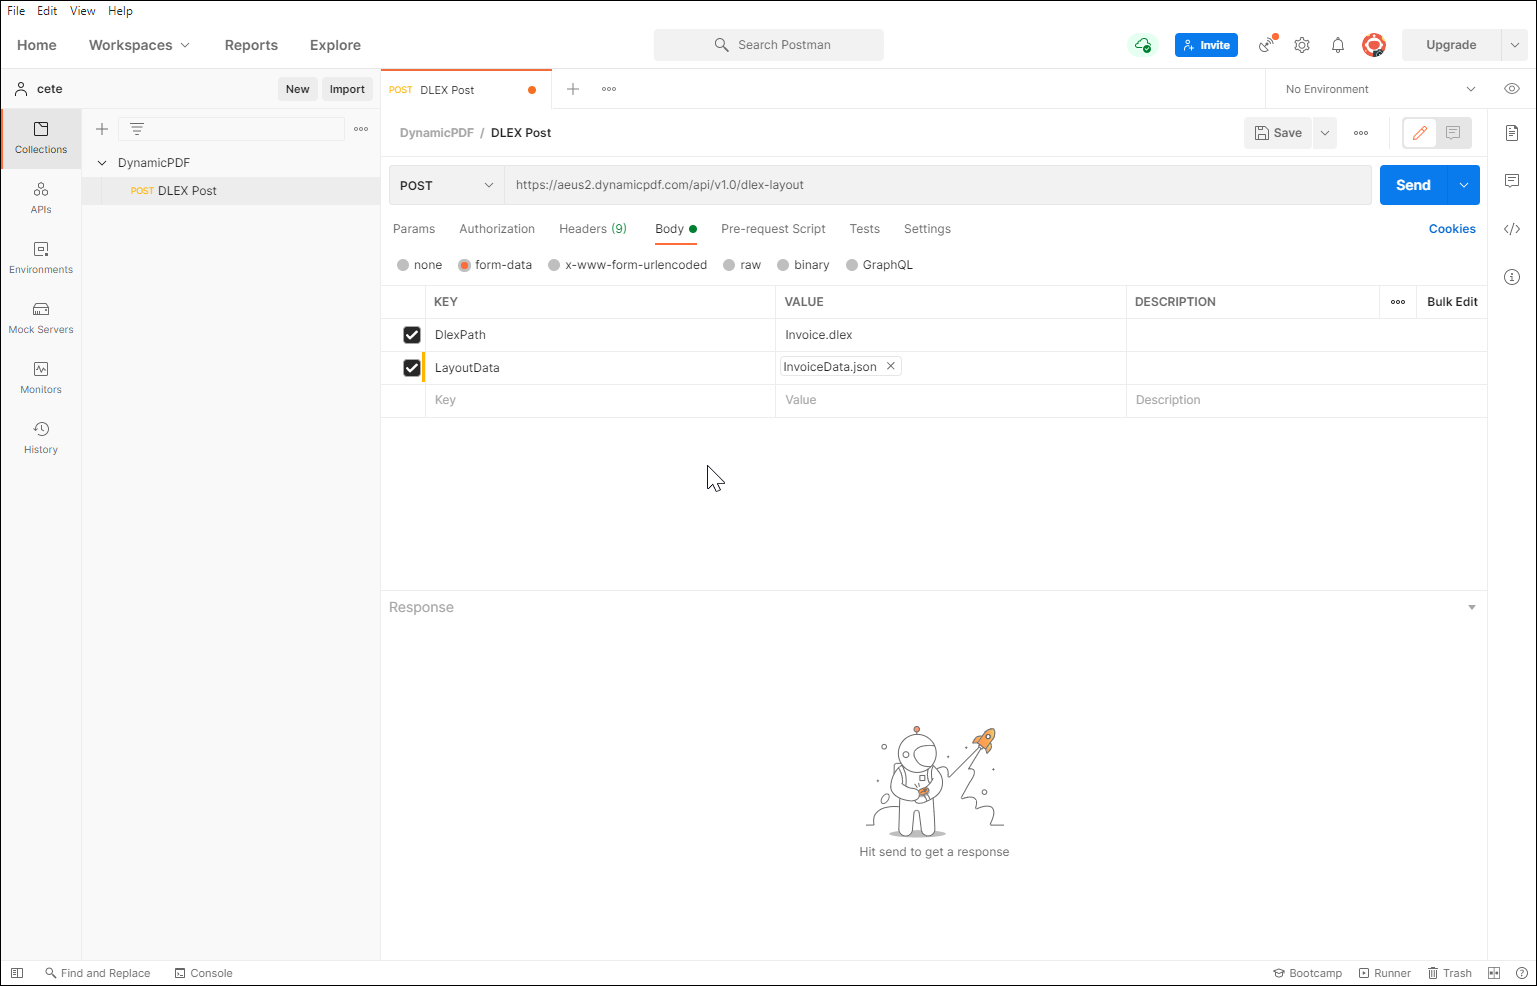
Figure 33. Adding form field parameters to a POST request.
- Send the request and Postman displays the returned PDF.
Older Postman versions do not support displaying embedded PDF documents.
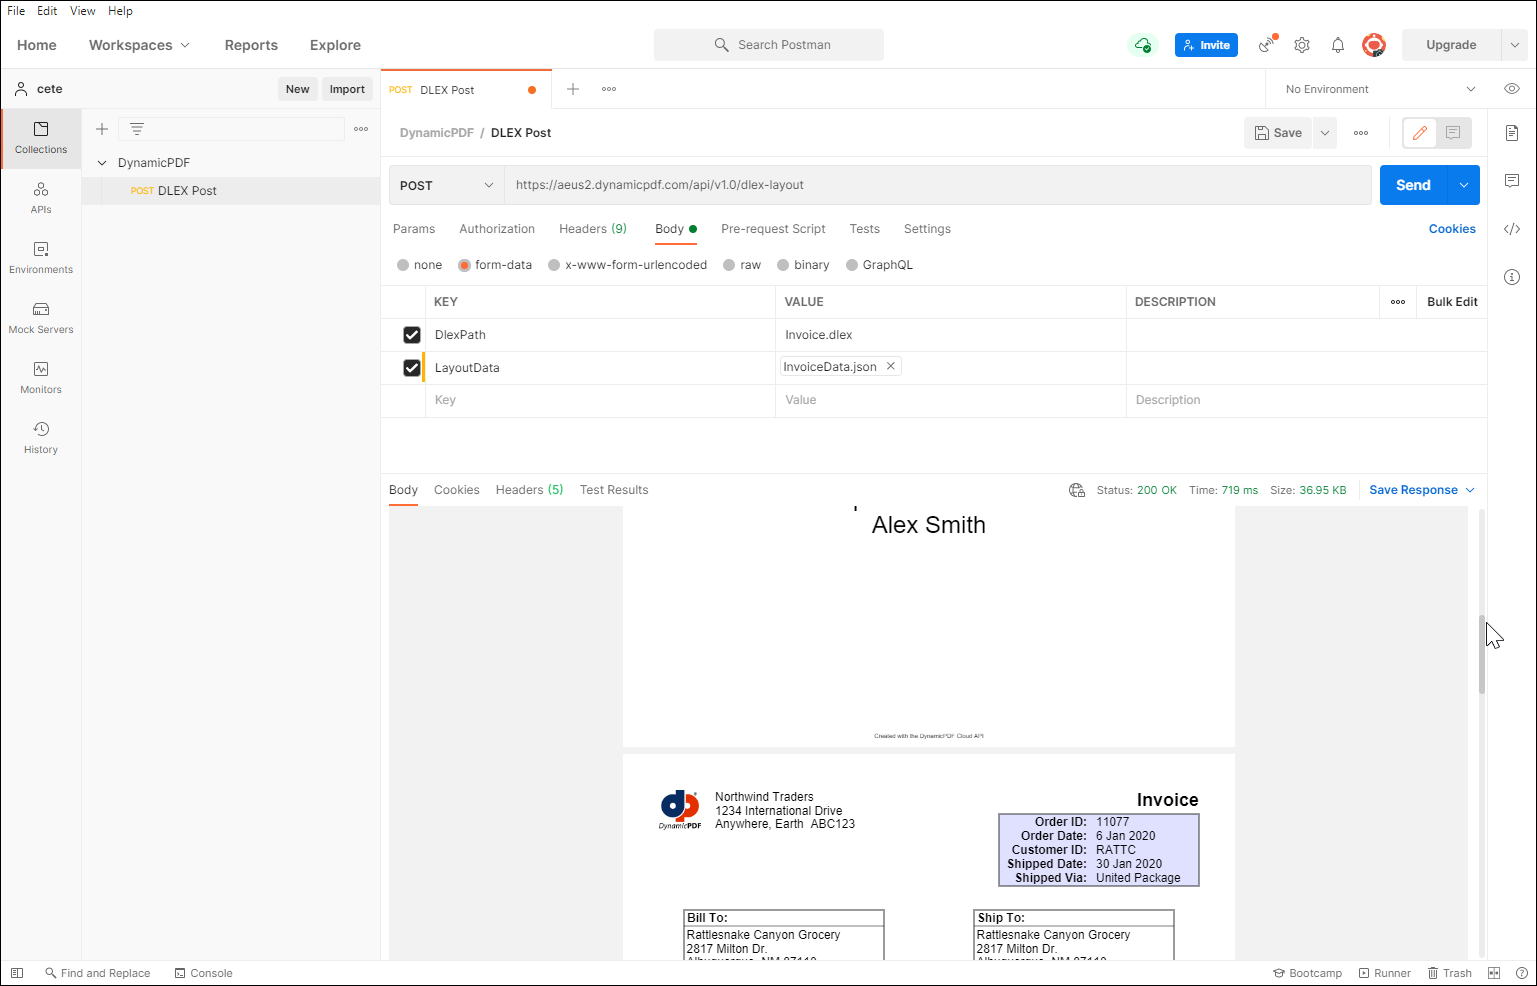 Figure 34. Sending a POST request using Postman.
Discussion
As this short tutorial illustrated, DynamicPDF Designer allows creating custom PDF reports using an intuitive GUI designer. You use Designer to create a DLEX report with associated JSON data. You then use the dlex-layout endpoint in DynamicPDF REST API with the DLEX and JSON data in your application to automate generating PDF documents. Explore the many tutorials, the DynamicPDF Designer documentation, and the DynamicPDF REST API documentation to discover all the functionality available. Using DynamicPDF Designer combined with the dlex-layout REST endpoint allows quickly adding PDF reporting to your organization's applications.