How to Use Bubble with DynamicPDF API.
DynamicPDF CloudAPI has all the resources you need to incorporate our REST endpoints into your applications. Also, using one of our client APIs to program your application's integration with DynamicPDF API is easy.
But there are situations where you might want to avoid writing any code and integrating PDF generation into your website. Bubble (https://bubble.io/) is one product you might use to create a dynamic web application without coding.
Bubble.io is all about clicking and completing dialogs with the appropriate values. The way to think about bubble.io API integration and working with data is "development by dialog completion." This will be more apparent as you complete this tutorial.
- In this tutorial, you use bubble.io to create a simple one-page landing page that calls DynamicPDF API's dlex-layout endpoint to create a PDF report for viewing from your bubble.io landing page.
Prerequisites include a bubble account and a DynamicPDF API account. Note that both products have free trial accounts and do not require a credit card to get started.
Getting Started
Before beginning, you must have the resources from the Creating a PDF from DLEX (dlex-layout Endpoint). Follow the tutorial's steps to load the sample project in your DynamicPDF Cloud Storage.
Be sure to download the JSON file to your local filesystem!
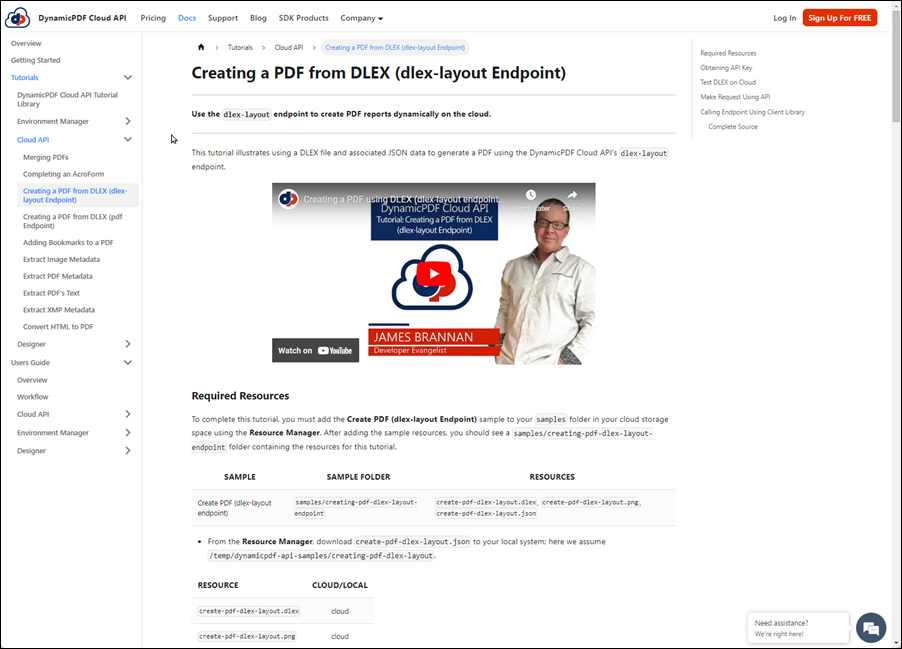
Figure 1. The Creating a PDF from DLEX (dlex-layout Endpoint) tutorial.
Bubble Apps
After logging into Bubble, it navigates you to the main Apps page.
- Create a new application named dlex-layout Example (Figure 2).

Figure 2. Creating a new App named dlex-layout Example.
- Accept the defaults for steps 2 and 3.
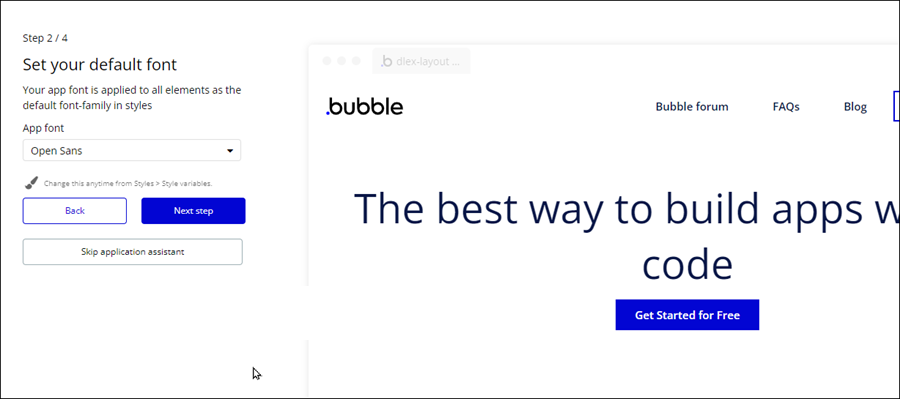
Figure 3. Creating a bubble app.
- Install the API Connector plugin on step four (Figure 4).
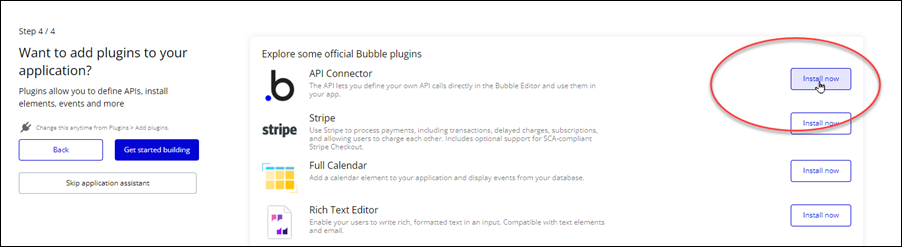
Figure 4. The API Connector bubble plugin.
- Click Get started building (Figure 5).

Figure 5. The final step in creating a new bubble app.
After creating the new app you are taken to the workspace for developing your new app. Start by adding a landing page.
- Select the Hero template and modify the text if you wish (Figure 6).
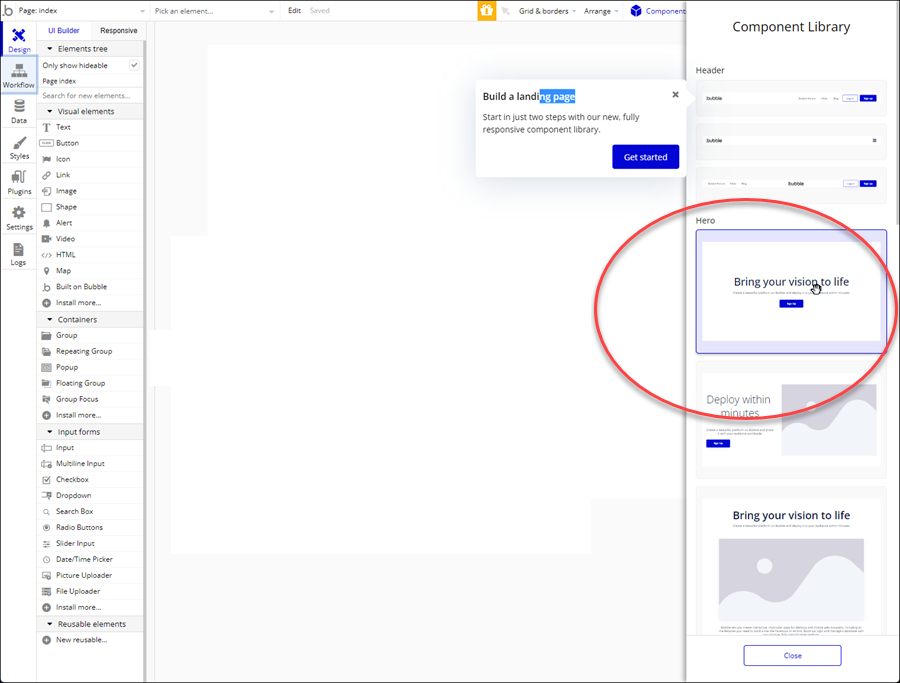
Figure 6. In this tutorial we use the Hero landing page template.
- Change the button's text to
Generate PDF(Figure 7).
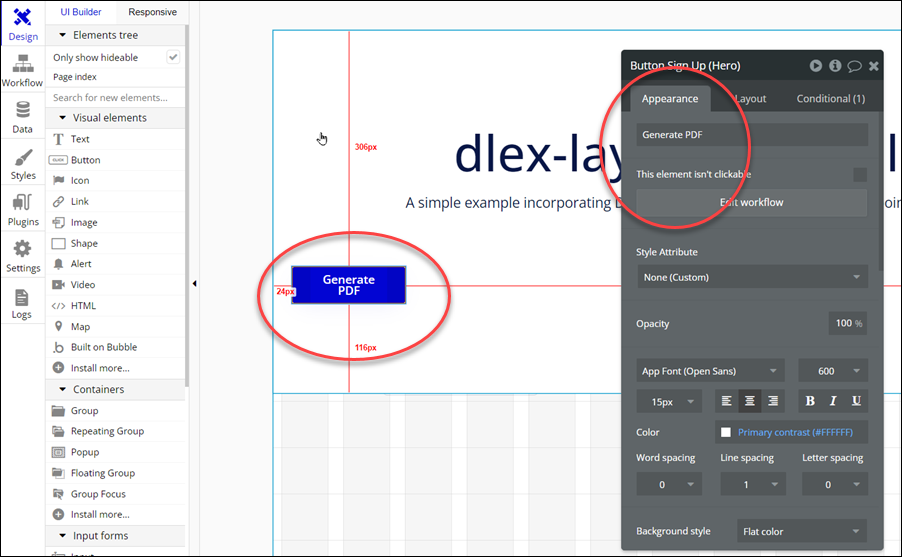
Figure 7. Changing the button's text to Generate PDF.
- Select Plugins and then click Add another API (Figure 8 -1).
- Name the API
dlex-layout-api(Figure 8 -2).
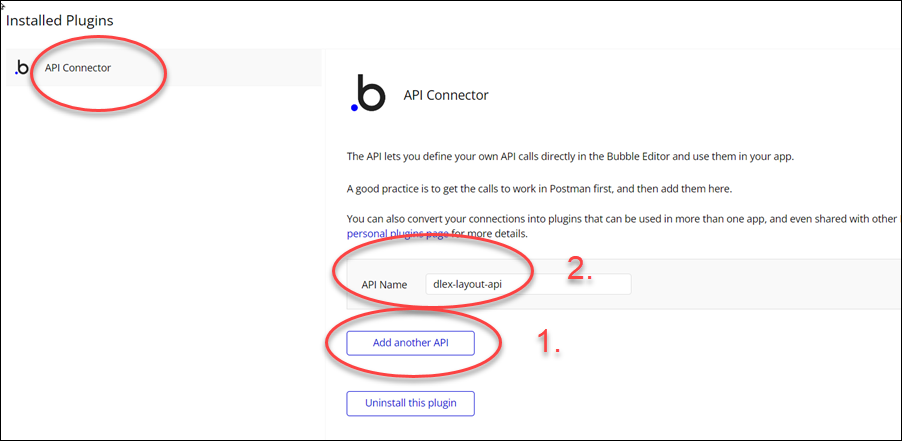
Figure 8. Adding an API to the API Connector.
- Select Add another call and name the call
API Call(Figure 9 - 1, 2).
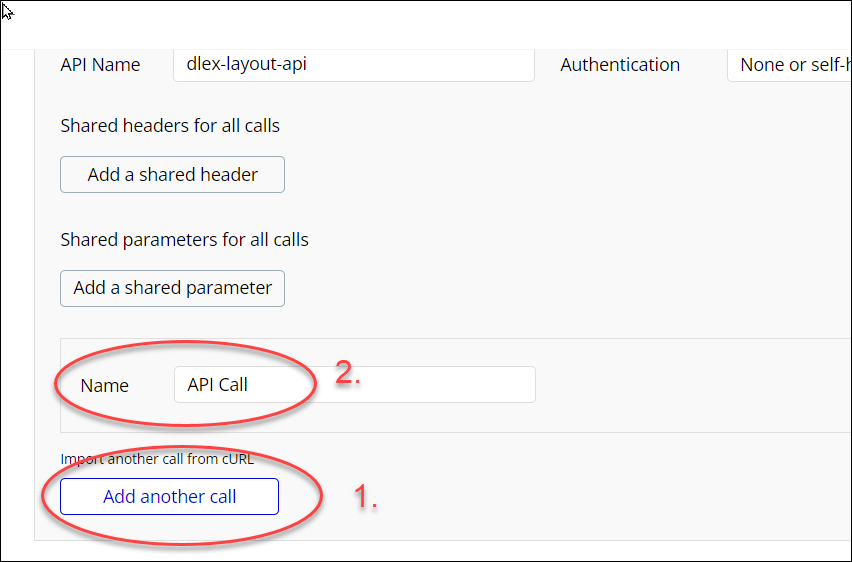
Figure 9. Creating an API to be called by the API Connector plugin.
Testing the dlex-layout Endpoint
Let's test the dlex-layout endpoint using cUrl before continuing. Leave bubble.io and go to the DynamicPDF CloudAPI website.
I assume you already have a DynamicPDF CloudAPI account and have downloaded the sample files from this tutorial to your cloud storage. I also assume you have cURL configured and working on your local system.
- Navigate to the DynamicPDF API tutorial referenced above and find the cURL command (Figure 10).
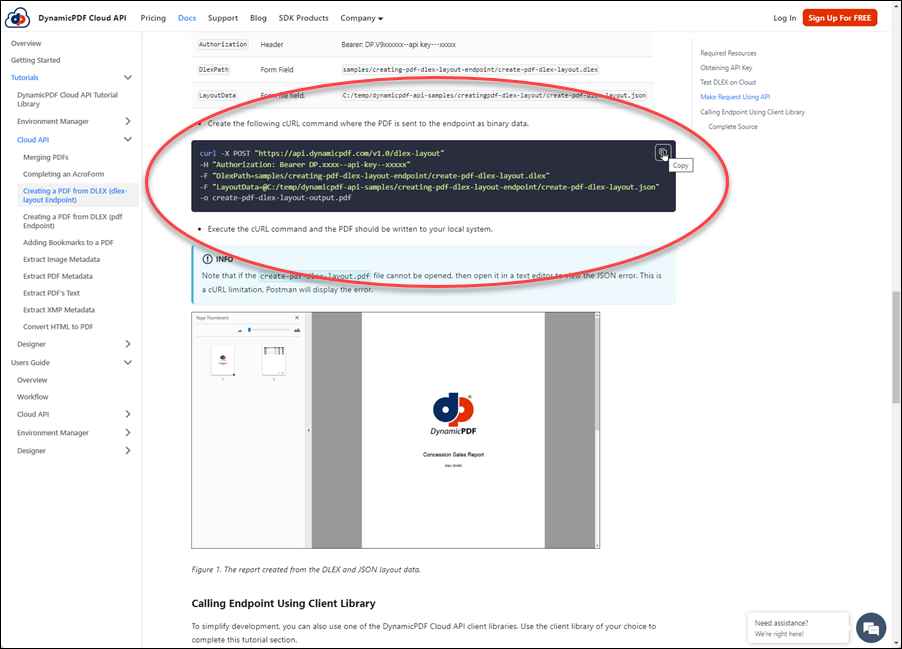
Figure 10. The cURL command in the DynamicPDF API tutorial.
curl -X POST "https://api.dpdf.io/v1.0/dlex-layout"
-H "Authorization: Bearer DP.xxx-api-key-xxx"
-F "DlexPath=samples/creating-pdf-dlex-layout-endpoint/create-pdf-dlex-layout.dlex"
-F "LayoutData=@C:/temp/dynamicpdf-api-samples/creating-pdf-dlex-layout-endpoint/create-pdf-dlex-layout.json"
-o create-pdf-dlex-layout-output.pdf
- Copy the cURL command and modify it by adding your API key, and the path you downloaded the JSON (Figure 11).
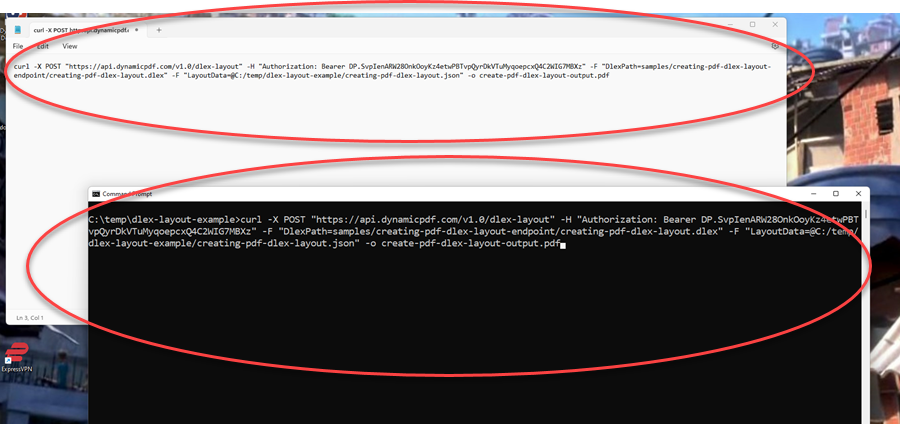
Figure 11. Calling the dlex-layout endpoint using cURL.
- Test calling the
dlex-layoutcommand using cURL from your command prompt (Figure 12).

Figure 12. Testing the dlex-layout endpoint using cURL.
- Ensure the endpoint creates the PDF (Figure 13).

Figure 13. The PDF created by calling the dlex-layout endpoint in cURL.
Creating the dlex-layout Call in bubble.io
Return to bubble.io now that you have ensured the dlex-layout endpoint was configured correctly and creates a PDF using cURL.
- Return to your bubble app (Figure 14).
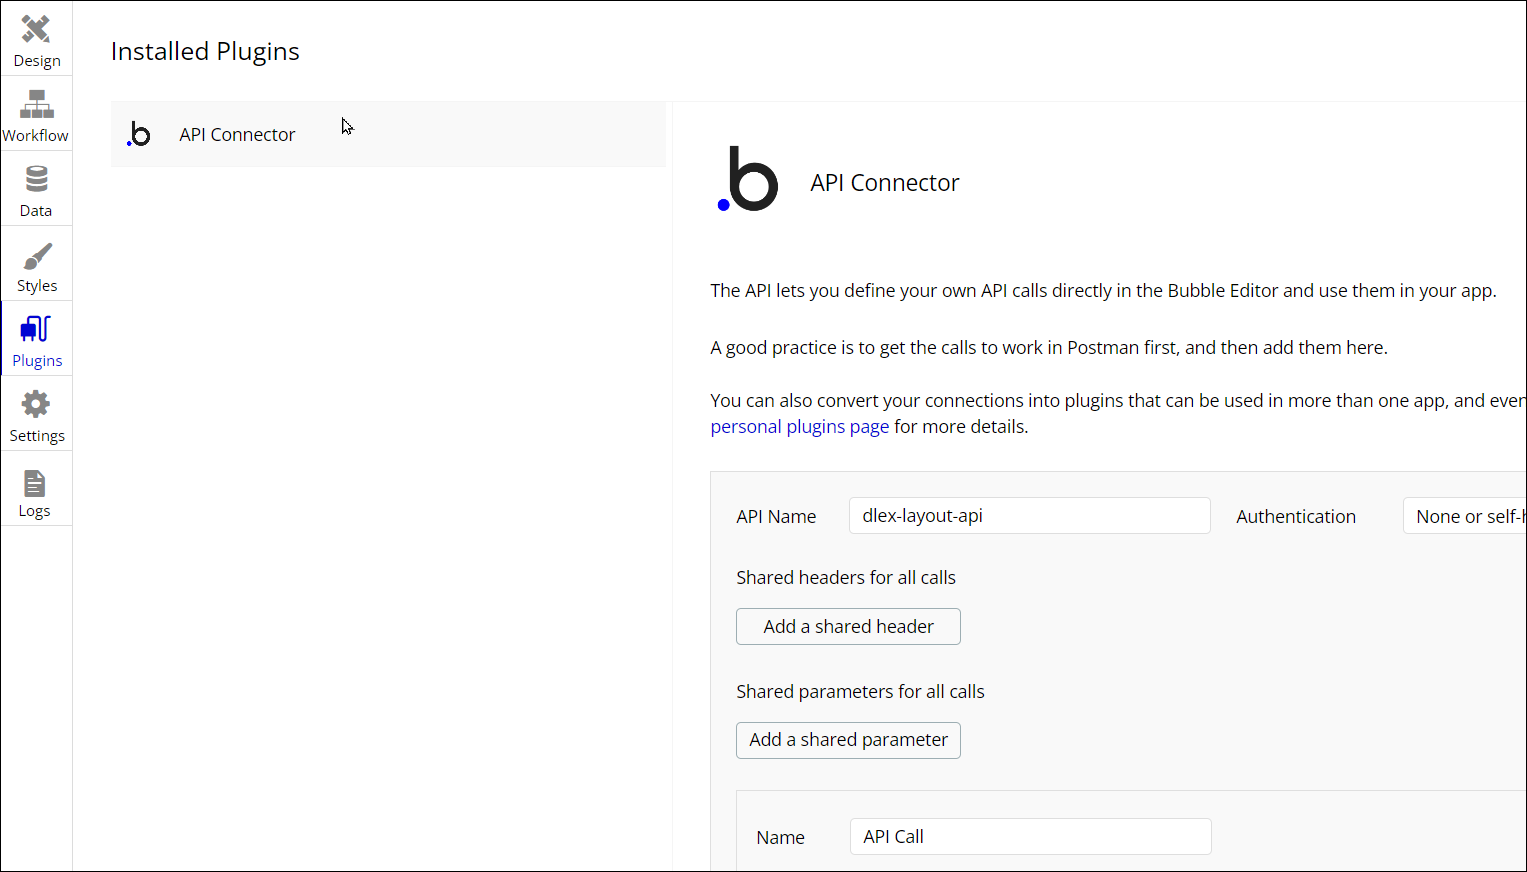
Figure 14. API Connector with one added API.
- Go to
API Calland click expand. - Select Data from the Use as dropdown (Figure 15 -2).
- Select File as the Data type (Figure 15 - 3).
- Select Add Header and add your DynamicPDF CloudAPI Authorization key prepended by
Bearer(Figure 15 - 4). - Set the call's Body type to Form-data (Figure 15 - 5).

Figure 15. Adding an API to the API Connector.
- Click the Add parameter button twice to add two new parameters (Figure 16 -1).
- Name the first parameter
LayoutDataand check the send file checkbox (Figure 16 -2). - Name the second parameter
DlexPathand add the path to the DLEX file from DynamicPDF API (Figure 16 -3).

Figure 16. Adding the call to dlex-layout.
- Click Initialize call and then click preview to ensure that the call was setup correctly (Figure 17).

Figure 17. Previewing the call.
A new tab with the PDF should appear if you configured the call correctly (Figure 18).
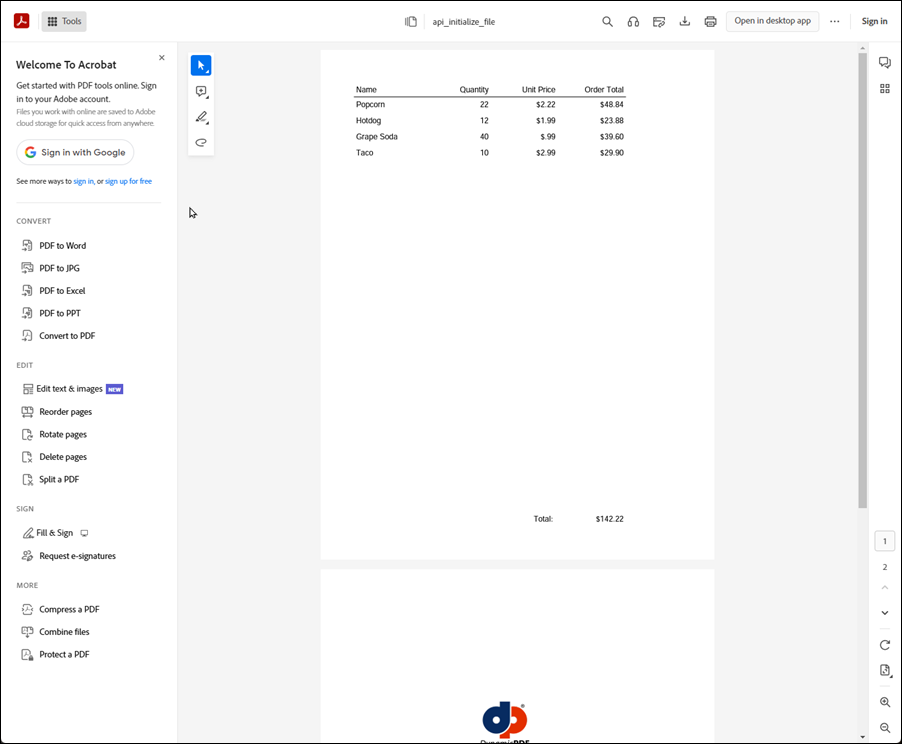
Figure 18. The PDF should be created if the call was configured correctly.
For the final landing page we do not want the parameter values pre-filled, so we remove the values and uncheck Private.
- Clear the values from the parameters and uncheck Private.

Now that you have tested the API call, you need to modify the landing page to use the newly created API call.
- Return to the Design tab and resize the page. Resize so that you can use the grid to layout the labels and input (Figure 19 - 1).
- Add two labels and two text inputs (Figure 19 -2).
- Assign the text
DLEX Pathto the first label andJSON LayoutDatato the second label. - Assign
cloudStoragePathto the first text input andlayoutDatato the second text input. These values are used later when defining the Generate PDF button's workflow actions.

Figure 19. Resize the landing page and add two inputs to the page.
- Move the Generate PDF button parallel to the two inputs. This step is not critical, but it improves the landing page's appearance (Figure 20).

Figure 20. Improving the landing page's appearance.
The Data and Workflow
In the next steps, you want the generated PDF added to your bubble.io app's data storage. You then open the PDF from data storage as a separate browser tab. Your browser recognizes the file as a PDF and displays it appropriately. You also add an action to prevent generated PDFs from filling your bubble.io storage space and ensure displaying only the latest generated PDF.
Deleting Last Created PDF
We first create an action to prevent persisting generated PDFs. Anytime a new PDF is created using the dlex-layout endpoint, we want to ensure the last created PDF is deleted first.
- Navigate to the Data tab and create a new data type and assign its name as
dlex-report(Figure 21 - 2, 3). - Create a new field for the Field name assign
dlex-report-fileand assign the Field type as file (Figure 21 - 4).

Figure 21. Configuring your bubble.io storage to save the generated PDF.
- Navigate to the Workflow tab and add a new workflow step for when the button is clicked (Figure 22).
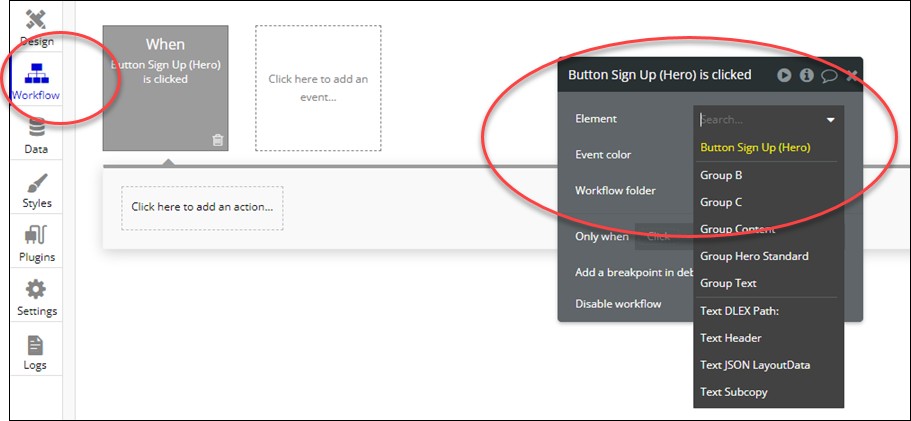
Figure 22. Creating a new workflow step.
- Select Click here to add an action... to create an action (Figure 23 - 1).
- Assign the type of action as Data and Delete a list of things... as the action (Figure 23 - 2).
- Assign the Type of things as
dlex-report(Figure 23). - Select Do a search for from the dropdown list for Only when (Figure 23 - 4).
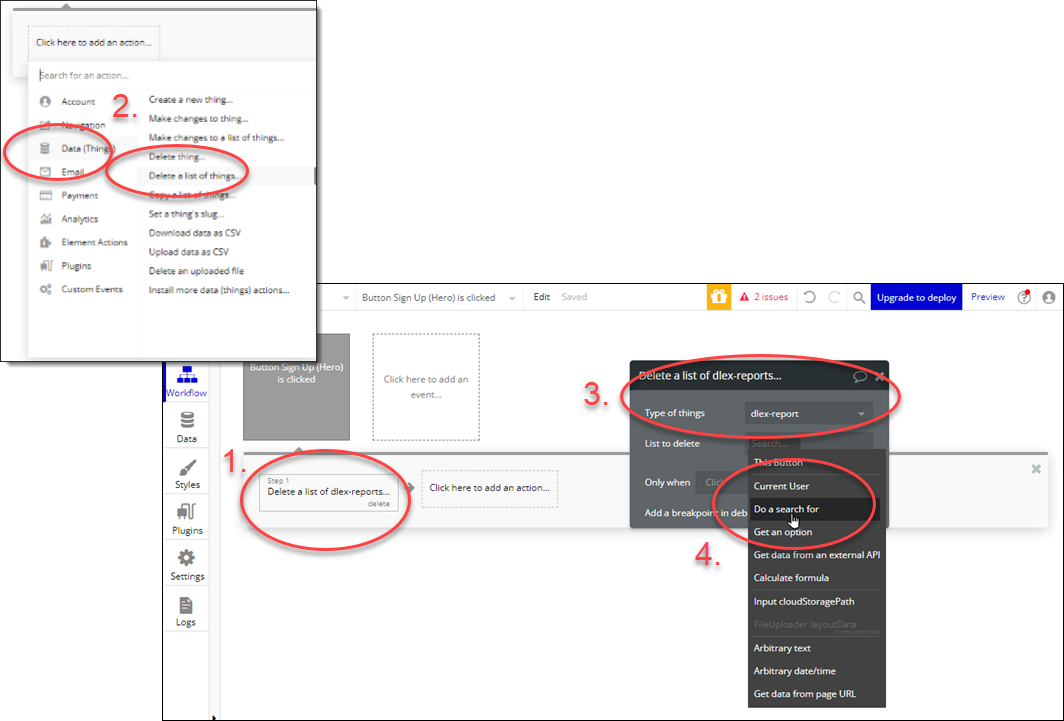
Figure 23. Creating a new delete action.
-
In the Delete a list of dlex reports... dialog now build the list to delete (Figure 24 -1).
-
Select
dlex-reportin the Do a search for dialog. -
Select :last item, select 's creation date, select <, and then Current Date and Time (Figure 24 - 2, 3).
The final value for Only when in the Delete a list of dlex-reports... dialog should be:
Search for dlex-reports:last items's Creation Date < Current date/time
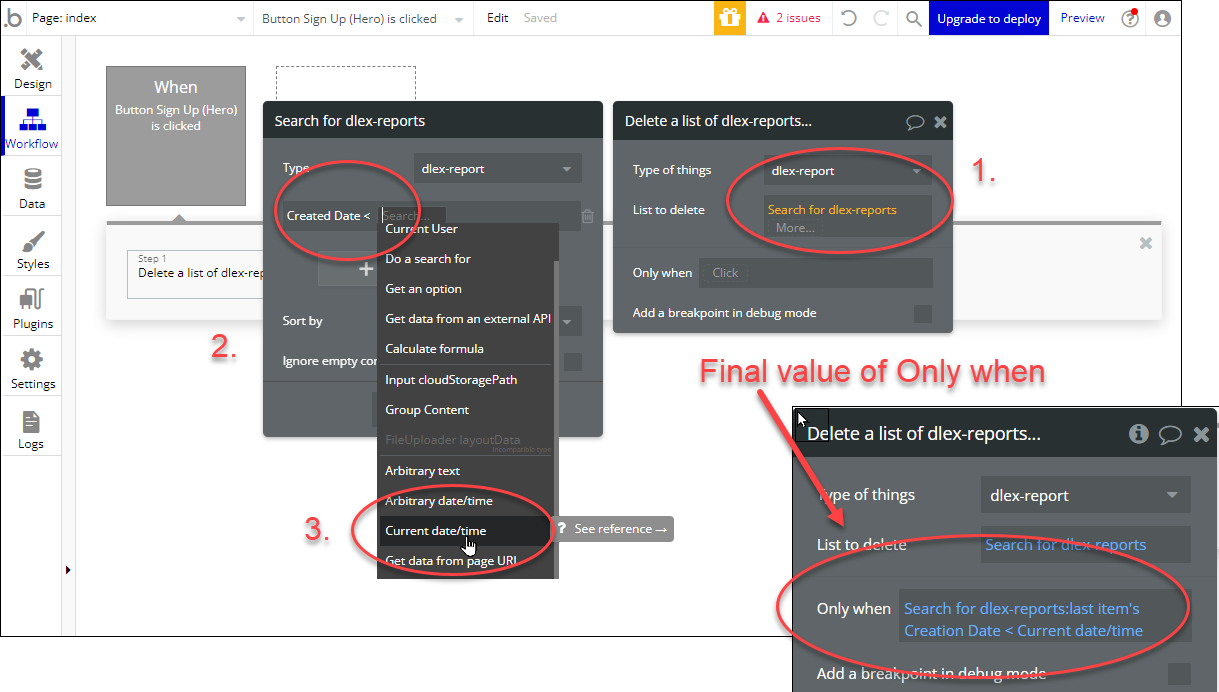
Figure 24. Initializing an action to delete the last item by current date and time.
Creating a New PDF
Now that we have created the delete action, let's create an action to create a new PDF using the dlex-layout endpoint.
- Create a new Create a new thing... Data (Things) action (Figure 25).
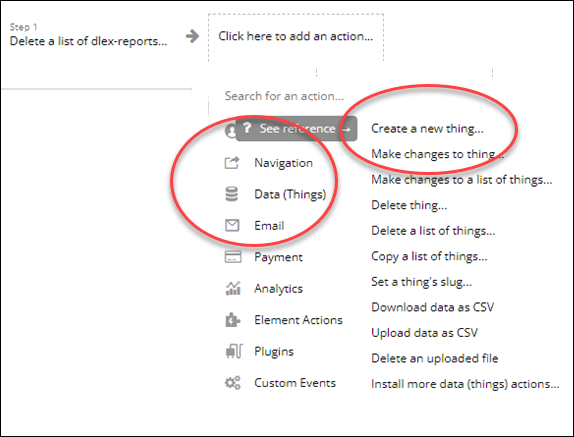
Figure 25. Create a new thing... action.
- Select
dlex-reportfrom the dropdown as the Type (Figure 26 - 1). - Select Get data from an external API for the Only when value (Figure 26 - 2).
- Select
dlex-layout-api - API Callas the API provider (Figure 26 -3, 4).

Figure 26. Creating a new PDF action.
- Select FileUploader
layoutDatafor the Dynamic link and InputcloudStoragePathfor the (param.)DlexPath(Figure 27).
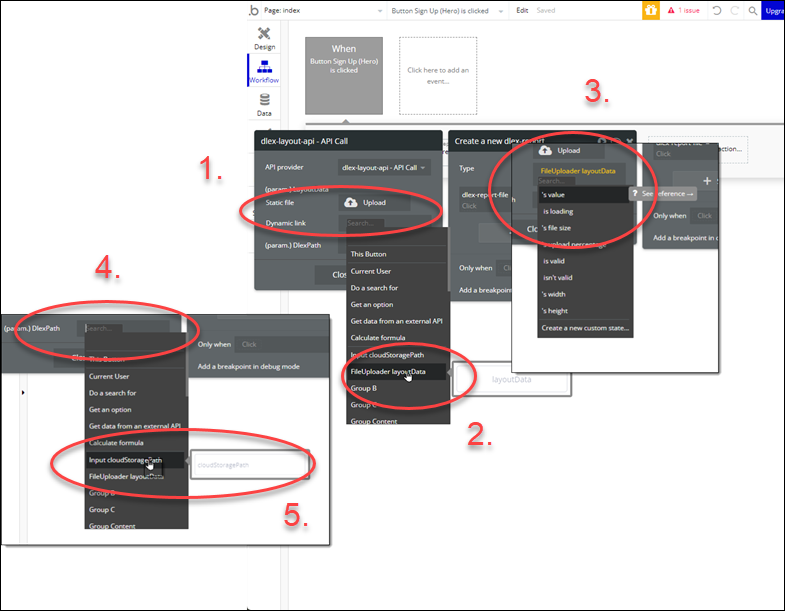
Figure 27. Initializing the data sent to the dlex-layout endpoint.
- Click Preview to view your application page in your browser.
- Get the relative path to the DLEX file from your DynamicPDF Cloud Storage and paste the value for the DLEX Path (Figure 28 - 1).
- Click the JSON LayoutData input and load the JSON data file from your local filesystem (Figure 28 - 2).
- Click Generate PDF (Figure 28 - 3).

Figure 28. Previewing the created landing page.
- Review the created PDF in your browser.

Figure 29. The previewed PDF generated by app.
- Click on the Data tab and then App data to ensure the PDF was created.
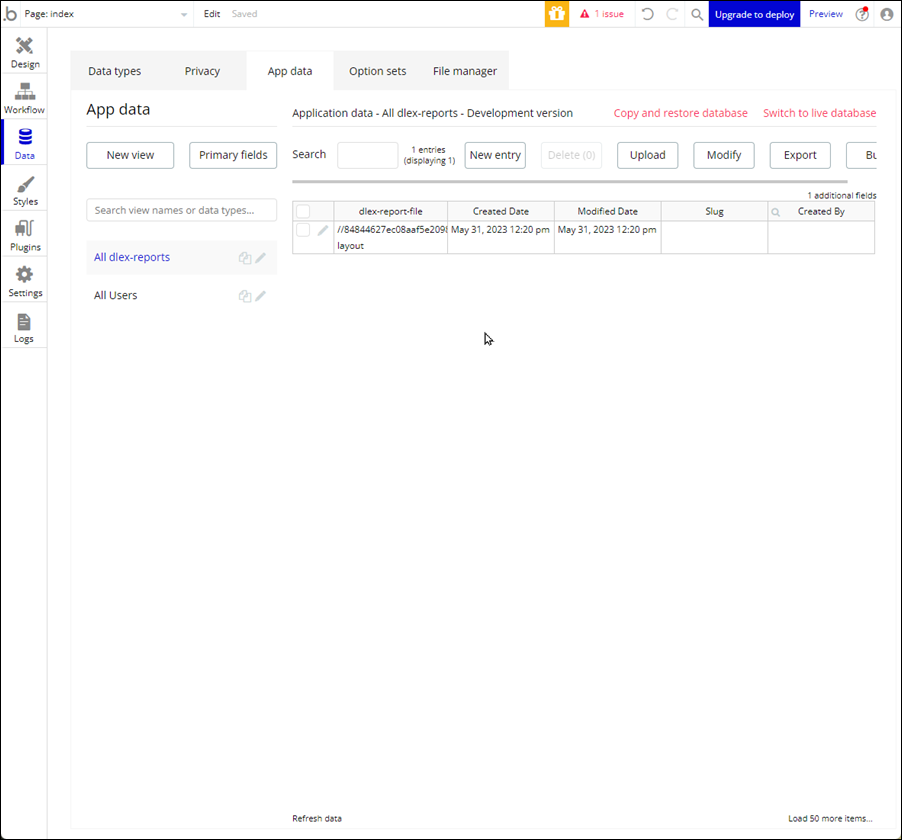
Figure 30. Ensuring the PDF was added to data storage.
Conclusion
In this tutorial, you incorporated the dlex-layout endpoint into your bubble.io application. Although this example was a simple landing page, it illustrates how to easily integrate DynamicPDF API's endpoints into your web applications built using bubble.io.