Using the DynamicPDF API Zapier App
In this tutorial, you learn how to use the DynamicPDF API Zapier App by using the Generate PDF from Remote DLEX Template action and the Rasterize PDF Pages to Images action from the DynamicPDF API Zapier App. You build a flexible workflow that dynamically selects the correct template and constructs file names automatically, allowing the Zap to process multiple layout data files without hardcoded values.
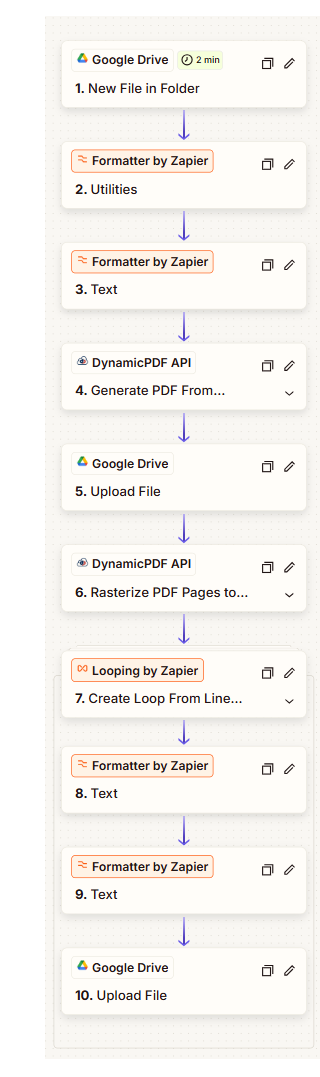
You create a Zap that:
- downloads a JSON layout data file from Google Drive,
- generates a PDF using the DynamicPDF API Zapier app's Generate PDF from Remote DLEX Template action,
- uploads the created PDF report to Google Drive,
- rasterizes the created report to PNG images using the DynamicPDF API Zapier App's Rasterize PDF Pages to Images action,
- loop through the created images to extract each image's data and name,
- provides the image name and extension separately for each image as variables,
- saves the images to Google Drive, constructing the image file name and extension,
- dynamically determines the correct DLEX template path using a Lookup Table based on the uploaded JSON file, and
- dynamically constructs the PDF report file name and image file names to prevent overwriting and support multiple templates.
Prerequisites
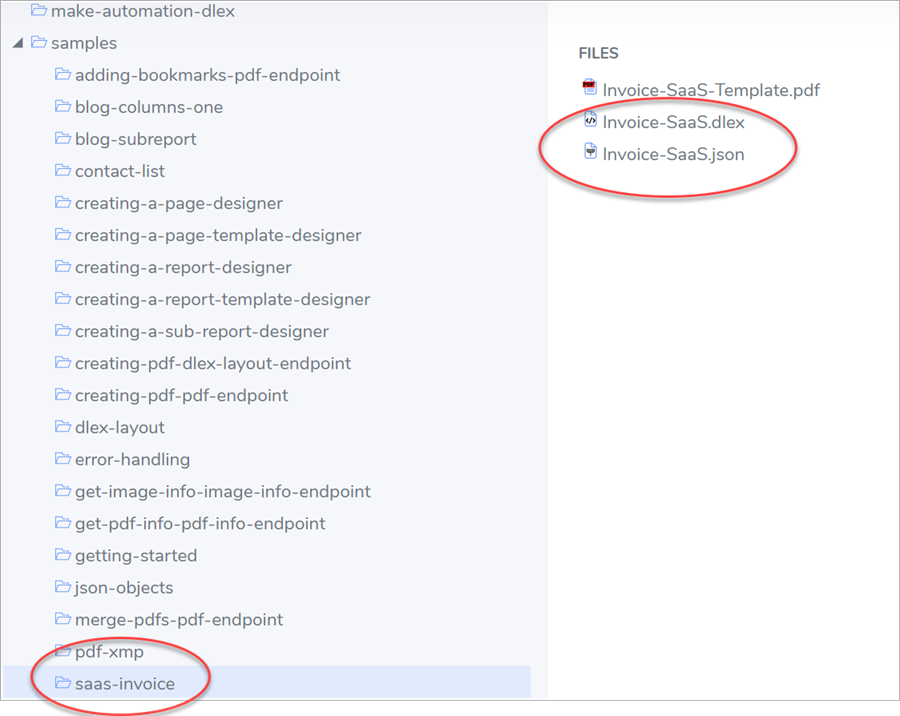
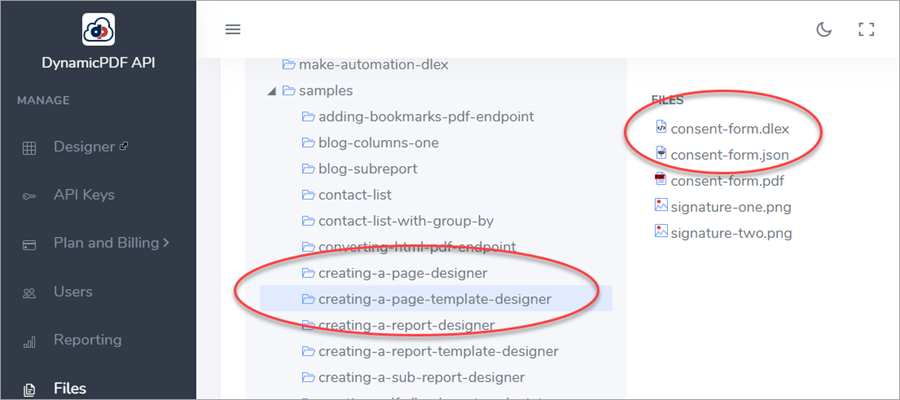
To complete the tutorial, you use the files from the saas-invoice, and and creating-a-page-template-designer sample projects available in your DynamicPDF API account's samples in the File Manager. Before starting, ensure you have the following items:
- a DynamicPDF API Key,
- a Zapier account,
- a Google Drive account (or access to one),
- the
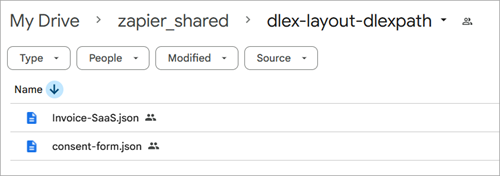
Invoice-SaaS.jsonlayout data saved to a Google Drive accessible by your Zap, - the
Invoice-Saas.dlextemplate in your DynamicPDF API file storage, and - the
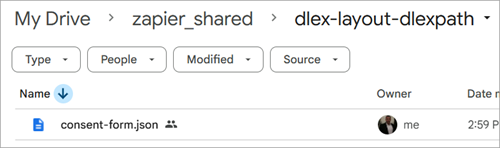
consent-form.jsontemplate in your DynamicPDF API file storage.
You obtain the saas-invoice and creating-a-page-template-designer samples from the DynamicPDF API File Manager.
See Sample Projects for more information on obtaining these two sample projects.
See the Create a SaaS Invoice sample for information on generating this report using DynamicPDF Designer (Create a SaaS Invoice).
Step 1- Review DLEX and Download JSON
- Login to your DynamicPDF API account.
- Open
Invoice-SaS.dlexin DynamicPDF Designer.
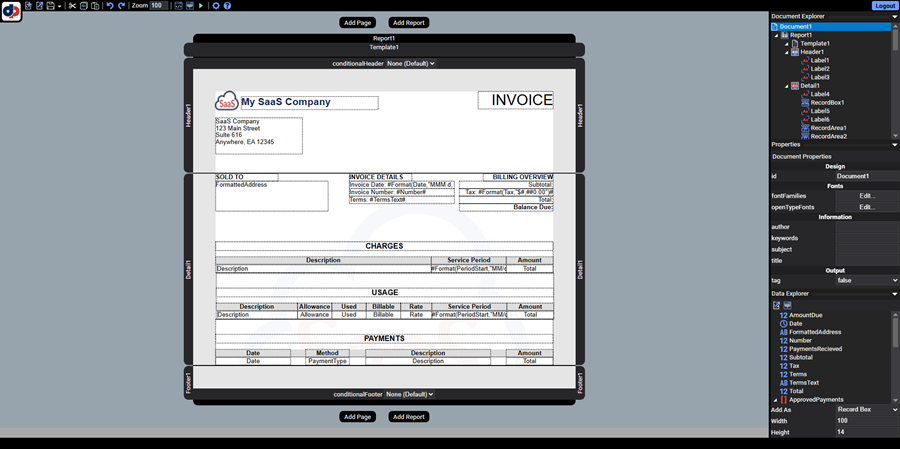
- Generate the PDF preview to confirm the template renders correctly.
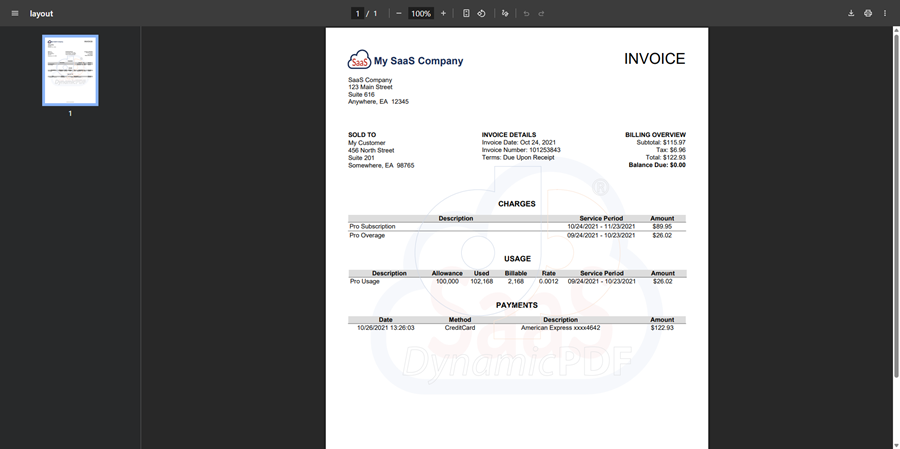
- Download the associated JSON layout data (
Invoice-SaaS.json) from the DynamicPDF API File Manager.
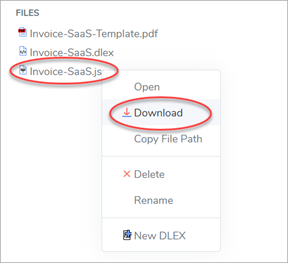
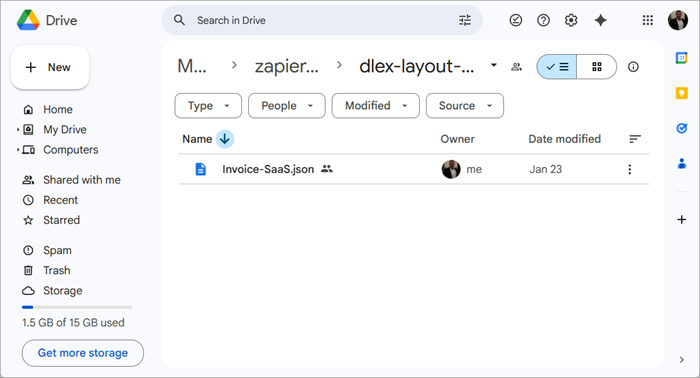
- Upload the
Invoice-SaaS.jsonlayout data to a folder in Google Drive.
Your Zap will use the JSON data file from Google Drive and the DLEX template path from the DynamicPDF API File Manager when constructing the Zap. Now that we have ensured the DLEX template renders correctly and we have downloaded the JSON layout data, let's create the Zap.
Repeat this process for the creating-a-page-template-designer sample to review its created PDF.
Step 2 - Create Trigger
Create a new Zap.
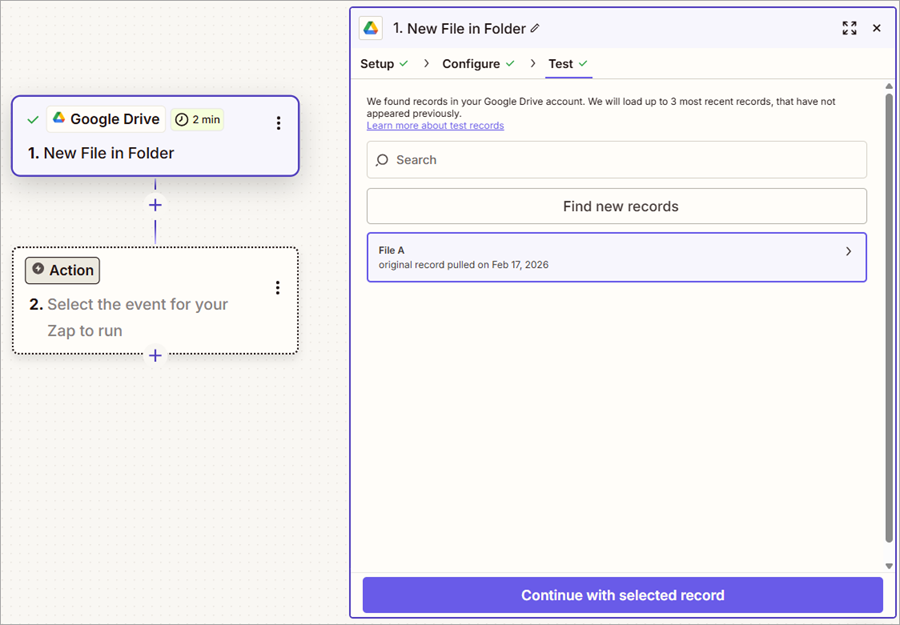
- Select Google Drive for the trigger and New File in Folder as the action.
- Select your drive and the folder containing
Invoice-SaS.json.
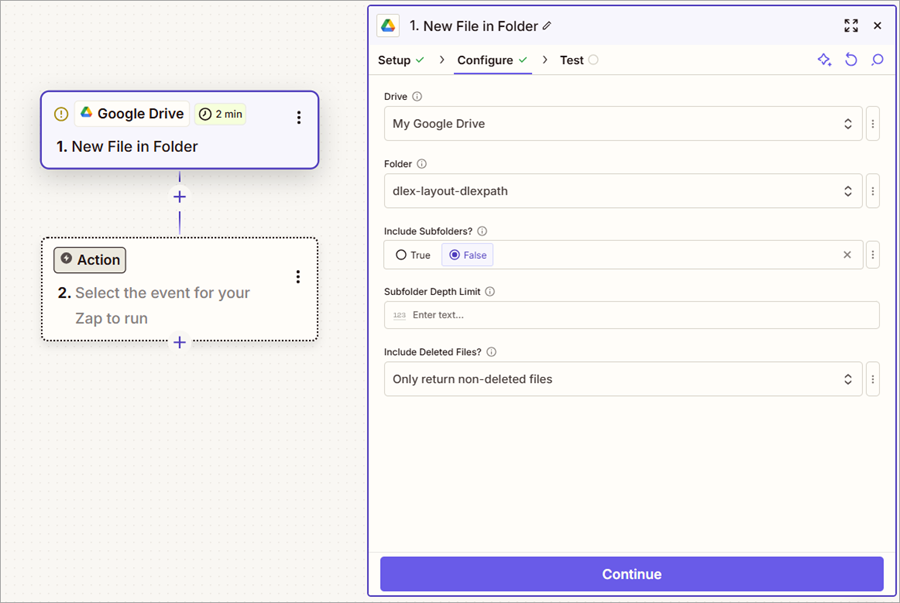
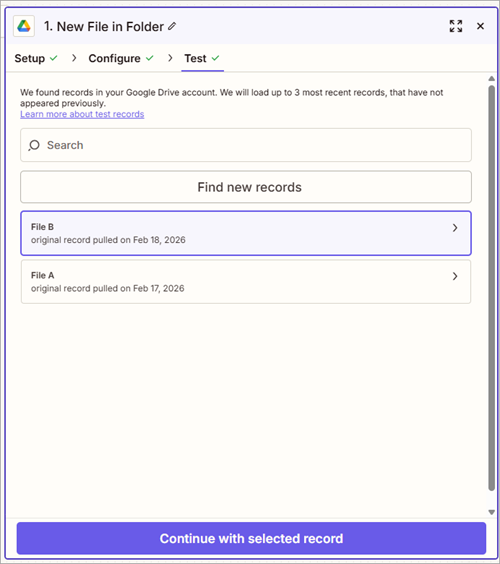
- Select Find new Records to find the file in Google Drive.
- After finding the file, select the file and continue to the first Action.
A file could come from Google Drive, Dropbox, a public URL, an Amazon S3 bucket, or any other source supported by Zapier. What matters is that the zapier app producing the file provides the required metadata, including the file name, MIME type, and binary content, so it can be sent correctly to the DynamicPDF API endpoints.

Step 3 - Generate the PDF
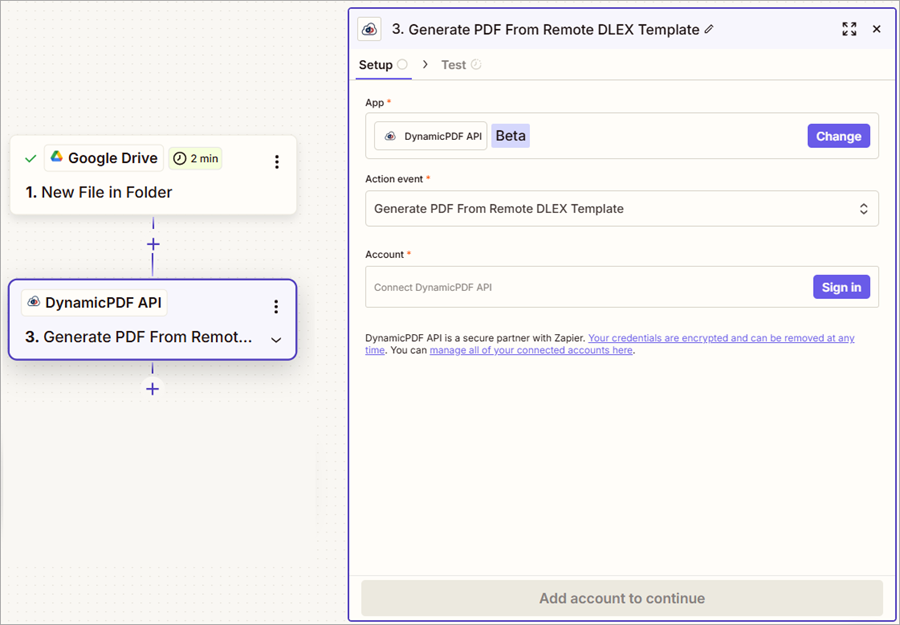
- Select DynamicPDF API as the Action type and Generate PDF From Remote DLEX Template as the Action event.
Create App Connection
If it is your first time using the DynamicPDF API Zapier App, you must first create a connection.
- Click anywhere in the Account field to open the Connect an Account dialog.
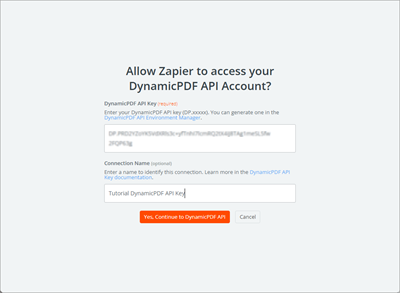
- Enter your DynamicPDF API key and assign a name for the connection.
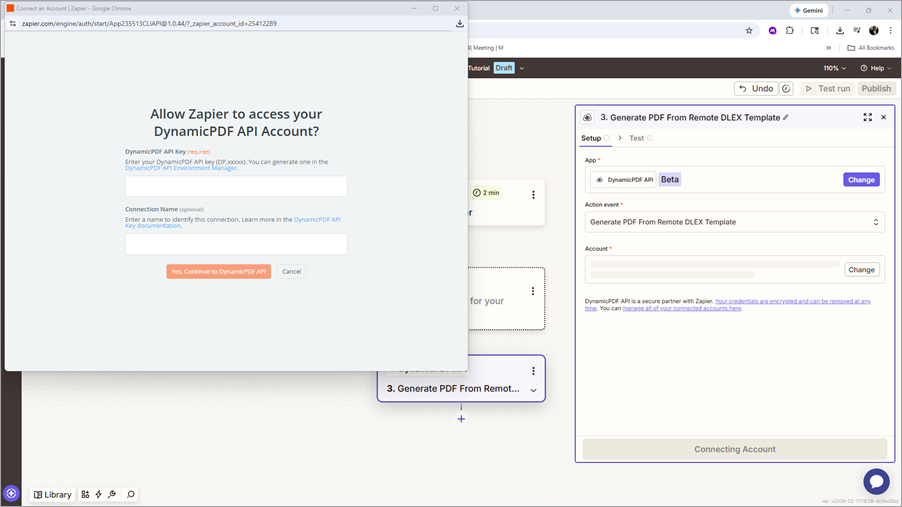
- Select Yes, Continue to DynamicPDF API to add the connection.
- Select Continue to progress to Configure.
Configure the Action
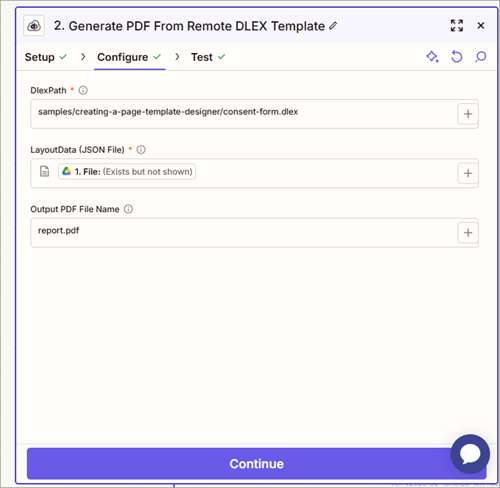
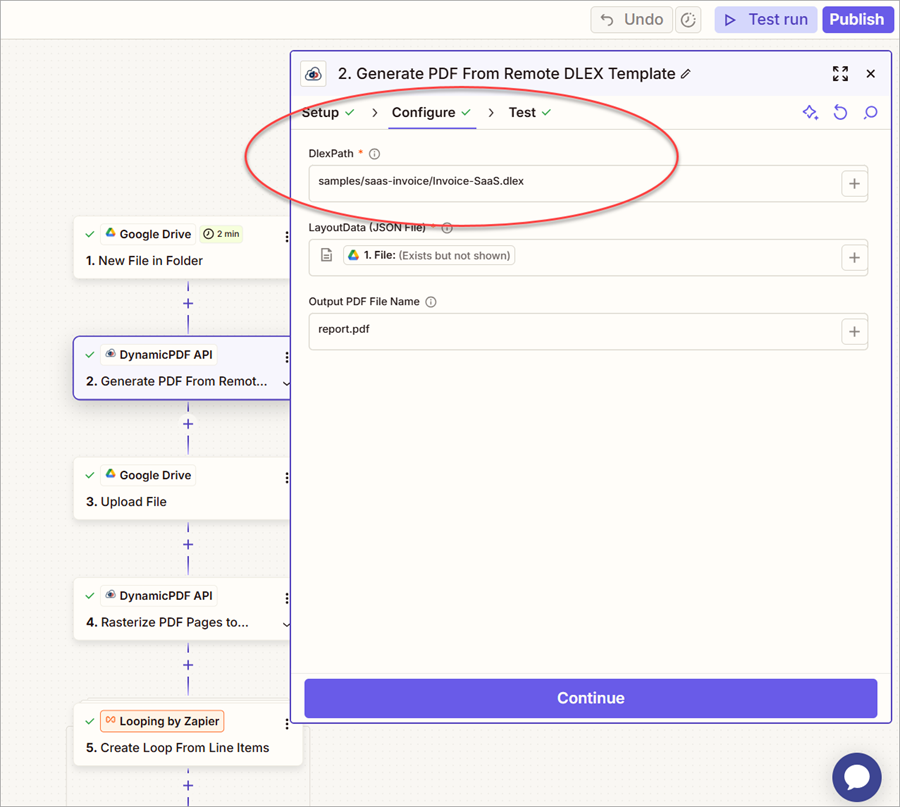
You now must map the DLEX file from DynamicPDF AP's File Manager to the DlexPath field and the local layout data JSON file to the Layoutdata field.
You can change the Output PDF File Name to whatever name you wish, the default is report.pdf.

- Return to DynamicPDF API's File Manager and copy the DLEX file's path to your clipboard.
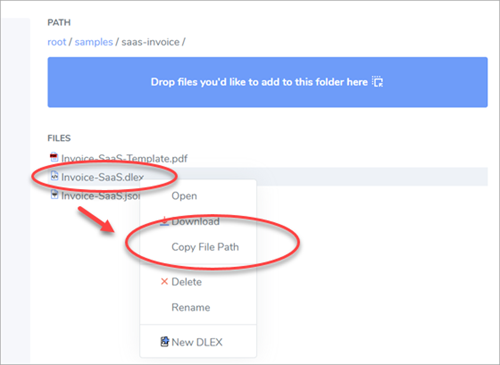
- Add the path to the DlexPath field.
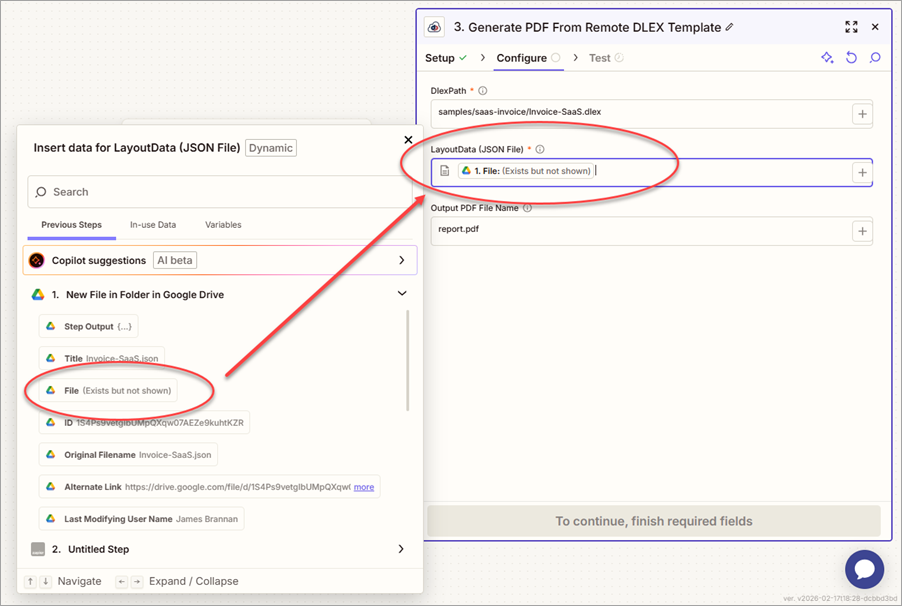
- Map File from the previous 1. New File in Folder in Google Drive step to the LayoutData (JSON File) field.
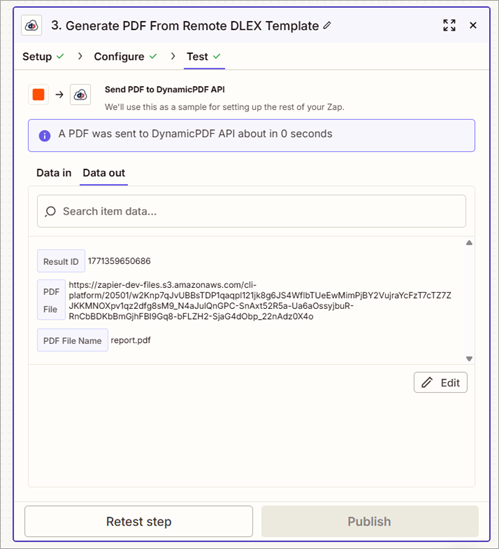
- Test step 3. Generate PDF From Remote DLEX Template by clicking Test step (or Retest step) to call the DynamicPDF API
dlex-layoutendpoint and return the generated PDF.
Now that you generated the PDF report successfully, let's save the created report to Google Drive.
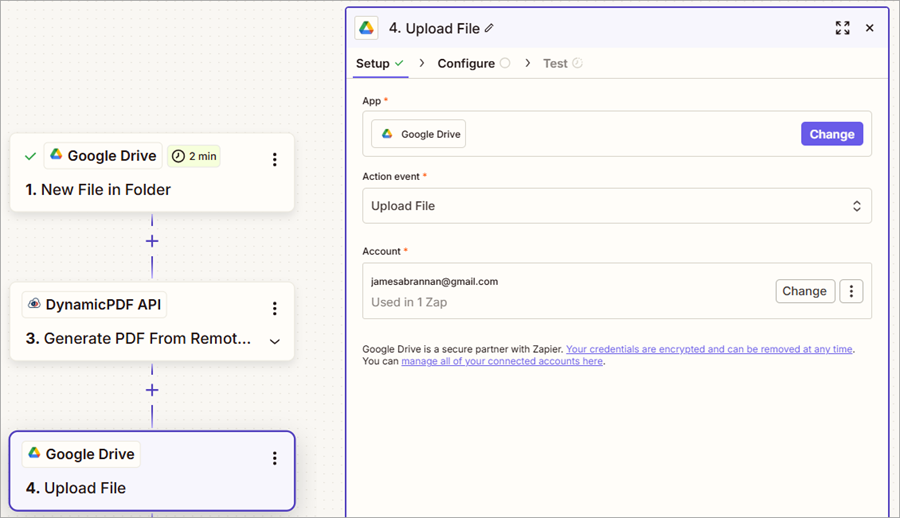
Step 4 - Save Generated PDF
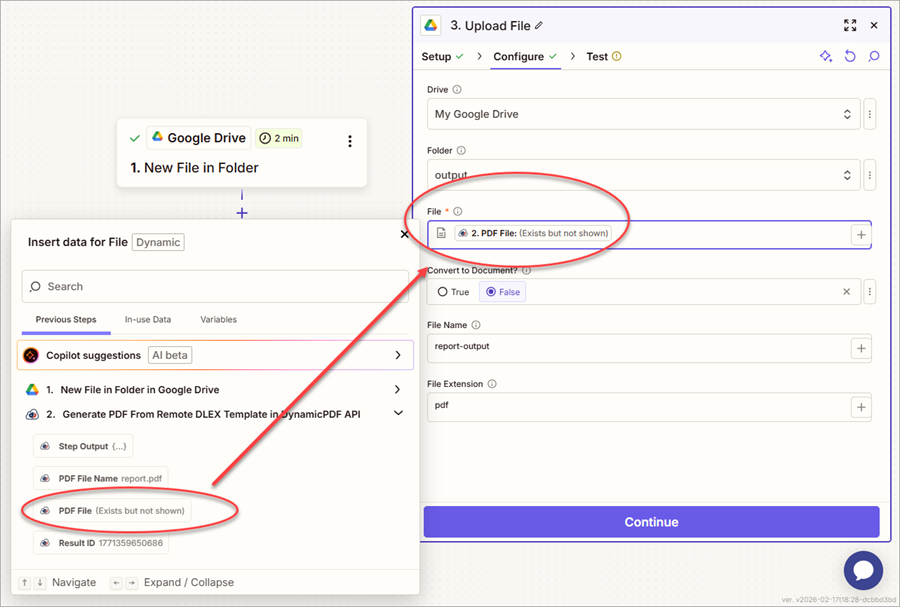
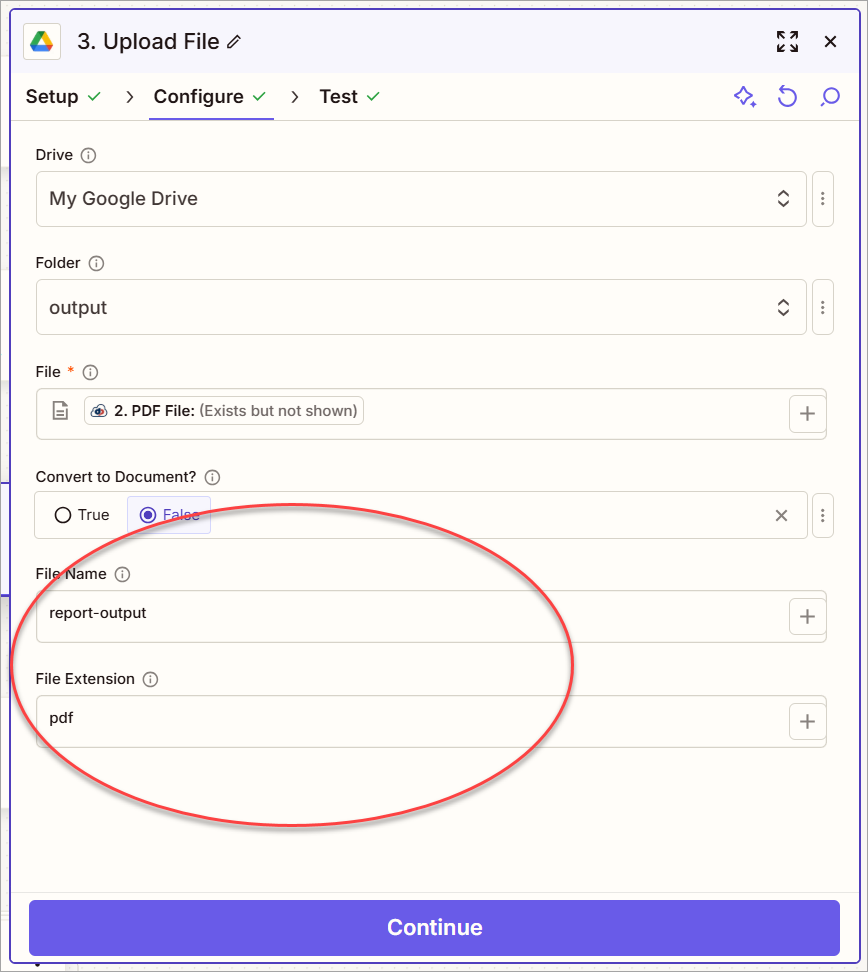
- Add a Google Drive action and assign Upload File as the Action event.
- Map the PDF File from the 2. Generate PDF From Remote DLEX Template in DynamicPDF API step.
- Assign a value to the File Name field and a value to File Extension field.
Later in this tutorial you modify the File Name field to be dynamically populated rather than hardcoded.
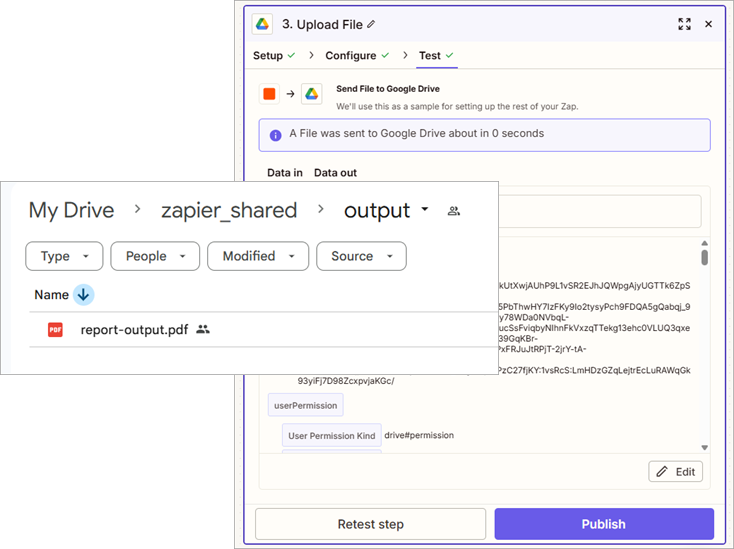
- Test the step and the PDF is uploaded to Google Drive.
Now let's take the produced PDF report and rasterize its pages into images.
Step 5 - Rasterize PDF to Images
To rasterize PDF pages to images you use the DynamicPDF API Zapier App's Rasterize PDF Pages to Images action.
To keep things simple, our report produces a single page, which, when rasterized, creates a single image. However, when rasterizing, the pdf-image endpoint returns a JSON array that can contain multiple images encoded as base64 text.
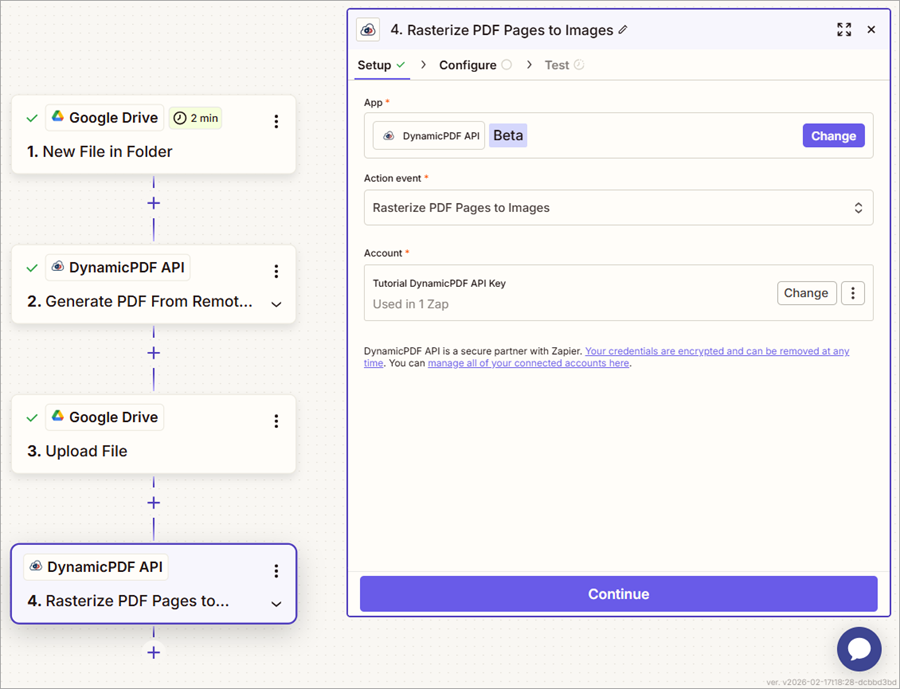
- Add a DynamicPDF API step and assign Rasterize PDF Pages to Images as the Action event.
- Map the PDF file from the 2. Generate PDF From Remote DLEX Template in DynamicPDF API step to the PDF File field.
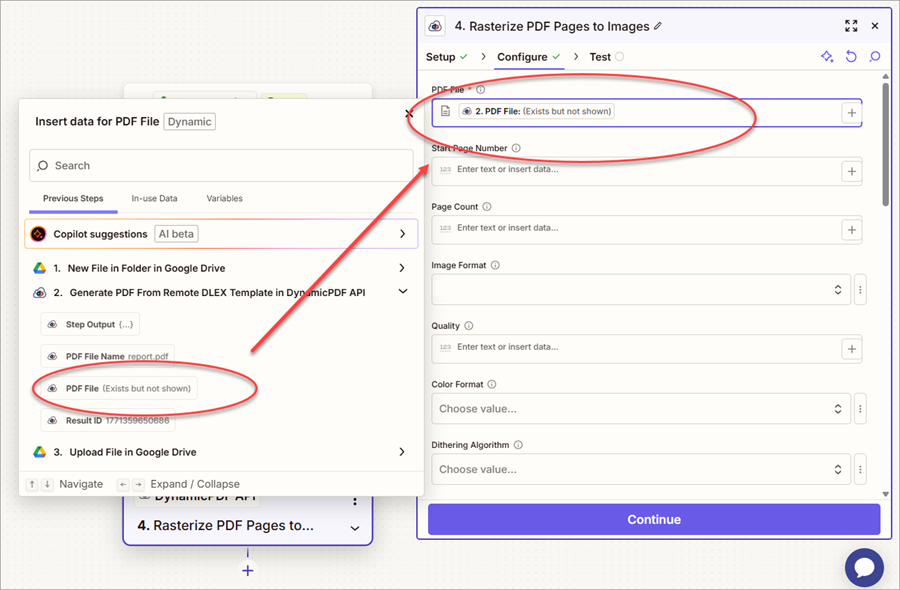
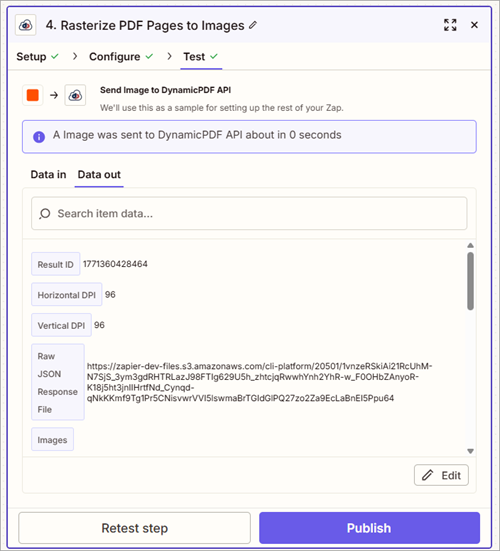
- Test the step and the
pdf-imageendpoint processes the PDF and returns the rasterized pages.
The endpoint returns a JSON document containing an array where the images are embedded as Base64 strings in that array. See the Convert PDF to Image solution example for more information on rasterizing PDFs to images (Convert PDF to Image).
Step 6 - Process Images
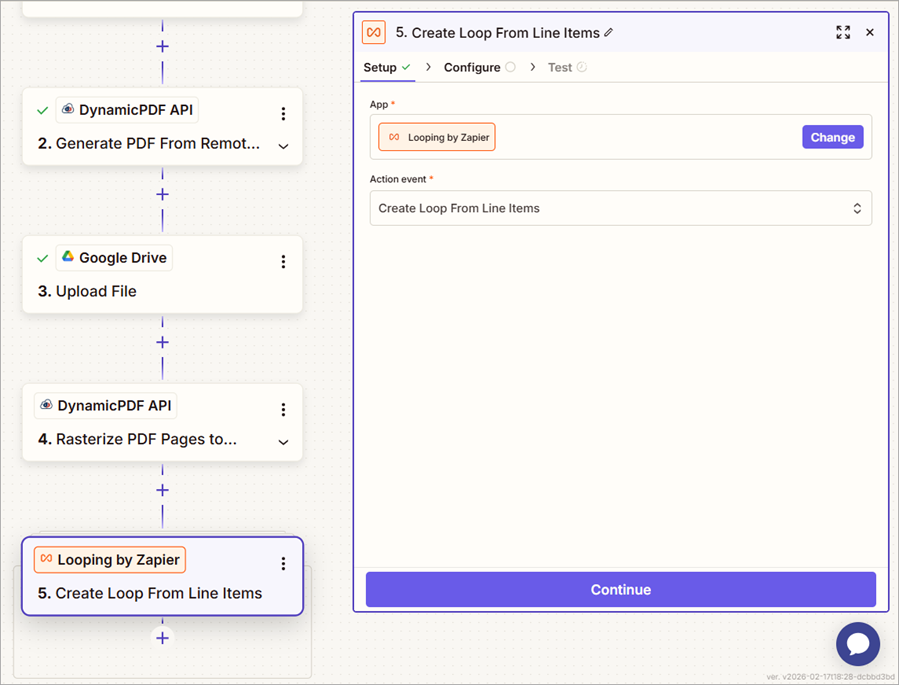
Although when creating and testing a Zap step by step, only a single image is returned, the pdf-image endpoint can return multiple images when rasterizing multiple pages. To process the images, use a Looping by Zapier action to iterate over the images created in the previous step.
- Add a Looping by Zapier action and assign Create Loop From Line Items as the Action event.
- Create a variable named filename and a variable named file.
- From the 4. Rasterize PDF Pages to Images in DynamicPDF API step, map the Files File Name to the filename field and the Files File to the file field.
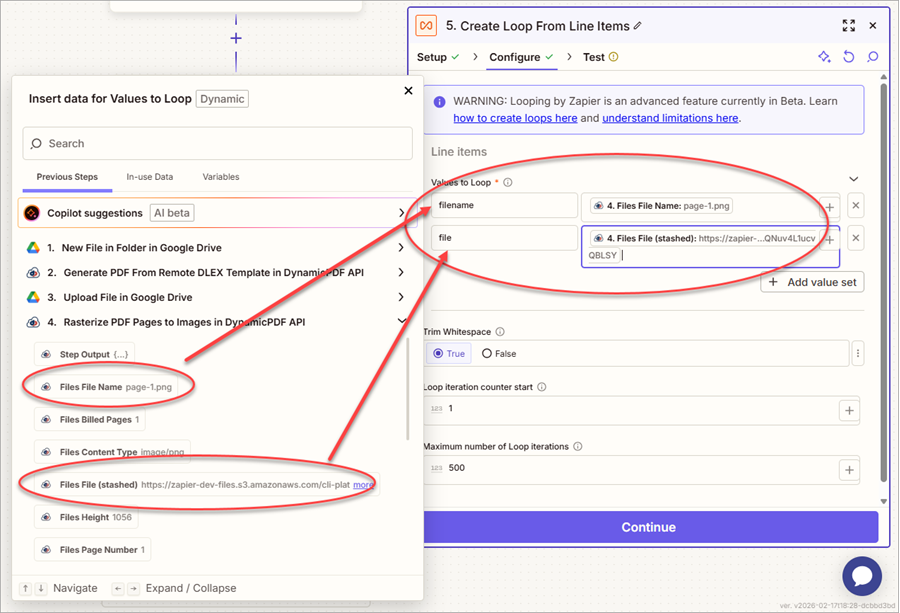
- Test the step and the image file and name are returned.
When building and testing your Zap, only a single file is returned, you must test the Zap to return all the images.
Step 7 - Extract File Name and Extension
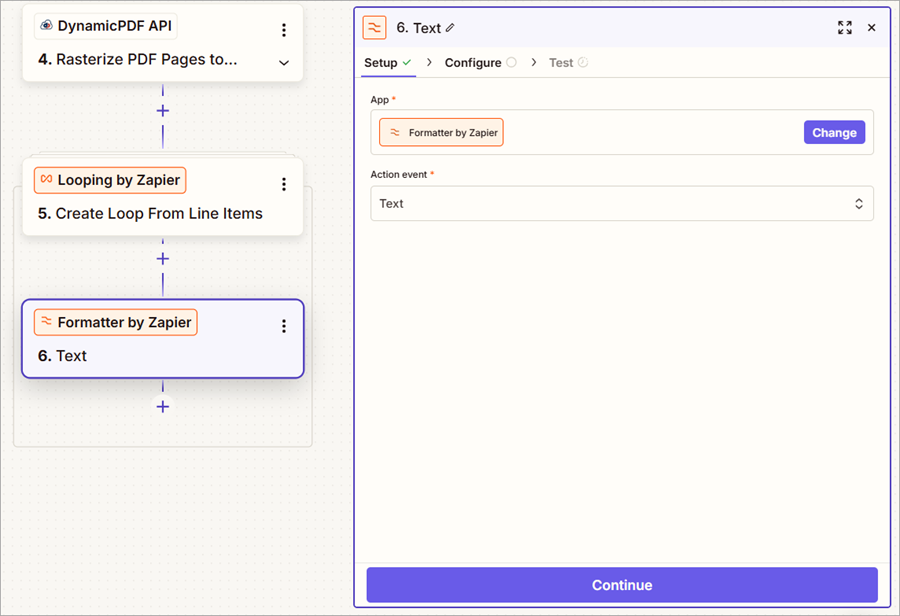
Although the Create Loop From Line Items returns the file name, note that it returns a file name with its extension. Recall that Google Drive Upload a File expects a file name and an extension. Let's split the name into its name and extension using two Formatter by Zapier actions. In the first one, you obtain only the file's name, while in the second one, you obtain only the file's extension.
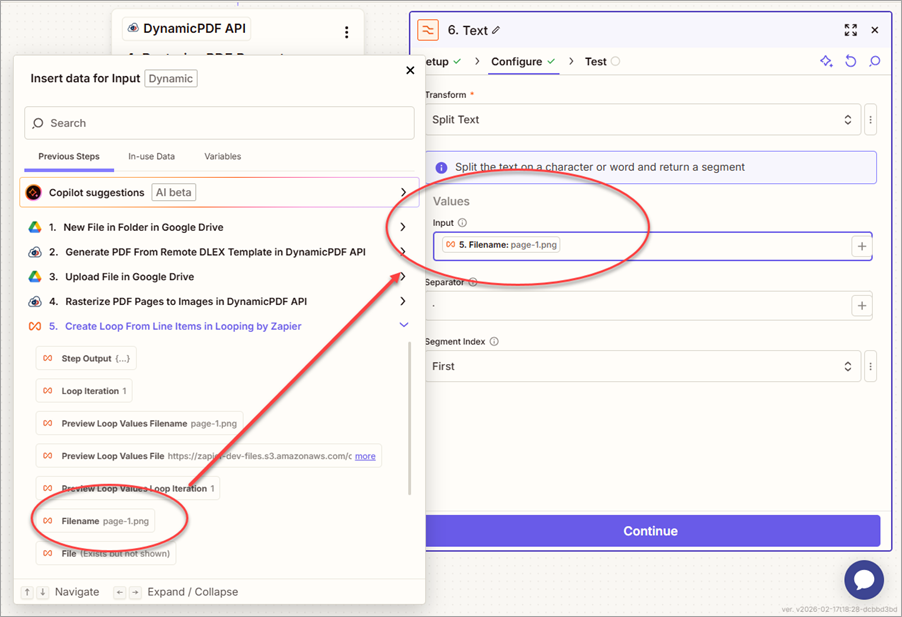
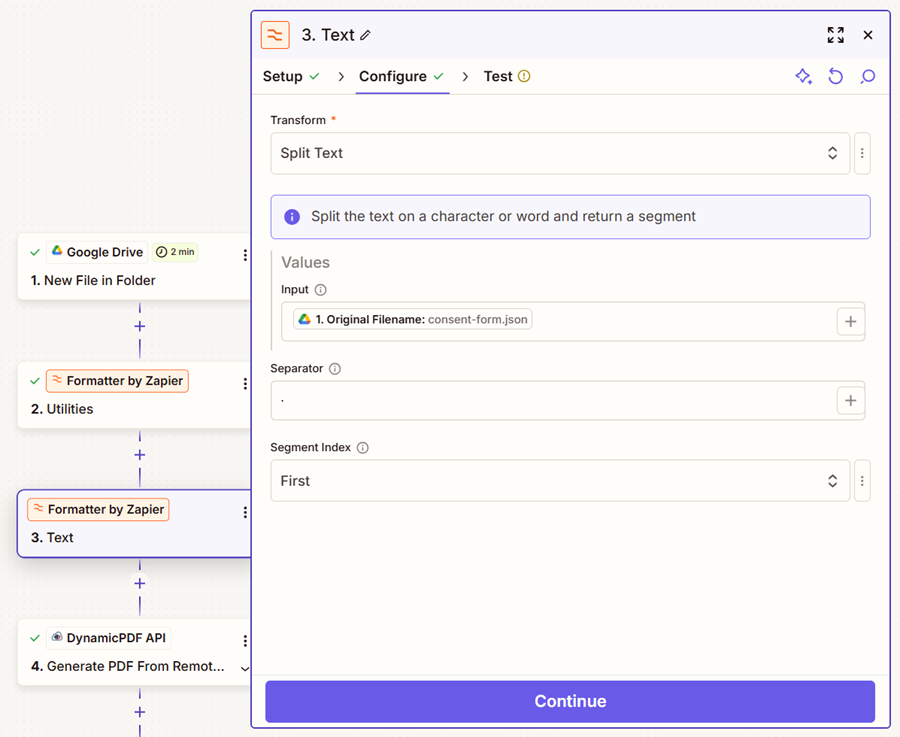
- Add a Formatter by Zapier action and assign Text as the Action event.
- Select Split Text as the Transform.
- From the 5. Create Loop From Line Items in Looping by Zapier step, map the filename variable to the Input field.
- Assign First as the Segment Index and a period as the Separator.
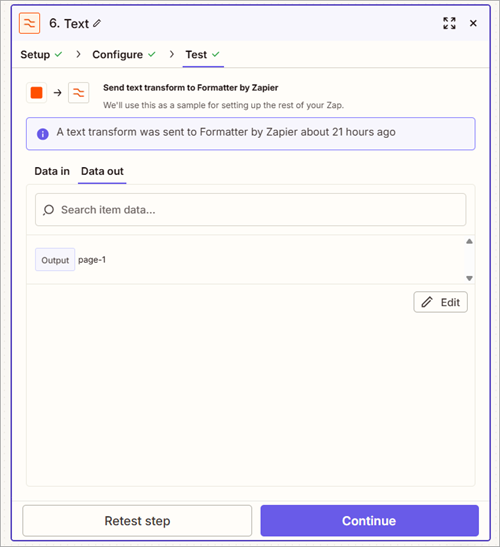
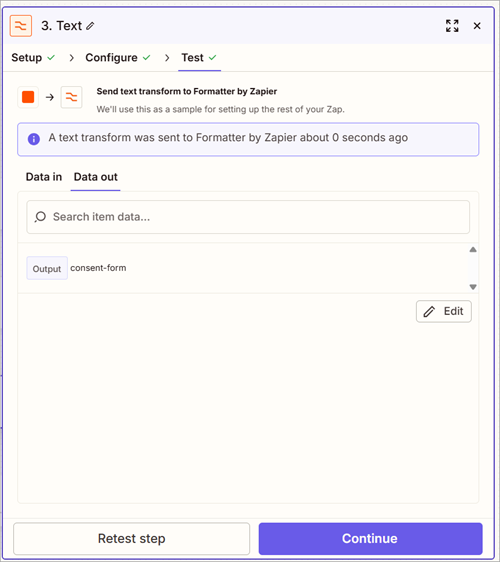
- Test the action and it returns the file name striped of its extension.
- Add a second Formatter by Zapier.
- Select Split Text as the Transform and map the filename to the Input field.
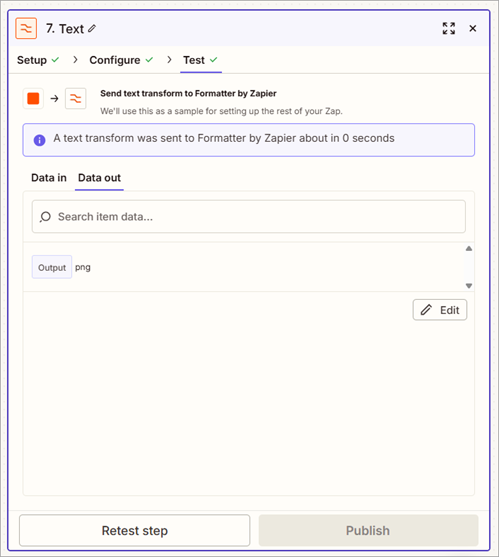
- This time, assign Second as the Segment Index.
- Test the step and it returns the file's extension.
Step 9 - Save Rasterized Images
Add a Google Drive action as a final step to save the rasterized images.
- Add a Google Drive action and assign Upload File as the Action event.
- Map the File from the 5. Create Loop From Line Items in Looping by Zapier step.
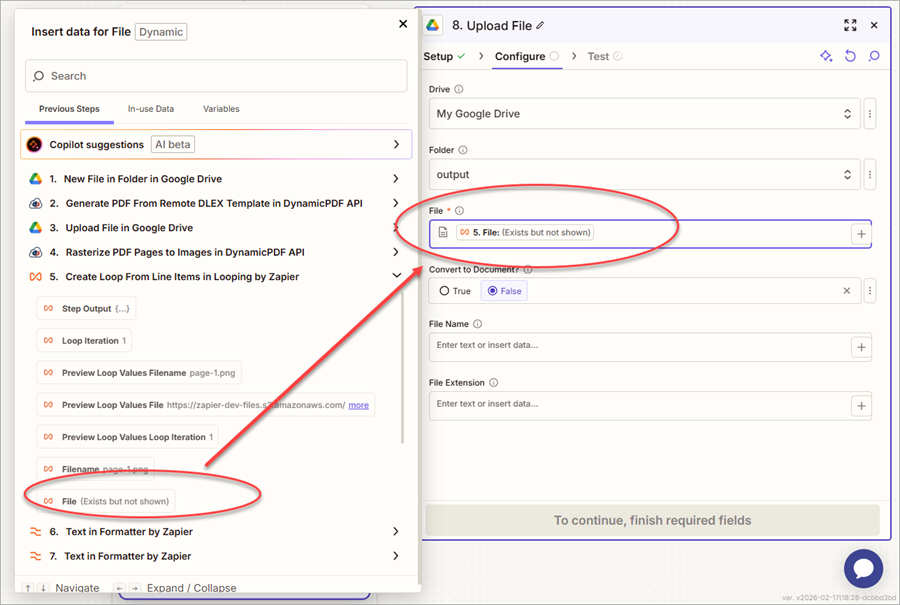
- Map the Output from the first 6. Text in Formatter by Zapier step to the File Name field
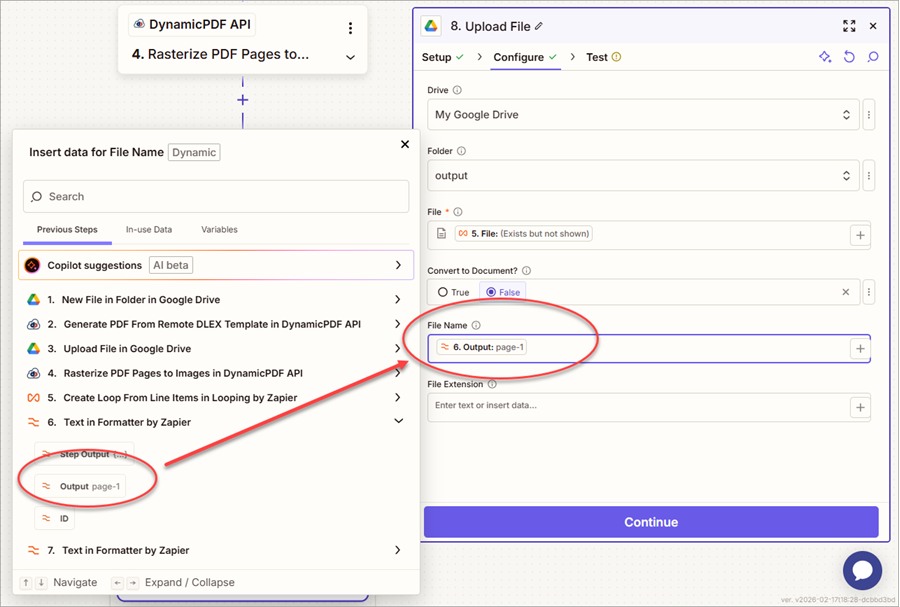
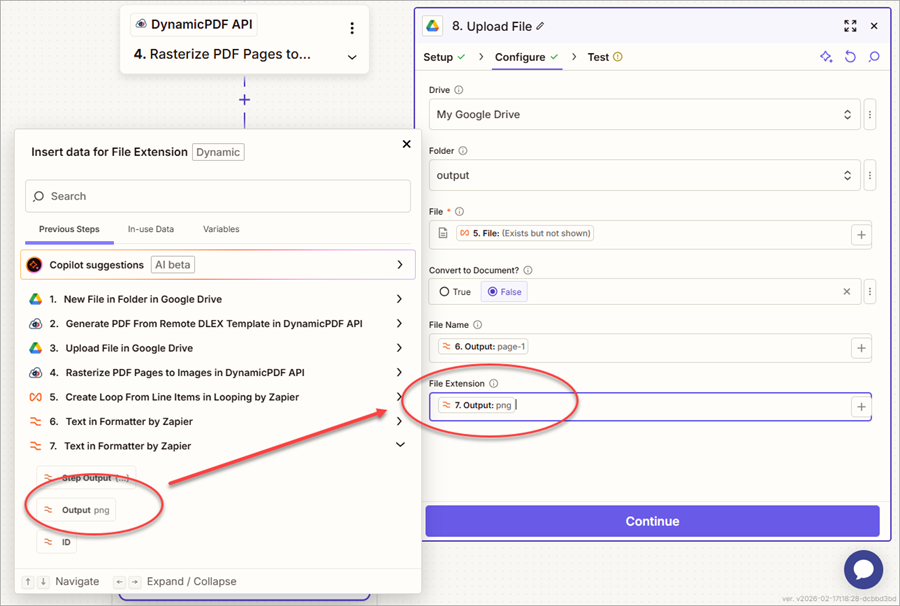
- Map the Output from the second 7. Text in Formatter by Zapier step to the File Extension field.
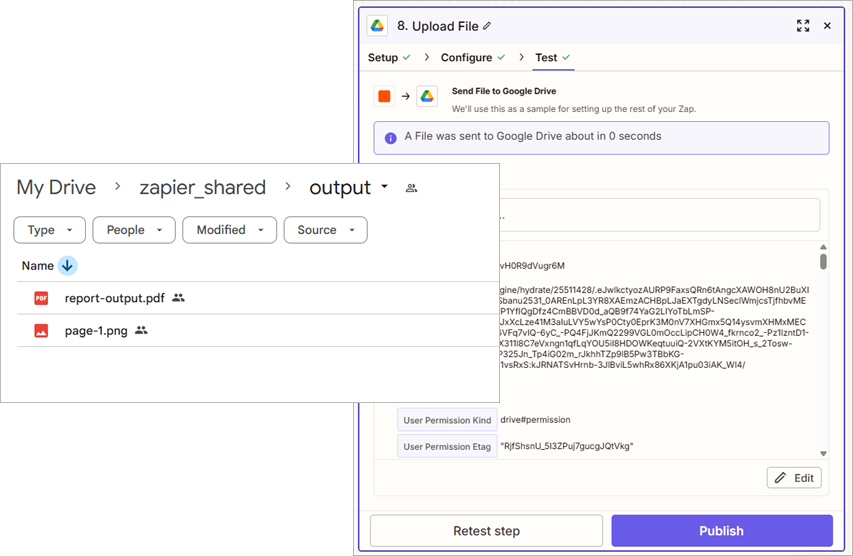
- Test the step and the file, correctly named, is uploaded to Google Drive.
Step 10 - Test the Zap
Now let's test the Zap. To properly test rasterizing a PDF with multiple pages, let's modify the Zap to use the consent-form.json layout data and the consent-form.dlex file.
- Replace the JSON in Google Drive with the new layout data.
- Return to the New File in Folder trigger and click Find new records to find the newly uploaded file.
- Select the newly found file.
- Return to the 2. Generate PDF From Remote DLEX Template and replace the DlexPath with the path to
consent-form.dlexin the DynamicPDF API File Storage.
- Select Test run and then select Test run on the left to run the Zap.
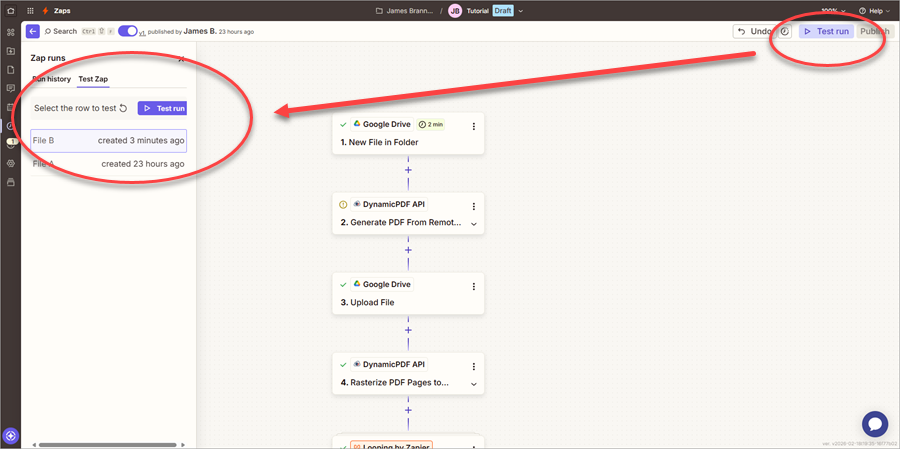
Wait for the Zap to complete.
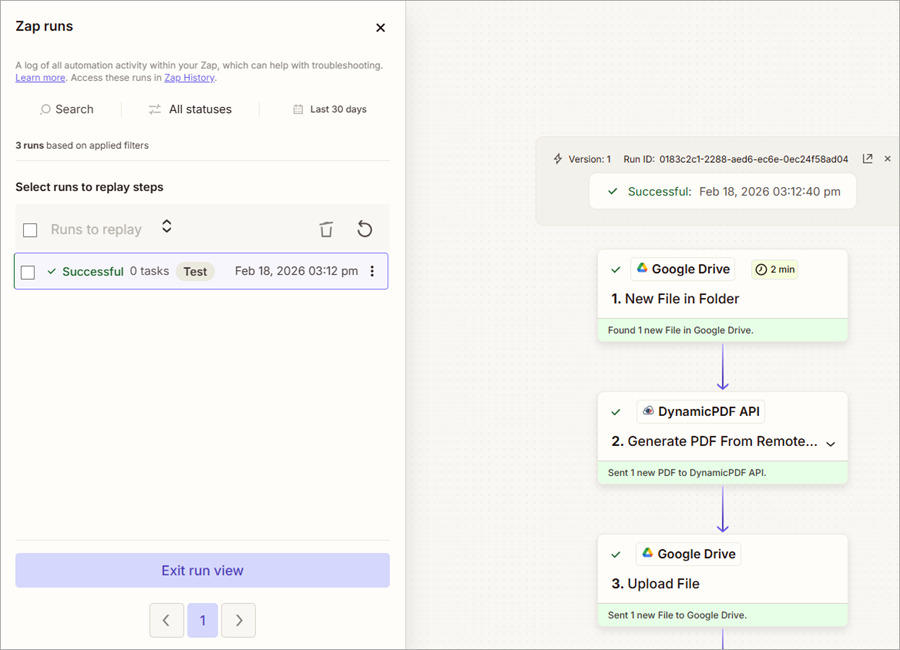
If successful, then both the report and it's rasterized pages are uploaded to Google Drive.

Production-Ready Enhancements
Note that the original trigger is configured to run every two minutes, checking for a new file in Google Drive and processing the file it finds. However, in the Generate PDF From Remote DLEX Template step, the DlexPath field is hardcoded.
This configuration only works when the uploaded JSON layout data corresponds specifically to the Invoice-SaaS.dlex template. Because each JSON layout data file must match its associated DLEX template, hardcoding the DlexPath prevents the Zap from correctly processing multiple templates.
To make the workflow flexible and production-ready, the DlexPath field must be populated dynamically based on the uploaded JSON file.
Although there are many ways to supply the file name and associated file path as variables, to keep things simple, we use a Utilities by Zapier action.
Step 11 - Add a Lookup Table
- Add a Formatter by Zapier step between 1. New File in Folder in Google Drive and the 2. Generate PDF From Remote DLEX Template steps.

- Assign the step's action as Zapier Utilities and set Lookup Table as the Transform.
- Map the Original Filename from the 1. New File in Folder in Google Drive trigger .
- Create two rows in the Lookup Table, one for
Invoice-SaaSand one forconsent-formwhere you assign the Original FileName as the Lookup Key where the key is the file name and the path is the value.
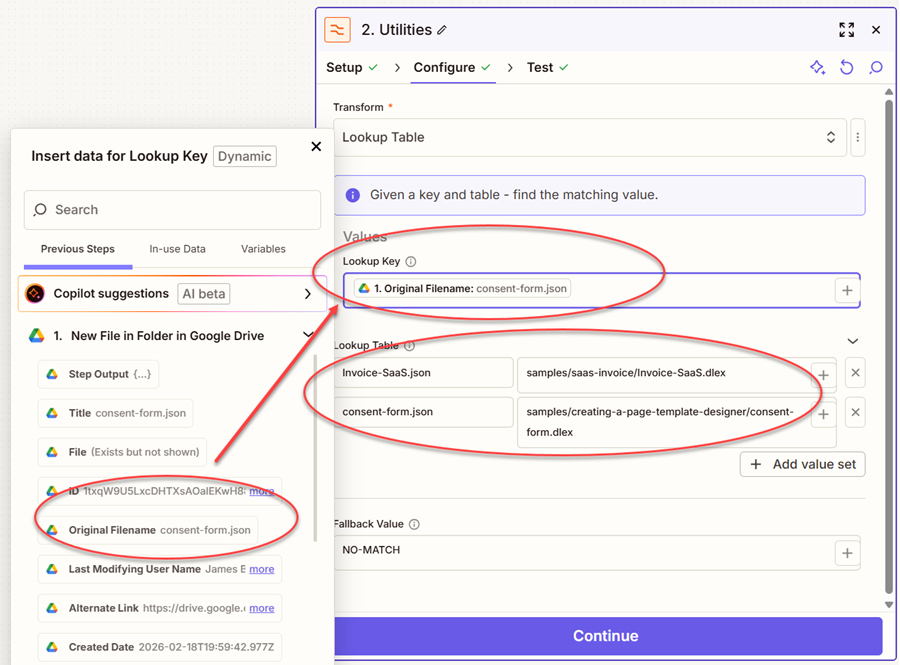
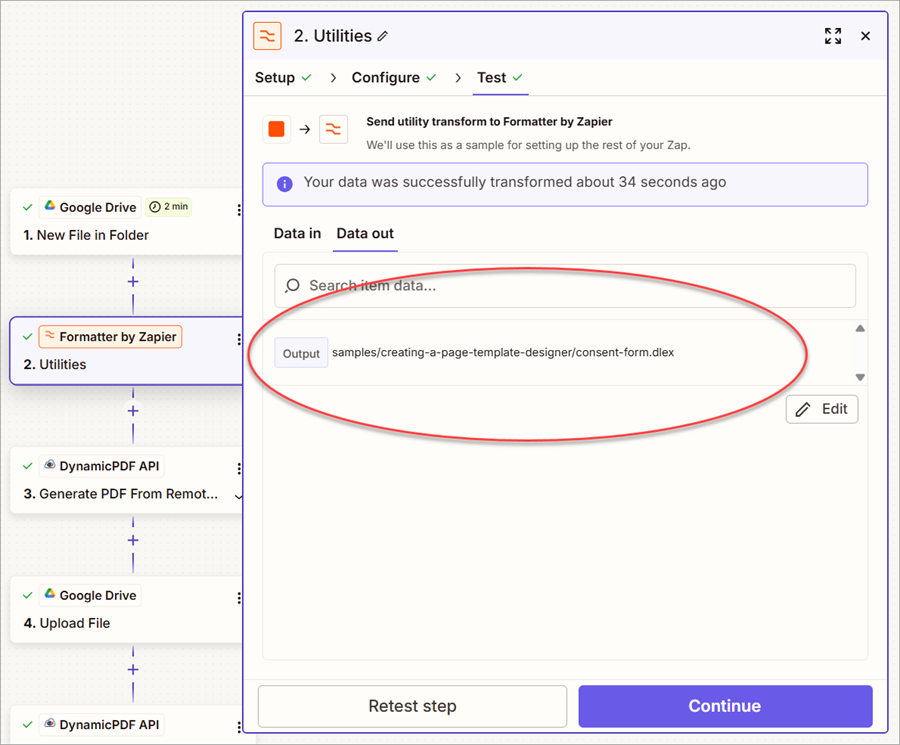
- Test the step and you should see the path return as Output.
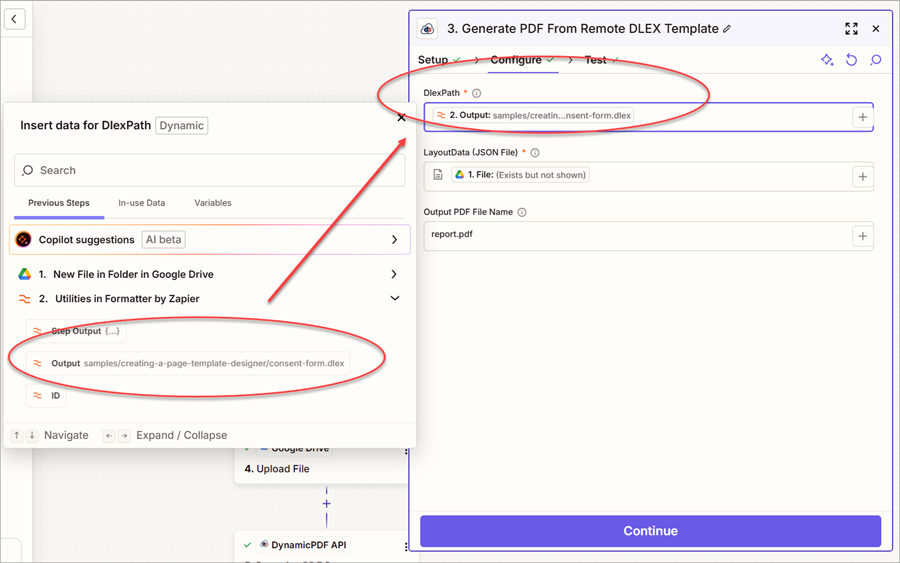
- Modify the 3. Generate PDF From Remote DLEX Template step so that the DlexPath is mapped to the Output from the 2. Utilities in Formatter by Zapier step.
Step 12 - Provide Dynamic File Names and Extensions
Note that the 3. Upload File In Google Drive step for the generated report also hardcodes the File Name and File Extension. This obviously will overwrite any produced report when used in an active Zap. Let's modify it to provide values dynamically.
- Add a Formatter by Zapier action and assign Split Text as the Transform.
- Map the Original FileName from the 1. New File in Folder in Google Drive trigger.
- Assign First as the Segment Index and a period as the Separator.
- Retest the step to ensure that the transform correctly returns the file name without its extension.
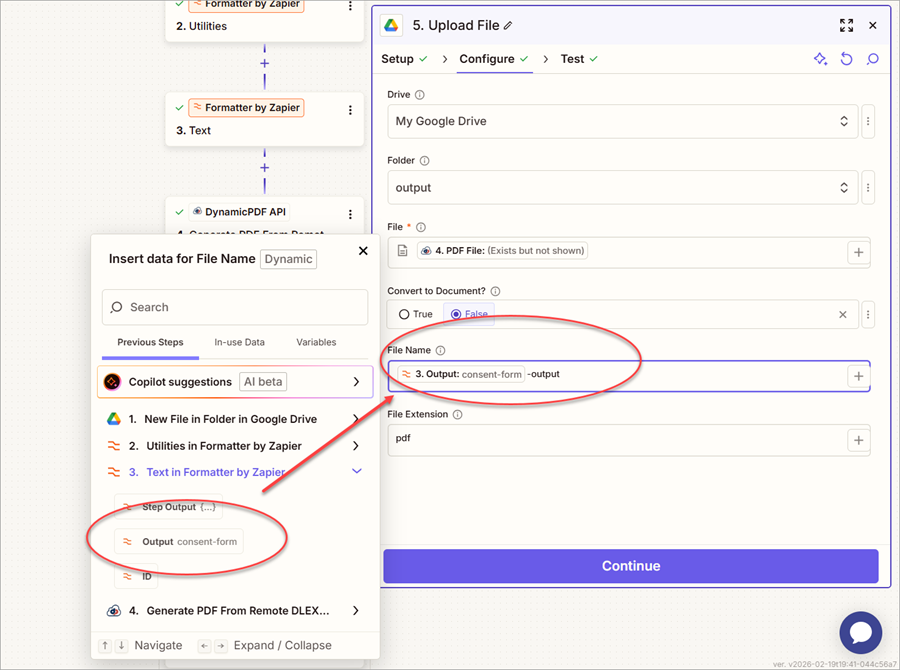
- Modify the 5. Upload File in Google Drive step so that the File Name is dynamically created from the Output returned from the 3. Text in Formatter by Zapier step and the word
-outputappended to the name.
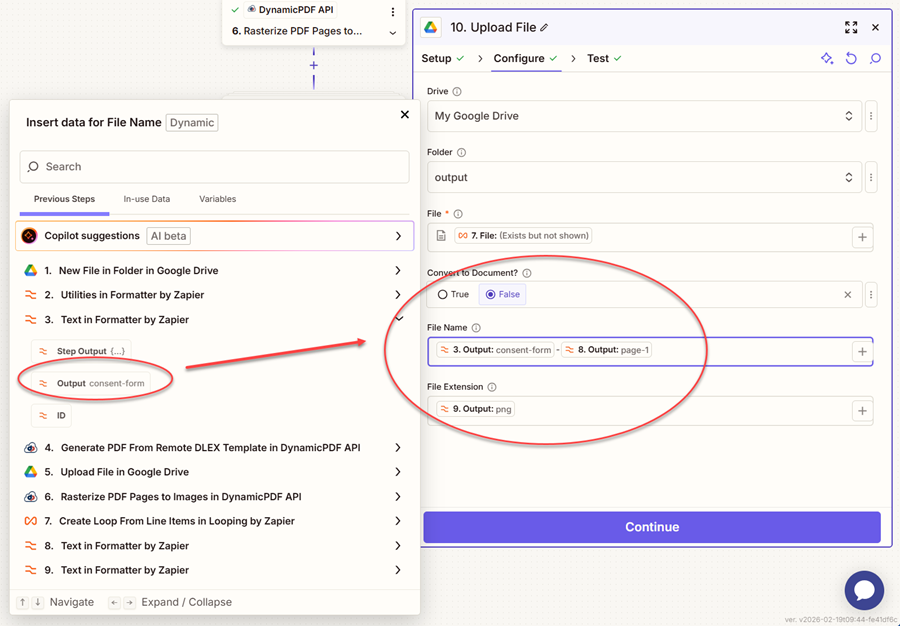
- Skip down to the 10. Upload File in Google Drive step after the rasterizing the PDF.
- Change the File Name to be the Output from the 3. Text in Formatter by Zapier step and the Output from the 8. Text in Formatter By Zapier step.
Step 13 - Run the Zap
Up to now, you have either tested each step as you built the Zap or you tested the Zap using Test run. However, when testing in this way, Zapier optimizes processing by using only the manually obtained file from previous steps. Moreover, it only executes the first iteration of a loop. To fully test your Zap, you must publish the Zap.
When you created the trigger, you left it in its default configuration to run every two minutes and check for a new file. If it finds a file, then it kicks off the Zap's processing steps. Let's publish the Zap and then have it process both layoutdata files used earlier in this tutorial.
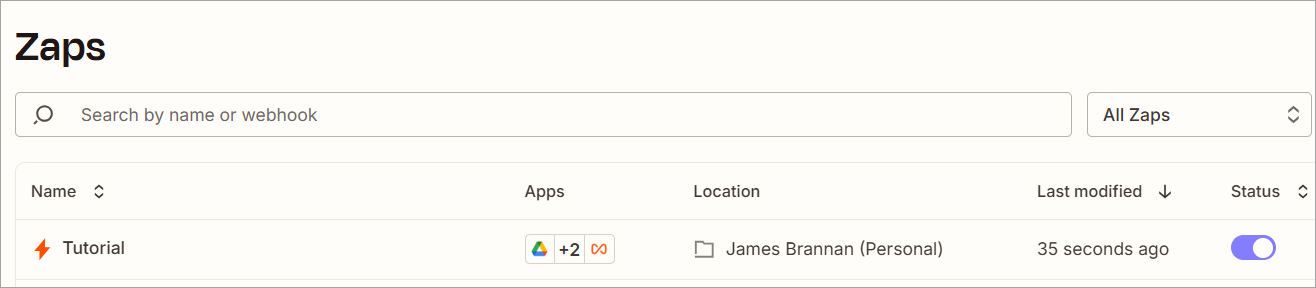
- Publish the Zap so that it will run every two minutes.
- Ensure any files in Google Drive are deleted and then add the two JSON layoutdata files.
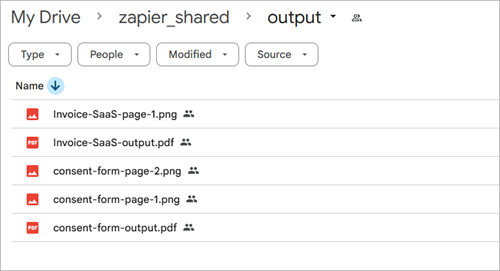
- Wait for the Zap to run and you should see the two reports and its associated rasterized pages, correctly named, outputted to Google Drive.
Conclusion
In this tutorial, you created a complete end-to-end document automation workflow using the DynamicPDF API Zapier App. You started with a JSON layout data file stored in Google Drive, generated a dynamic PDF from a remote DLEX template, saved the resulting report, rasterized its pages into PNG images, and uploaded each image with properly constructed file names.
You then enhanced the workflow by dynamically determining the correct DLEX template path using a Lookup Table and dynamically constructing file names and extensions for both the generated report and rasterized images, eliminating hardcoded values and making the Zap production-ready.
This workflow demonstrates how DynamicPDF API can serve as a powerful document engine inside Zapier, enabling automated report generation, PDF transformation, and multi-file processing without writing custom code.
You can now extend this pattern to:
- Generate invoices, reports, contracts, or forms from structured data.
- Convert multi-page PDFs into image sets for previews or archival.
- Trigger document workflows from CRMs, forms, databases, or cloud storage
- Build scalable, production-ready document automation pipelines.
By combining DynamicPDF API’s REST endpoints with Zapier’s orchestration tools, you unlock a flexible, no-code solution for document generation and transformation that integrates seamlessly into modern automation workflows