Using n8n Workflows with the DynamicPDF API
In this tutorial, you use the HTTP Request node to integrate your n8n workflow with the DynamicPDF API's pdf endpoint. You run your n8n workflow first locally in your own environment and then remotely in the n8n SAS cloud.
You learn how to create three different n8n workflows. In the first example, you create an n8n workflow locally and merge two PDF documents, an image, a Word document, and an HTML page into a single PDF using the DynamicPDF API's pdf endpoint. After completing the first workflow, you then merge two PDF documents using the pdf endpoint, but instead of running locally, you run the workflow in the n8n Cloud online. Finally, you run a workflow in the n8n cloud using resource available from your DynamicPDF API account's Cloud Storage.
See the tutorial Merging PDFs if you are not already familiar with the pdf endpoint.
Although the DynamicPDF API has everything you need to incorporate it's REST endpoints into your applications by calling the endpoints directory or using one of our client APIs, you might wish to integrate PDF manipulation and generation into workflows visually using a tool like n8n. n8n is an open-source workflow automation platform that lets developers visually connect APIs, services, and data flows without heavy coding. It supports nodes for HTTP requests, file operations, data transformations, and more. One particularly useful node is the HTTP Request node. The HTTP Request node connects workflows to external web services and APIs. It allows sending HTTP requests using methods such as GET, POST, PUT, PATCH, or DELETE, and configuring headers, query parameters, request body, and authentication. This node can handle different content types, including JSON, form-data, and binary file uploads. We use this node to connect your n8n workflow to DynamicPDF API.
You can run n8n in several ways, depending on your setup and control needs. n8n Cloud is the hosted SaaS version, managed by the n8n team, offering automatic scaling, updates, and secure isolation for each user. You can also run n8n locally using either Docker, npm, or as a desktop app. Running locally lets you run n8n on your own infrastructure, providing full access to local files, credentials, and system integrations.
Within both local and self-hosted environments, you can run workflows in sandboxed mode (where each node executes in an isolated environment for safety) or you can run workflows without a sandbox. Running outside a sandbox allows more flexibility and access to your system resources. However, even outside the sandbox, n8n executes code in a Node.js virtual machine (VM), ensuring controlled execution while still allowing direct interaction with the local runtime.
You can also run n8n in the cloud and use its platform without managing your own infrastructure. The cloud version runs fully hosted on n8n’s servers and provides features such as secure credential storage, automatic updates, and team collaboration tools. However, it operates in a sandboxed environment and prevents access to your local file system and external command execution. Custom modules, direct filesystem operations, and unrestricted network connections are also disabled. However, as you see in the second half of this tutorial, you can still integrate your n8n workflows with the DynamicPDF API.
Install and Run n8n Locally
Let's first run n8n locally to build and test automation workflows on your own system.
1. Prerequisites
Ensure your environment meets the following requirements:
- Node.js version 18 or higher (LTS recommended)
- npm (included with Node.js) or yarn
- Git (optional, for cloning the source repository)
Check your versions using the following two commands.
node -v
npm -v
Download Node.js from https://nodejs.org if needed.
Step 2: Install n8n Using npm
Install n8n globally using npm.
npm install n8n -g
Start n8n without a sandbox using the following command.
n8n --no-sandbox
By default, n8n runs on http://localhost:5678, providing access to the workflow editor and REST API.
You can also install and run using Docker or manually, refer to n8n online documentation for more information.
Step 2: Verify Installation
Once installed, verify n8n is running by opening your browser and navigating to the following URL.
http://localhost:5678
Obtaining the Files
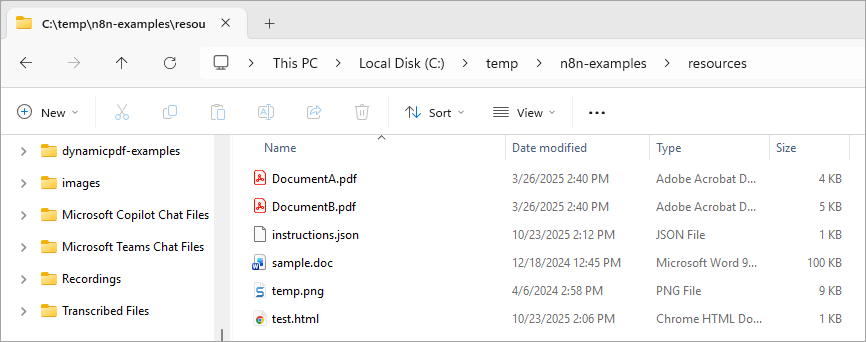
Download the example files from n8n-examples.zip and unzip the files, being certain to create a path of c:/temp/n8n-examples.
Now that you have n8n running locally and the needed files downloaded, lets build the first workflow incorporating the pdf endpoint and local files.
Running n8n Locally
In the first example you prepare a workflow that performs a local file-based merge using the DynamicPDF API’s pdf endpoint. Each step prepares input files, transforms them into the correct binary format, and submits them to the API in a multipart form request. The workflow ends by writing the merged PDF to disk.
In this first example, you use the pdf endpoint's endpoint that sends multipart/form-data as the form's body, where the instructions.json and each resource are sent as a file's binary (pdf multipart form).
Refer to Merge PDFs and Other Resources to see how to use the pdf endpoint by calling it directly or using one of DynamicPDF API's client libraries.
Start the Workflow
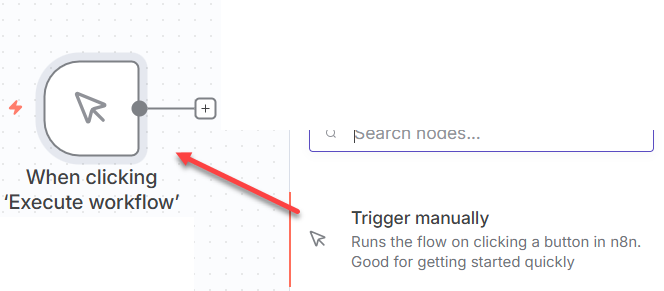
Create a new workflow entitled DynamicPDF pdf-endpoint local and then add a new Trigger manually trigger to start the workflow.
Load the Instruction File
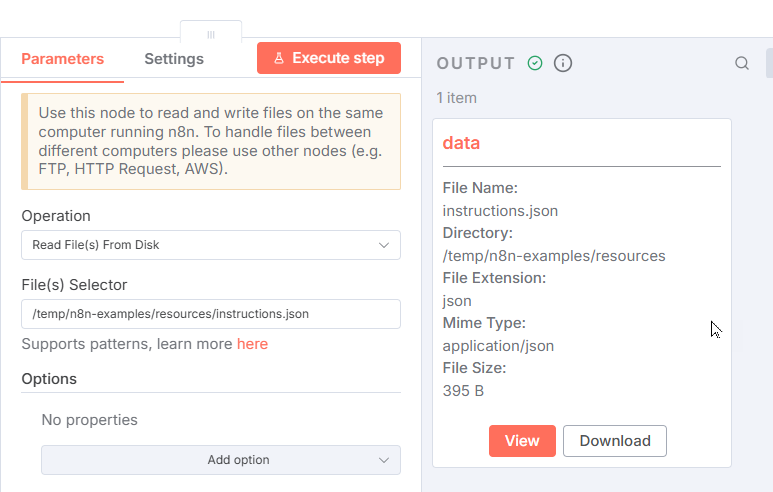
Click the + next to the trigger and add a Read/Write Files from Disk node. you use this node to retrieve the instructions.json file. The instructions file defines how the merge is handled by the DynamicPDF API's pdf endpoint.
This node uploads a file and stores the data in binary format within the workflow’s context so later nodes can reference it directly.
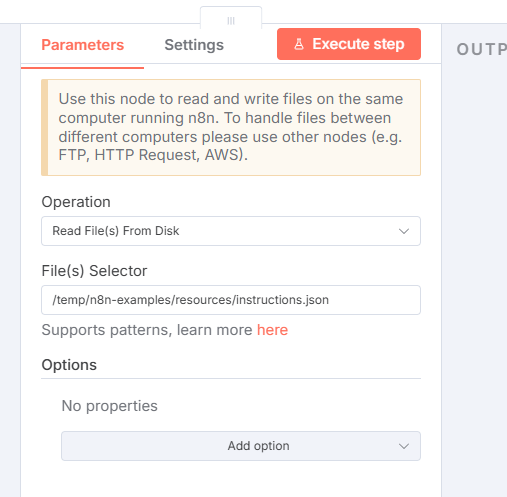
After creating the node, click Execute step to perform the node's task. You should see the file uploaded to n8n memory.
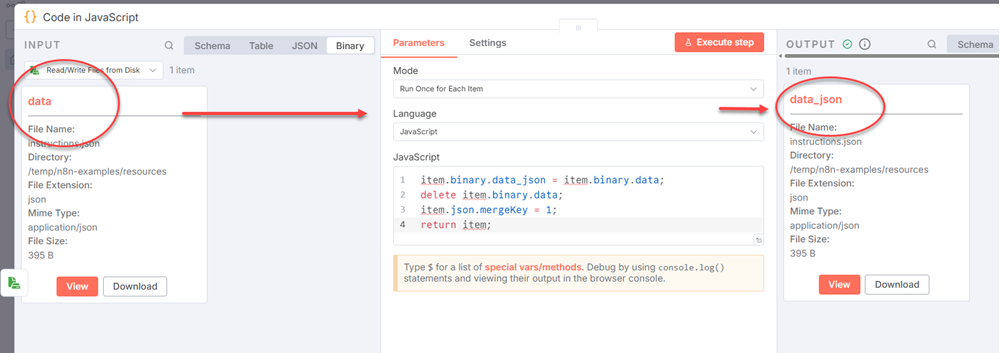
Now, for some reason, the node does not provide a way to rename data. But you are uploading four more files; each time, they will be named data and override the previous file. To prevent each file upload from overwriting the last, you must rename the file output from data to a different name by creating a Code node to rename the file's data output.
Add a Code node and rename the binary property from data to data_json and attach a merge key for joining with other file items. Also remove the data to ensure clean and predictable data flow between nodes.
Select Run Once for Each Item from the Mode dropdown and JavaScript as the Language. Then add the following JavaScript to the node.
item.binary.data_json = item.binary.data;
delete item.binary.data;
item.json.mergeKey = 1;
return item;
Click Execute step and you should see data replaced by data_json.
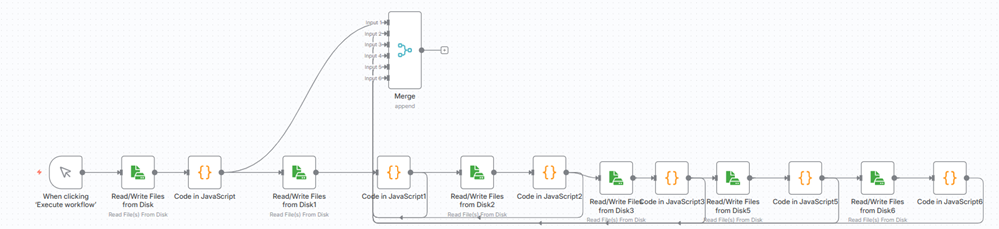
The workflow now contains a manual trigger and two nodes. The first node reads the JSON file from disk and the second renames its resulting data.

Load Resources
Repeat the process in the previous steps for the following files.
DocumentA.pdfDocumentB.pdfsample.doctemp.pngtest.html
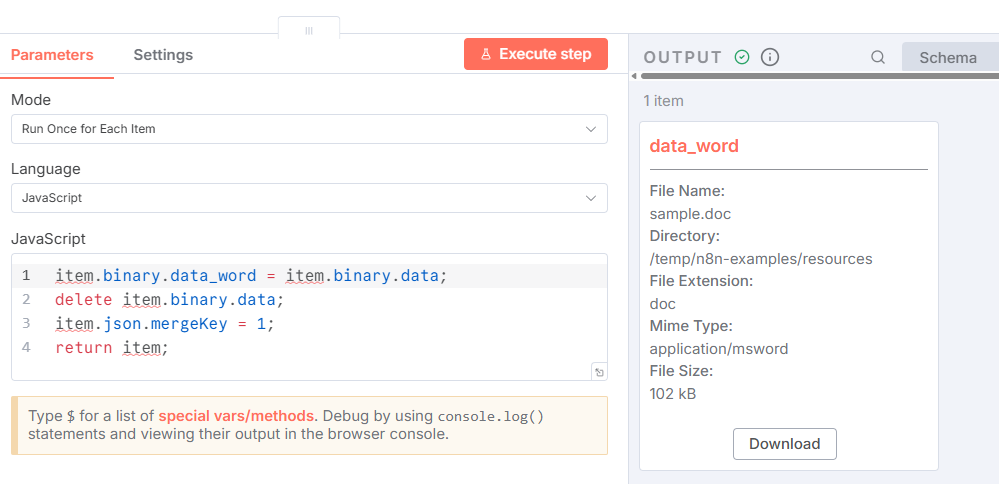
When adding the file, rename the binary data from data to:
data_pdf1data_pdf2data_worddata_img, anddata_html.
For example, when adding the Word document, you should rename data to data_word.
After adding all five resources, you should now have a workflow containing thirteen nodes.

Merge Resources
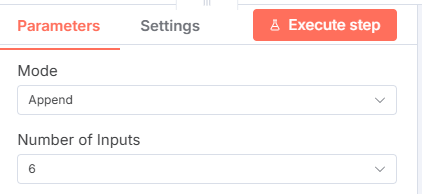
You must now merge the resources using a Merge node. A Merge node combines data from two or more different input streams within a workflow. This node consolidates our multiple data streams into a single unified output for further processing.
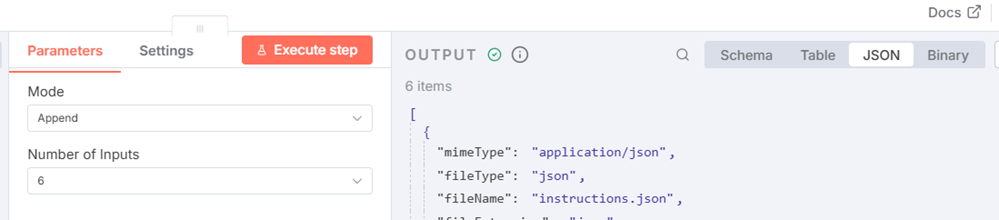
Add a Merge node, assign Append as its Mode and change Number of Inputs to 6 (one input for each resource including the instructions.json).
From each Code node, attach the node to an input on the Merge node.
After wiring the Merge node, execute the node, and you should see the following JSON in OUTPUT.
[
  {
    "mimeType": "application/json",
    "fileType": "json",
    "fileName": "instructions.json",
    "fileExtension": "json",
    "fileSize": "395 B",
    "mergeKey": 1
  },
  {
    "mimeType": "application/pdf",
    "fileType": "pdf",
    "fileName": "DocumentA.pdf",
    "fileExtension": "pdf",
    "fileSize": "3.85 kB",
    "mergeKey": 1
  },
  {
    "mimeType": "application/pdf",
    "fileType": "pdf",
    "fileName": "DocumentB.pdf",
    "fileExtension": "pdf",
    "fileSize": "4.48 kB",
    "mergeKey": 1
  },
  {
    "mimeType": "application/msword",
    "fileName": "sample.doc",
    "fileExtension": "doc",
    "fileSize": "102 kB",
    "mergeKey": 1
  },
  {
    "mimeType": "image/png",
    "fileType": "image",
    "fileName": "temp.png",
    "fileExtension": "png",
    "fileSize": "8.94 kB",
    "mergeKey": 1
  },
  {
    "mimeType": "text/html",
    "fileType": "html",
    "fileName": "test.html",
    "fileExtension": "html",
    "fileSize": "169 B",
    "mergeKey": 1
  }
]
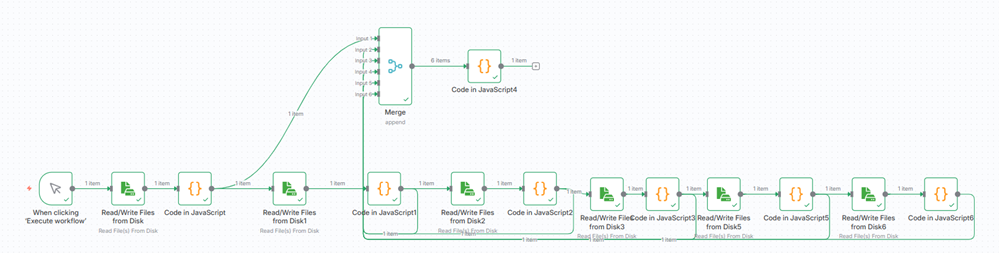
After creating the Merge node, add another Code node and add the following JavaScript. Select Run Once for All Items for its Mode and JavaScript for its language.
// Collect all incoming items
const all = $input.all();

// Create an output item with all binaries combined
const out = {
  json: { message: "Combined for multipart POST" },
  binary: {}
};

// Copy each binary from its item to a named property
for (const i of all) {
  if (i.binary?.data_json) out.binary.data_json = i.binary.data_json;
  if (i.binary?.data_pdf1) out.binary.data_pdf1 = i.binary.data_pdf1;
  if (i.binary?.data_pdf2) out.binary.data_pdf2 = i.binary.data_pdf2;
  if (i.binary?.data_word) out.binary.data_word = i.binary.data_word;
if (i.binary?.data_img) out.binary.data_img = i.binary.data_img;
if (i.binary?.data_html) out.binary.data_html = i.binary.data_html;
}
return [out];
The Code node's JavaScript consolidates the binaries into a unified object, ensuring each file type has a distinct name and prepares the structure required by the multipart POST request.
Submit the Request
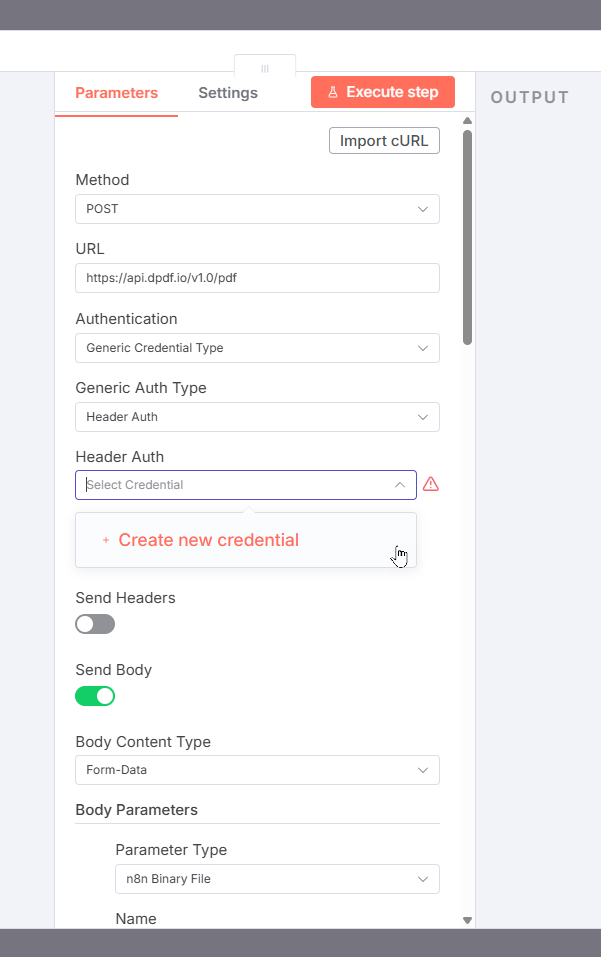
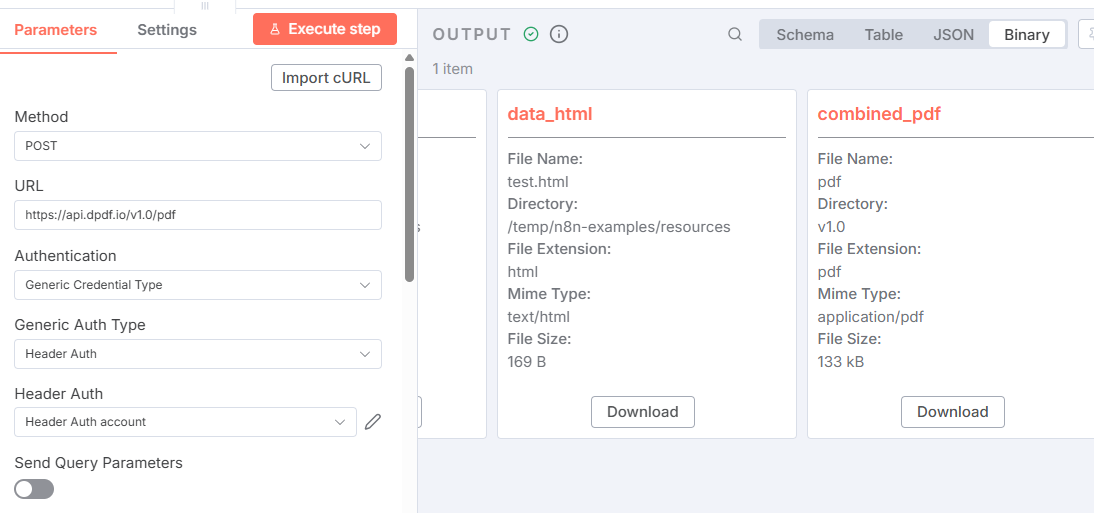
You are now ready to call the DynamicPDF API's pdf endpoint. Create a new HTTP Request node. Assign POST as the Method and assign the endpoint's URL (https://api.dpdf.io/v1.0/pdf) to URL.
You now need to add your desired API key from DynamicPDF API.
Assign API Key
Select Header Auth from Generic Auth Type. Then in Header Auth select Create new credential from the dropdown. Assign Authorization as the Name and Bearer and your api-key as the value, for example: Bearer DP.---api-key---.
Use your own key and obviously this key has been deleted as of the time of this tutorial being published.
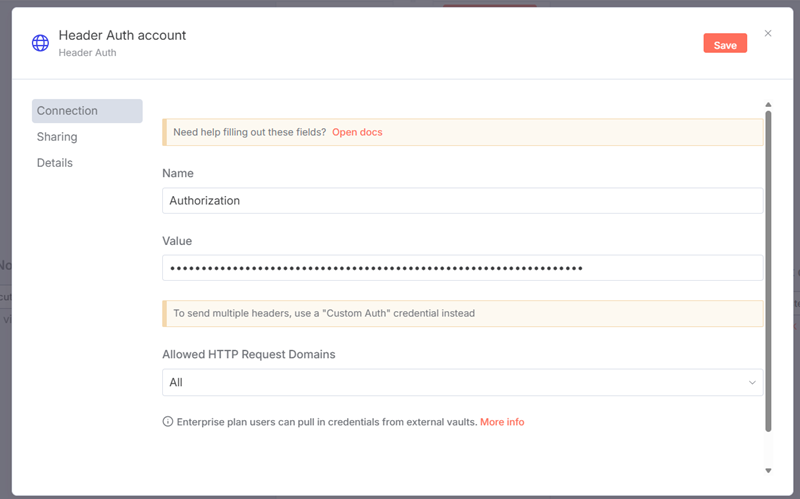
You only have to create this authorization once and - as you will see later in this tutorial - you can reuse the authorization.
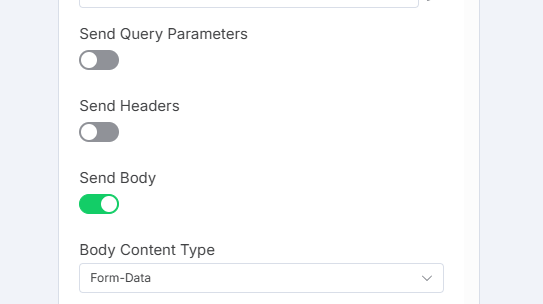
Request Body
After adding the authorization, you now need to create the request's body. Toggle Send Body and assign Form-Data as the Body Content Type.
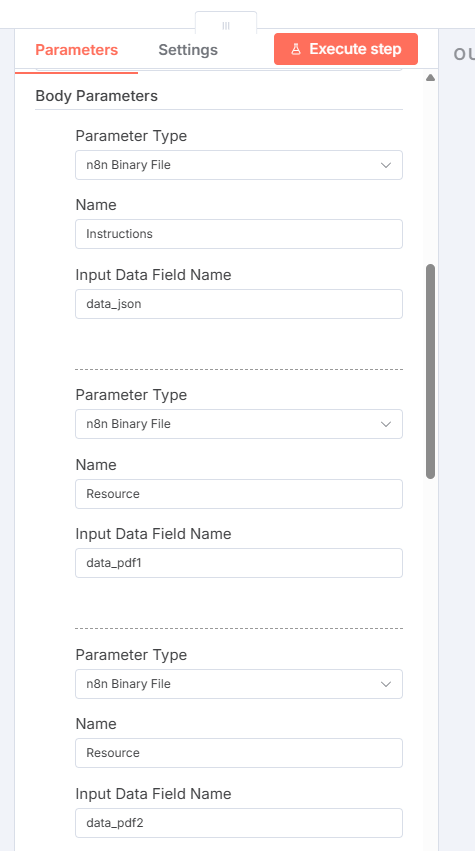
Then add each of the resources using the Add Parameter button. Assign the Parameter Type as n8n Binary File and the endpoint's name (LayoutData and Resource) and then the binary data's name for the Input Data Field Name. Reuse the name Resource for all three resources, as the form submission treats it as an array.
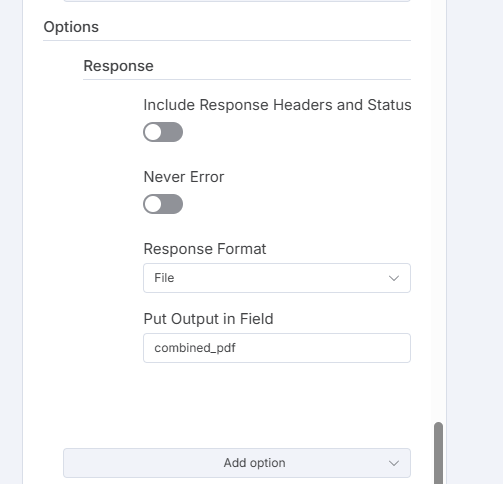
Response
After creating the request, click Add options and select Response. Select File as the response type and assign combined_pdf to the Put Output in Field.
The HTTP Request node is now initialized to send the multipart form data to the DynamicPDF API endpoint https://api.dpdf.io/v1.0/pdf using header-based authentication (Authorization: Bearer <api-key>). Each binary input is attached as a form field:
Instructionsreferencesdata_jsonResourcefields reference the prepared document and media binaries
The response is configured to return as a binary file labeled combined_pdf.
Execute the HTTP Request node and if everything was wired correctly, you should see the combined_pdf data returned from the node.
Now let's add a final Read/Write Files node to write the combined PDF to your filesystem. Add the path to write the completed PDF to an assign combined_pdf as the Input Binary Field.
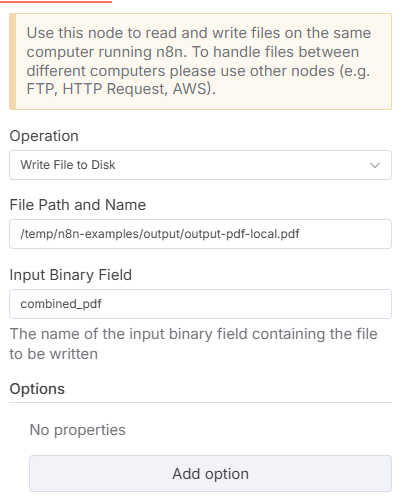
The complete workflow should appear as follows.
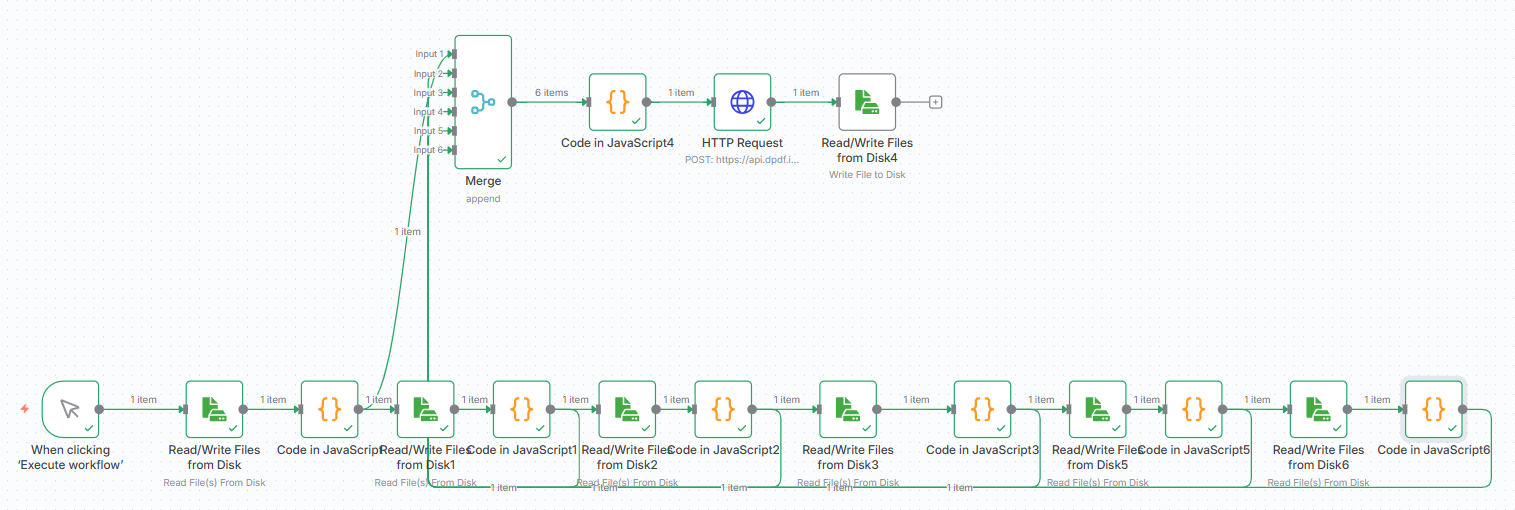
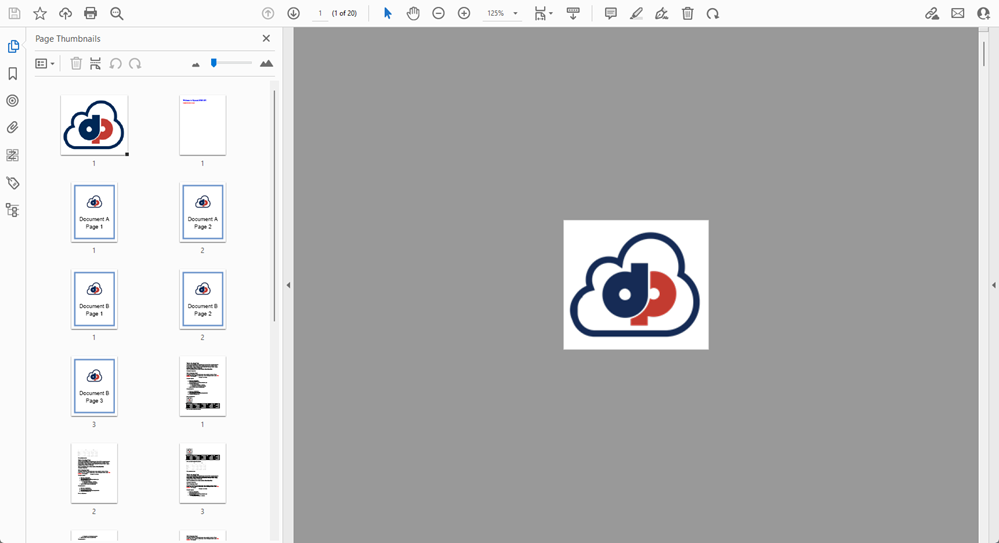
Click Execute workflow to execute the workflow and ensure it runs without error. Upon completion you should see the combined PDF document in your output folder with the name output-pdf-local.pdf. Open it and you see the merged PDF document.
Merging in n8n Cloud
While running n8n locally gives you complete control over your workflows, environment, and data, running n8n in the cloud (n8n Cloud) removes the need for infrastructure management. However, you have less control over the environment and cannot directly access local files or internal network resources. Some operations also run in a sandboxed context, limiting file system and network access compared to a local setup. But as you might wish to run your workflows in the cloud, let's consider an example using DynamicPDF API's pdf endpoint with a workflow in the n8n cloud.
In this second example we use the pdf endpoint's ability to send files as JSON data rather than a multipart form-data form submission (pdf JSON). The instructions.json, rather than a binary file upload, is instead the endpoint's form data (raw/json) and the resource's binary data encoded as base64 are embedded in the JSON request.
Load Resources
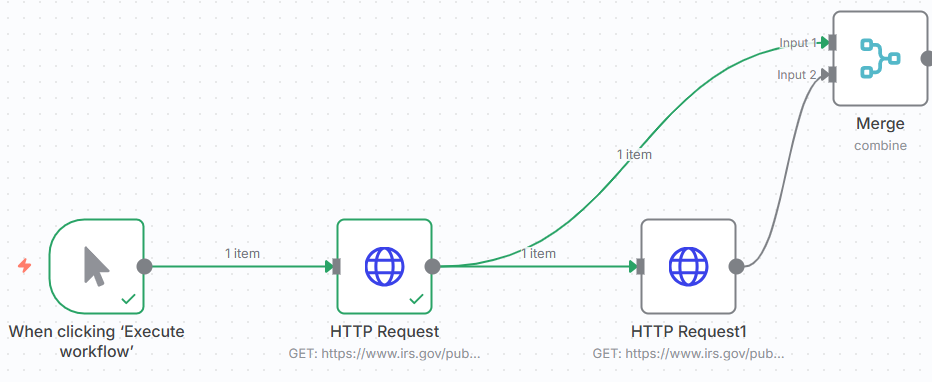
Start by creating a manual trigger by adding a new Execute workflow trigger and then attach an HTTP Request node.
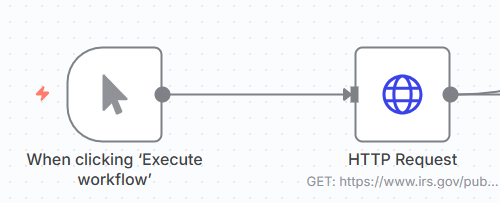
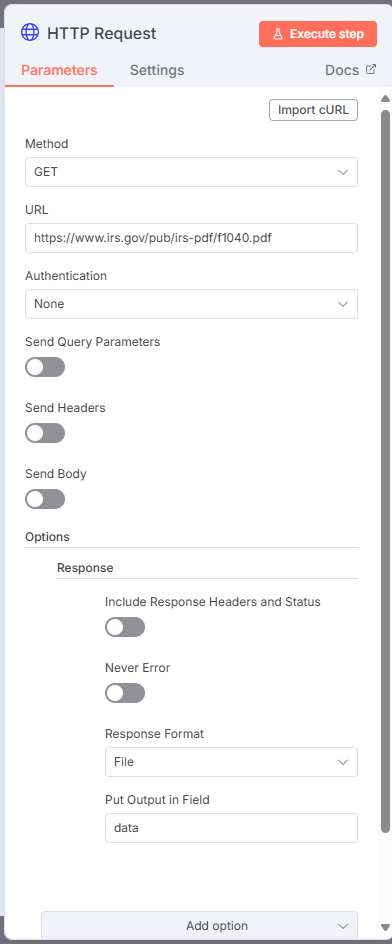
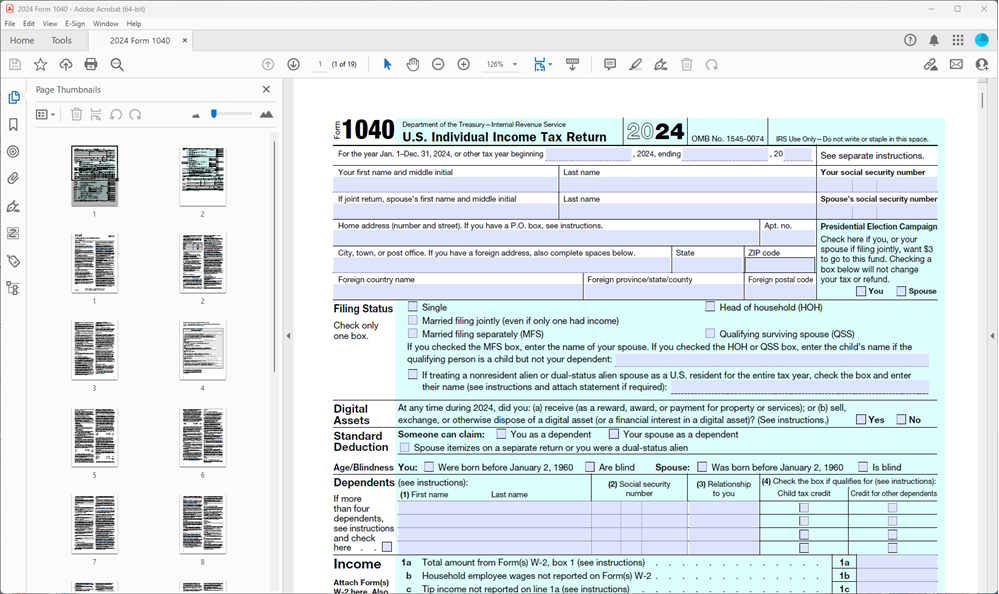
Ensure the Method is GET and add the following URL to the following PDF, https://www.irs.gov/pub/irs-pdf/f1040.pdf which fetches the IRS Form 1040 PDF directly from the IRS website. Assign the Response as a File and leave data as the Put Output in Field.
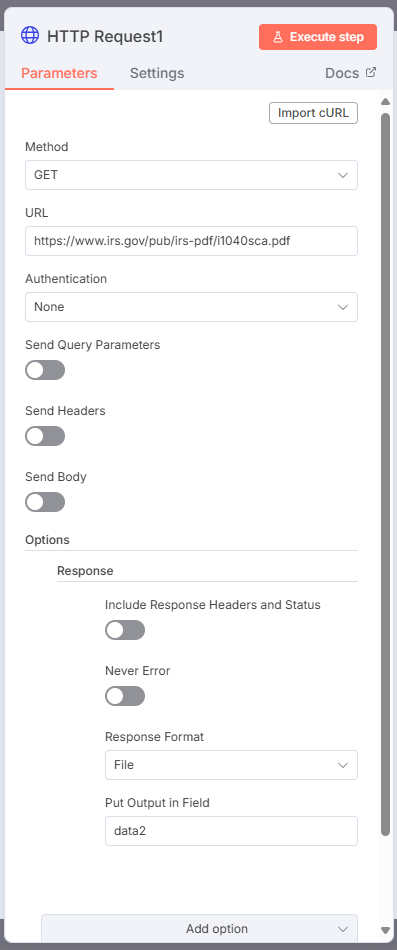
Create a second HTTP Request and assign it https://www.irs.gov/pub/irs-pdf/i1040sca.pdf as the URL. Set the Response as File and data2 as the name.
n8n also has nodes for obtaining files from your Google Drive, AWS S3 buckets, DropBox, and other file providers. Refer to n8n documentation for more information.
Merge Resources
After adding the two HTTP Request nodes, create a new Merge node. Assign Combine as the Mode, Position from the Combine By dropdown and assign 2 as the Number of Inputs.
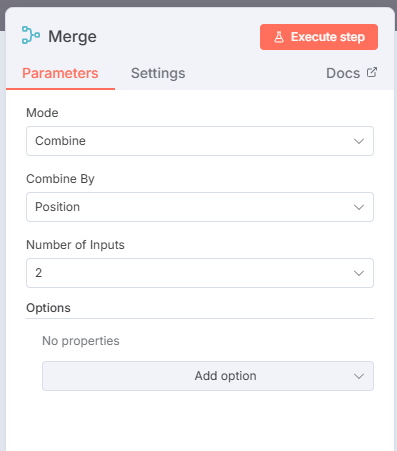
Attach both HTTP Request nodes to the Merge node's inputs.
Add a Code and assign the following JavaScript. This JavaScript iterates over the binary files, converts them to Bas64 encoded strings and stores the filenames and MIME types to reference them in the next step.
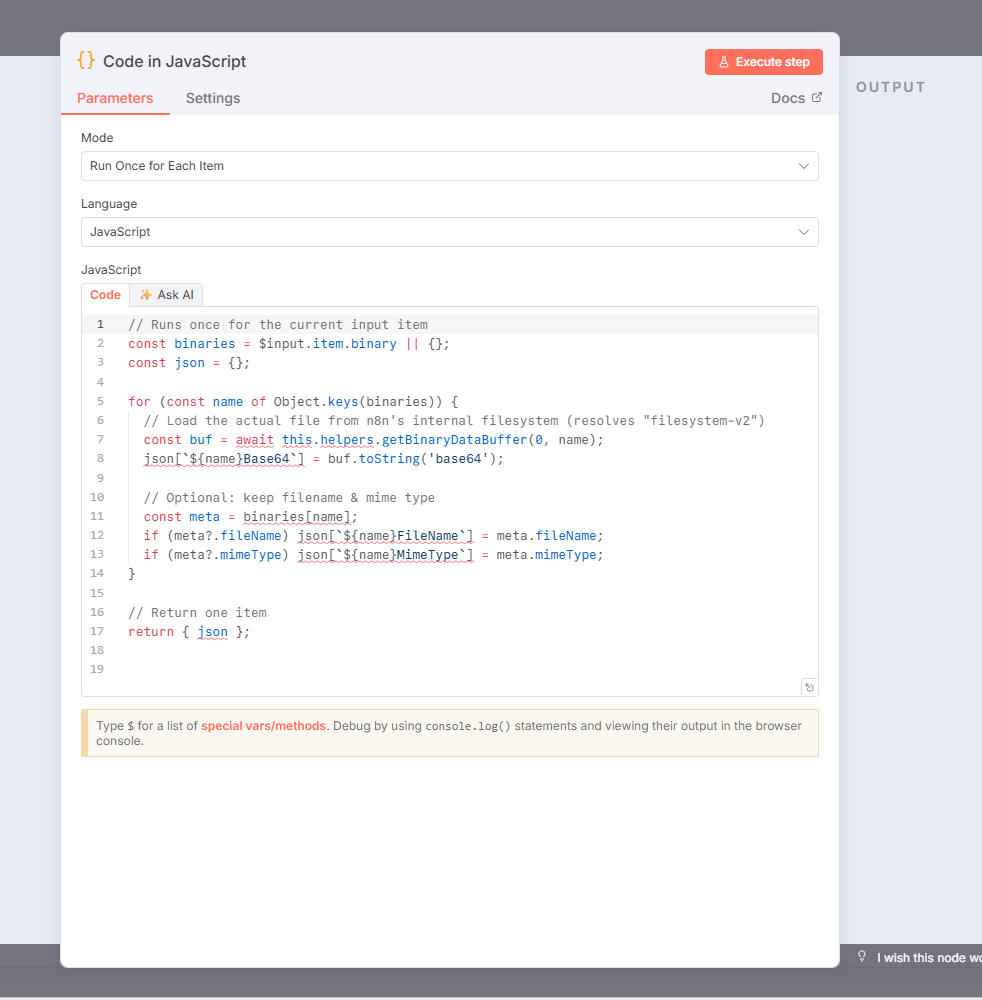
const binaries = $input.item.binary || {};
const json = {};

for (const name of Object.keys(binaries))
{
    const buf = await this.helpers.getBinaryDataBuffer(0, name);
	json[`${name}Base64`] = buf.toString('base64');
	const meta = binaries[name];

	if (meta?.fileName) json[`${name}FileName`] = meta.fileName;
	if (meta?.mimeType) json[`${name}MimeType`] = meta.mimeType;
}

return { json };
Submit the Request
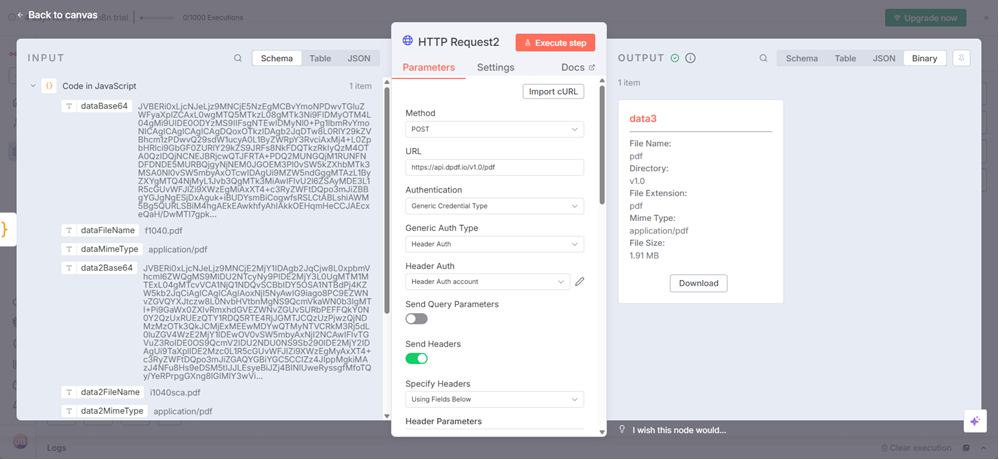
Create a new HTTP Request node and assign POST as the Method. Assign the pdf endpoint's URL and add header authorization. Toggle the Send Body toggle and select JSON as the Body Content Type. Specify Using JSON as the Specify Body and then add the Instructions JSON.
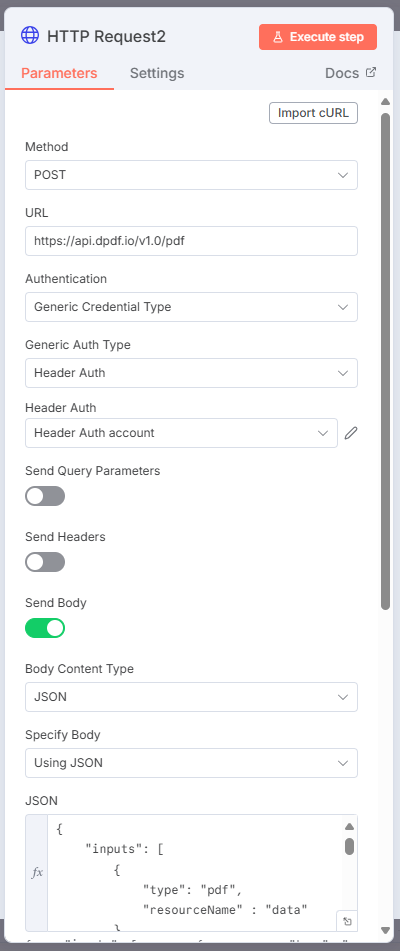
The following JSON merges two PDF documents where the resource base64 data comes from the workflow.
{
    "inputs": [
        {
            "type": "pdf",
      		"resourceName" : "data"
    	},
		        {
            "type": "pdf",
      		"resourceName" : "data2"
    	}
    ],
    "resources": [
        {
            "name" : "data",
			"data": "{{$json.dataBase64}}"
        },
		 {
            "name" : "data2",
			"data": "{{$json.data2Base64}}"
        }
    ]
}
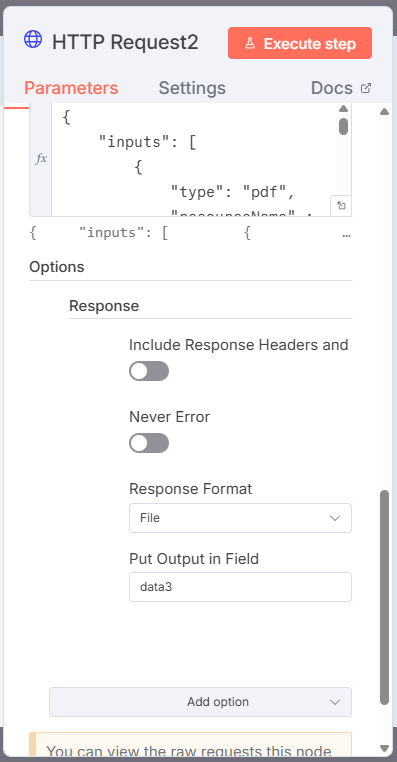
Assign File as the response's Response Format and assign the name data3 as the output.
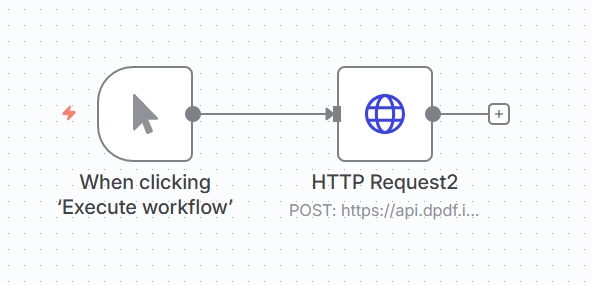
The workflow should have six nodes and has the following workflow.
- User clicks Execute Workflow.
- n8n downloads two PDFs from IRS.gov.
- The Merge node combines the downloads.
- The Code node converts both files to Base64.
- The DynamicPDF API merges the PDFs into one.
- The resulting merged PDF (
data3) can then be used, saved, or sent in later workflow steps.

Click Execute workflow and the workflow calls the pdf endpoint and writes the returned data to data3.
Now, because you are working within the n8n cloud, you cannot save the data to a file unless you use an online service like DropBox, AWS S3, or Google Drive. Therefore, select Download to download data3 and open the merged PDF.
Files From DynamicPDF API Cloud
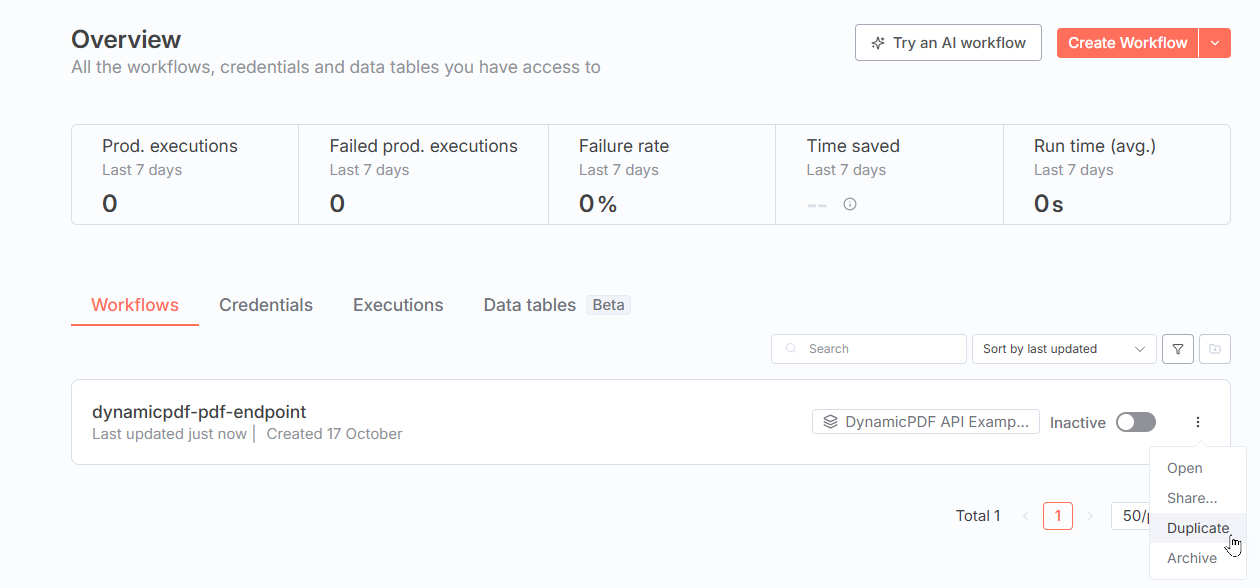
Of course, when using the n8n cloud you are not limited to files from one of n8n's providers nor from an HTTP request. Let's create one final workflow that obtains its resources directly from the DynamicPDF API Cloud Storage.
Duplicate the previous workflow.
Delete all nodes except the last HTTP Request node.
From your samples folder in the File Manager download instructions.json to your local filesystem.
Refer to the documentation's DynamicPDF API Tutorial Library for more information on adding sample files to your samples folder (https://dpdf.io/docs/tutorials/tutorials-overview);
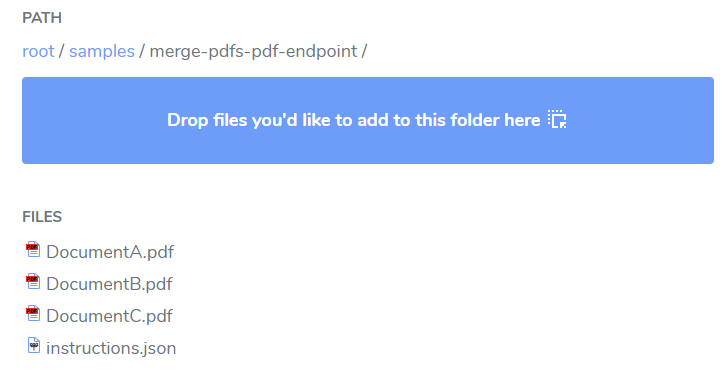
Open instructions.json and get the relative paths to all three files from DynamicPDF API File Manager by right-clicking each file and selecting Copy File Path.

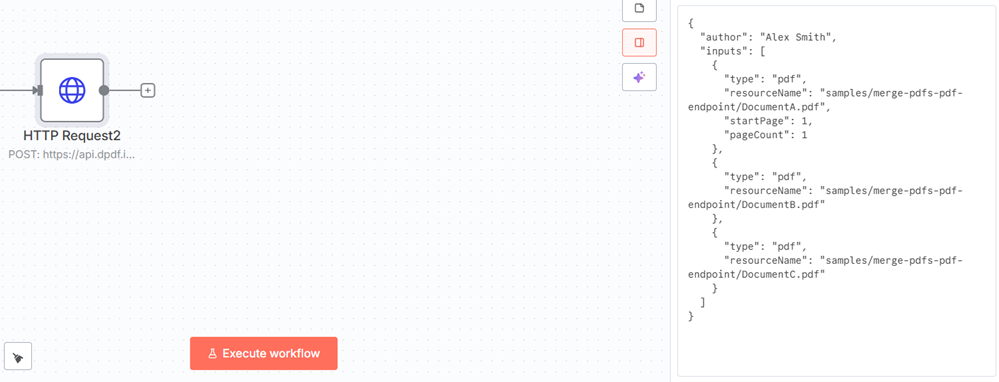
Modify the JSON to contain the three relative paths to the PDF resources.
{
  "author": "Alex Smith",
  "inputs": [
    {
      "type": "pdf",
      "resourceName": "samples/merge-pdfs-pdf-endpoint/DocumentA.pdf",
      "startPage": 1,
      "pageCount": 1
    },
    {
      "type": "pdf",
      "resourceName": "samples/merge-pdfs-pdf-endpoint/DocumentB.pdf"
    },
    {
      "type": "pdf",
      "resourceName": "samples/merge-pdfs-pdf-endpoint/DocumentC.pdf"
    }
  ]
}
Replace the Request body JSON you had previously added to the HTTP Request node with the modified JSON.
Click Execute step and the merged PDF is available for download. As before, download the file directly from the node's output.
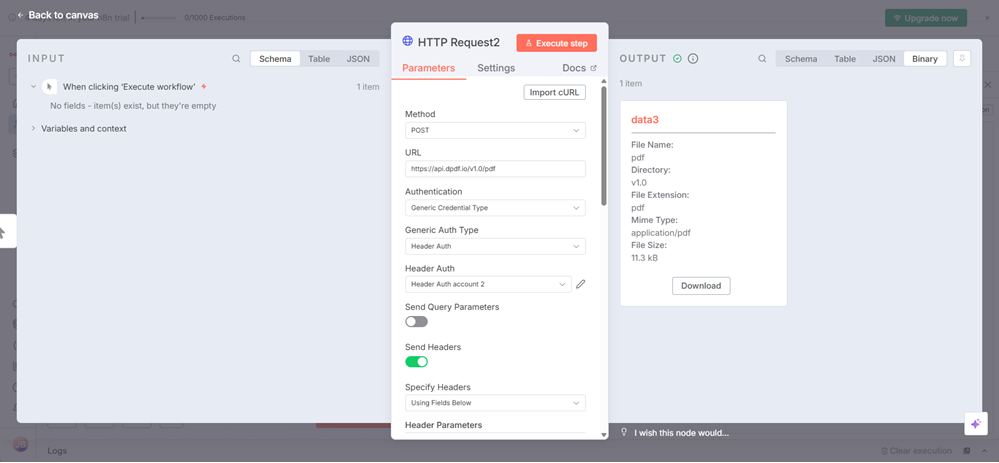
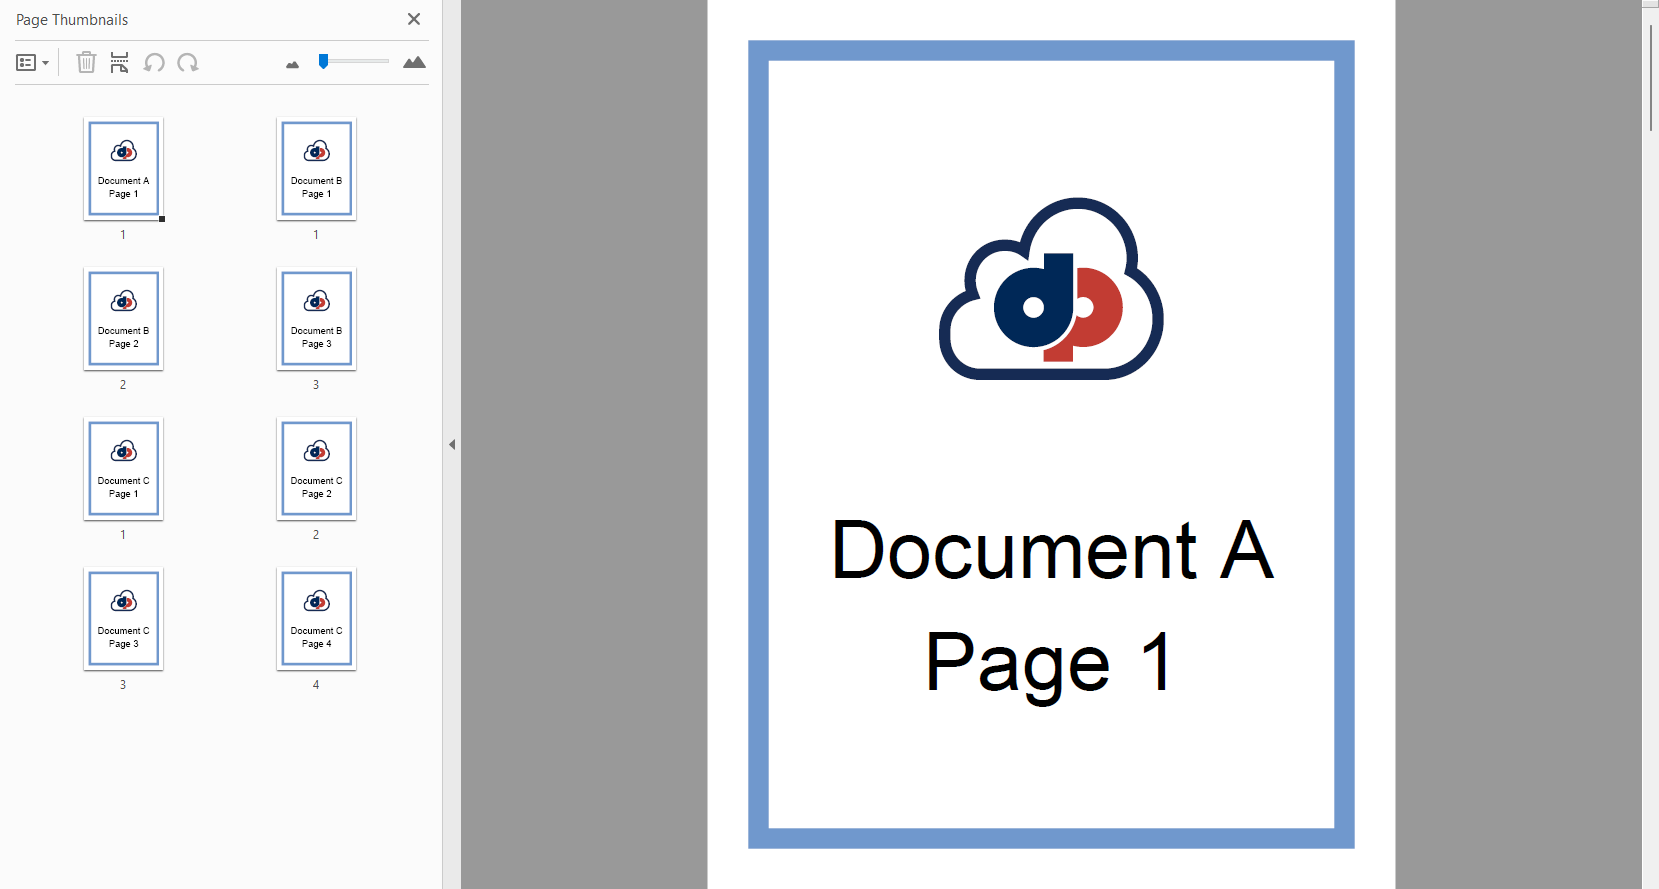
Open the downloaded file and you should see the merged PDF document.
Resources
- Documentation on
pdfendpoint using multipart form-post (pdf multipart form). - Documentation on
pdfendpoint using JSON (pdf JSON). - Documentation on n8n workflows (n8n Docs).
- Sample resources for first workflow ( n8n-examples.zip).
- Merging files on you local n8n instance workflow (dynamicpdf-pdf-endpoint-merge-files.json).
- Merging files on your n8n cloud instance workflow (dynamicpdf-pdf-endpoint-cloud.json).
- Merging files on your n8n cloud instance workflow where files in DynamicPDF Cloud storage (dynamic-pdf-endpoint.json) .