Create a Page Using a Template
In this tutorial, we examine adding a PDF template to a report to complete a form. Using a template is a powerful technique you can use to format a report using DynamicPDF Designer.
But before using a template to generate a report, let's first use a template to create a page containing a PDF form with a template and completed values. Certainly, you have downloaded a PDF form, filled-in the form fields with values, and saved the completed PDF. DynamicPDF Designer allows you to complete a form programatically.
Required Resources
Before beginning this tutorial, add the creating-a-page-using-template-designer samples folder to your cloud storage space in the File Manager.
- Login to the Portal and open the File Manager.
- Select the
samplesfolder and then click the Add Samples button. - Check the
creating-a-page-using-template-designerproject to add the folder containing the needed resources.
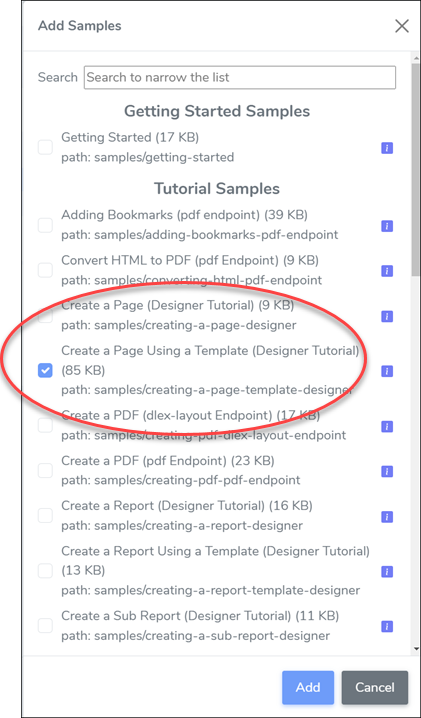
Figure 1. The Create a Page Using a Template sample folder.
- You should now see the following three resources.
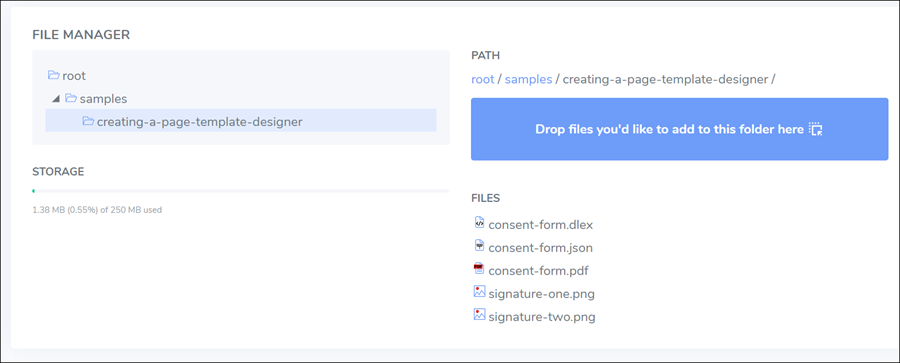
Figure 2. The resources used in this tutorial.
The steps in this tutorial assume you are creating the DLEX from scratch. If you wish following along, and not duplicating this tutorial's steps, then simply review the sample project's files. Otherwise, delete the DLEX file.
- Delete the
consent-form.dlexby right-clicking and selecting Delete. - Right click in the pane and select
New Dlex. Assign the name asconsent-form.dlex.
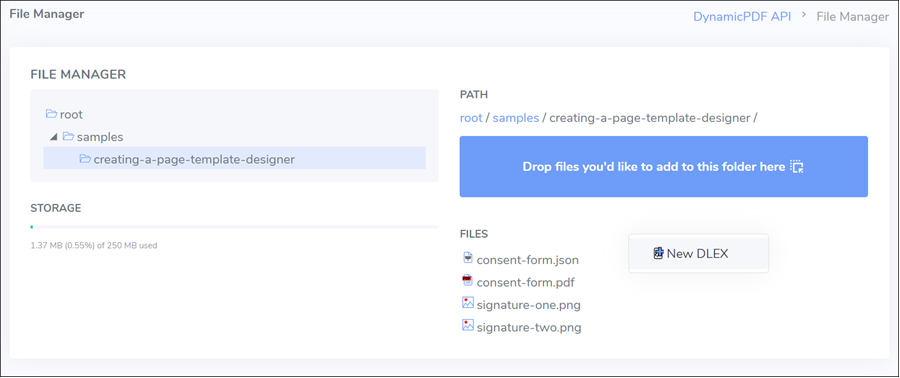
Figure 3. Creating a new DLEX file.
Create Page
Now that we have the resources let's create the page by using a template.
-
Open
consent-form.dlexin Designer. -
Select Add Page to add a new page.
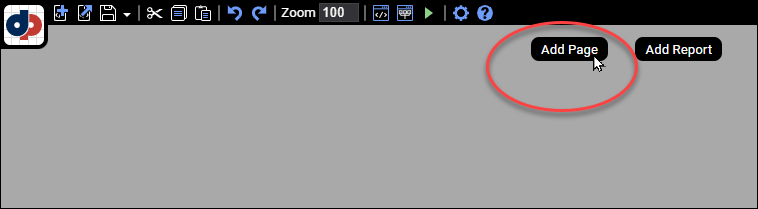
Figure 4. Click the Add Page button to add a new Page element to a DLEX.
Add JSON Data
- Open the Layout Data Editor and the layout data is preloaded, as the JSON dataset's name is the same as the DLEX file's name.
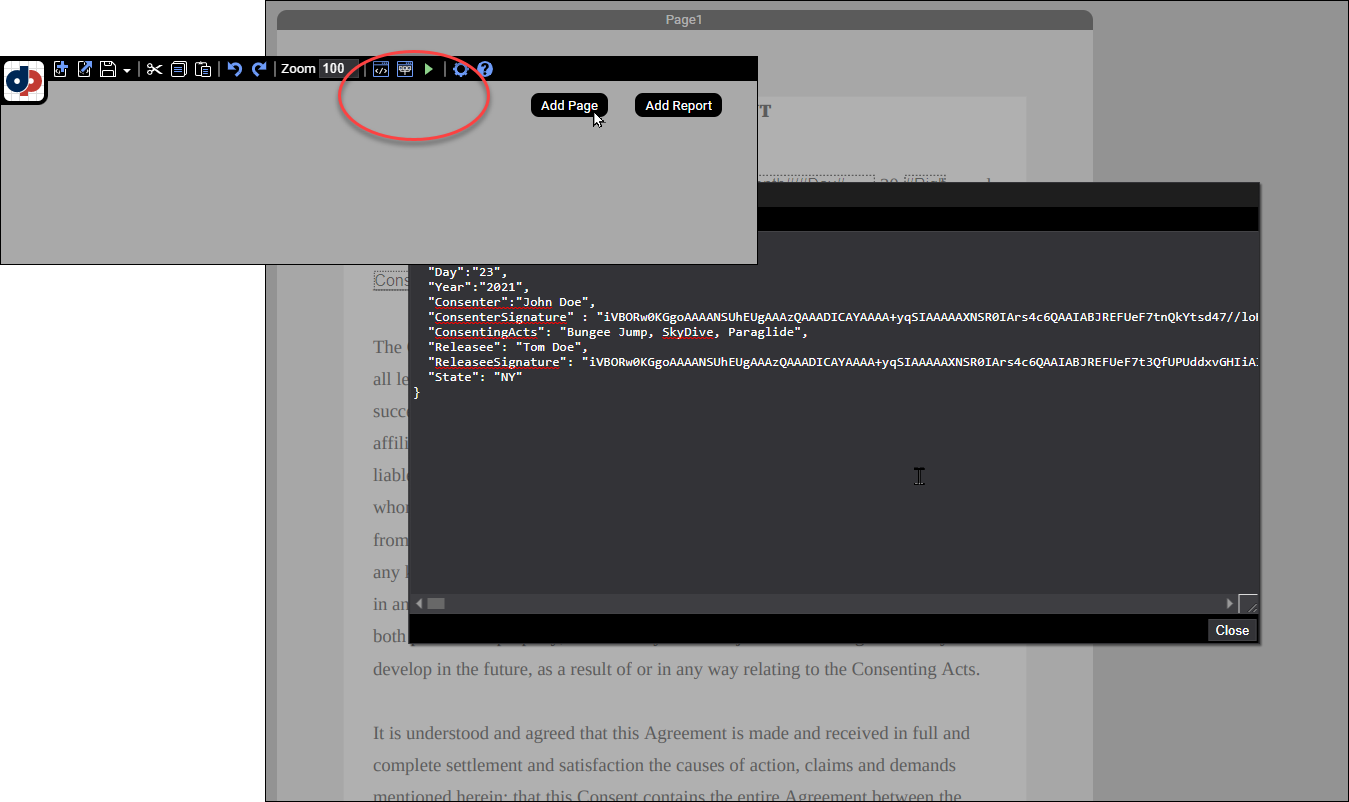
Figure 5. View a DLEX file's JSON data using the Layout Data Editor.
The JSON data should appear as follows (the base64 encoded data is truncated).
Base64 is an encoding scheme that represents binary data as an ASCII string format. You use the encoding scheme when transmitting binary data over media that doesn't support binary data.
{
  "Month": "1",
  "Day": "23",
  "Year": "2022"
  "Consenter": "John Doe",
  "ConsenterSignature":"<base64 encoded image>",
  "ConsentingActs": "Bungee Jump, SkyDive, Paraglide",
  "Releasee": "Tom Doe",
  "ReleaseeSignature": "<base64 encoded image>"
  "State": "NY"
}
The images are in the samples folder and are named signature-one.png and signature-two.png respectively. You can get an encoded string from an image using a tool such as https://elmah.io/tools/base64-image-encoder/ or https://www.base64encode.org/.
Add Template
- From the PDF Template, open the File Explorer and add the
consent-form.pdfto add it as the page's template.
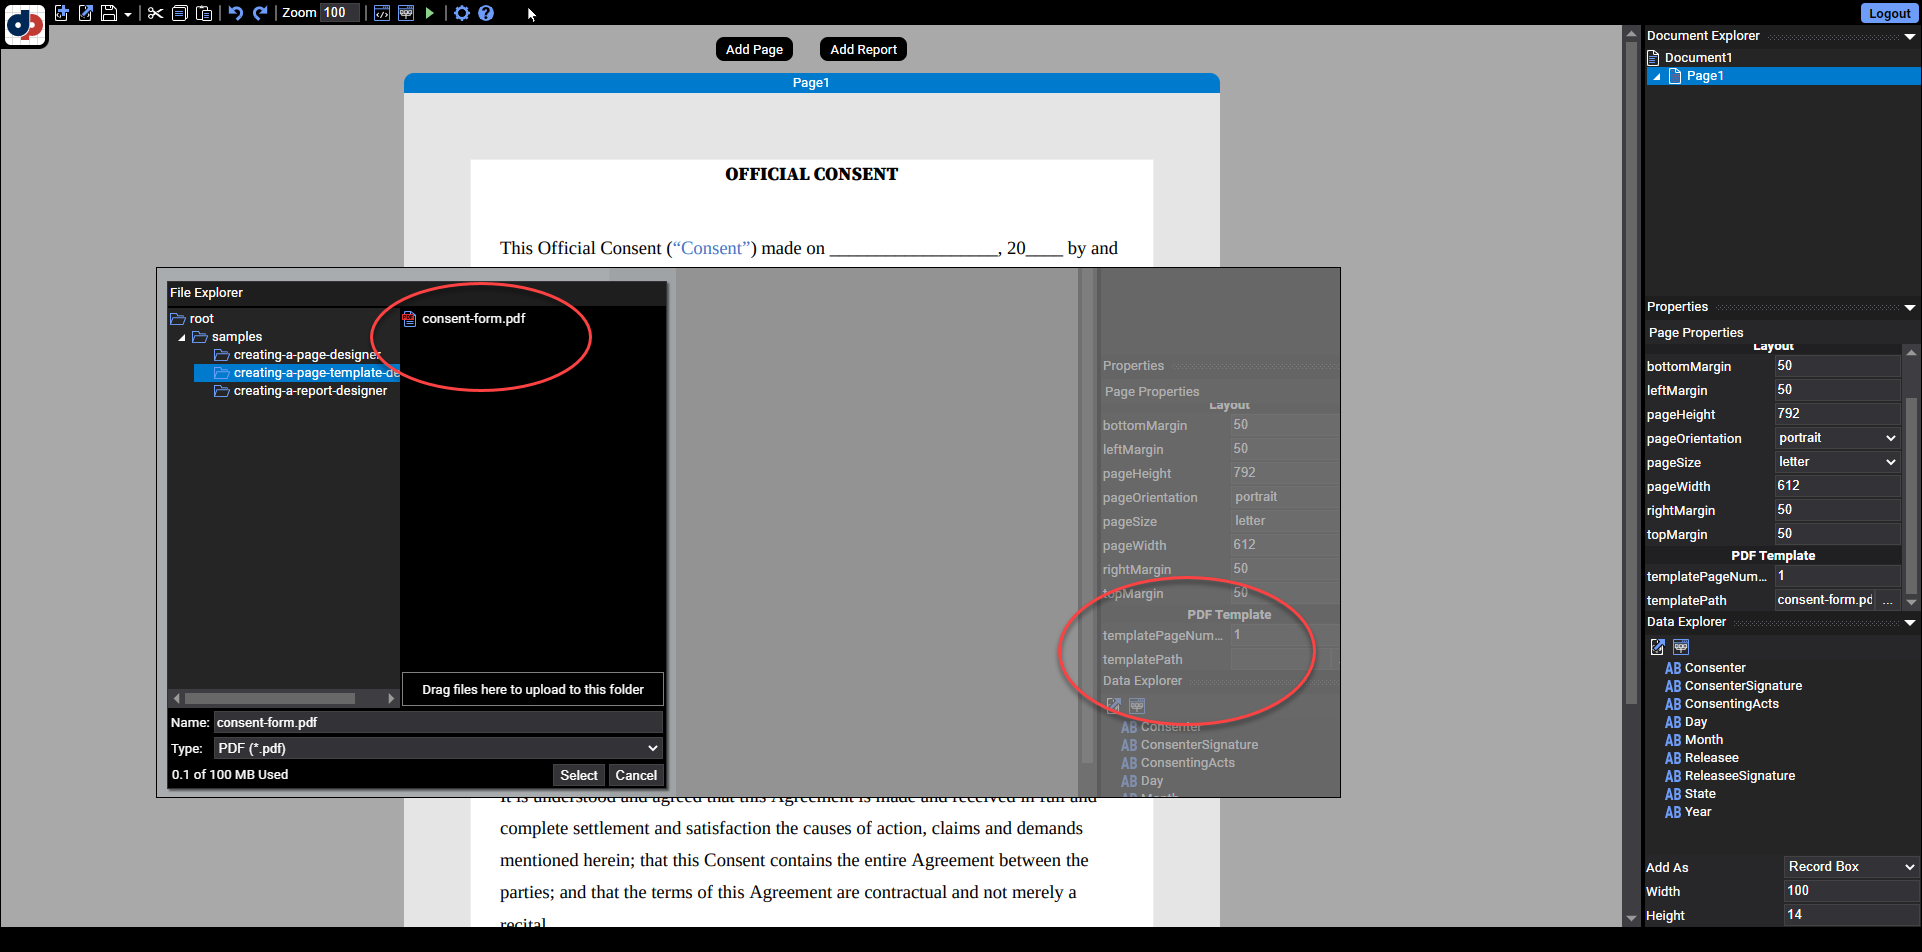
Figure 6. Add a PDF via the templatePath in the PDF Template page.
The page now contains the PDF as the page's template.
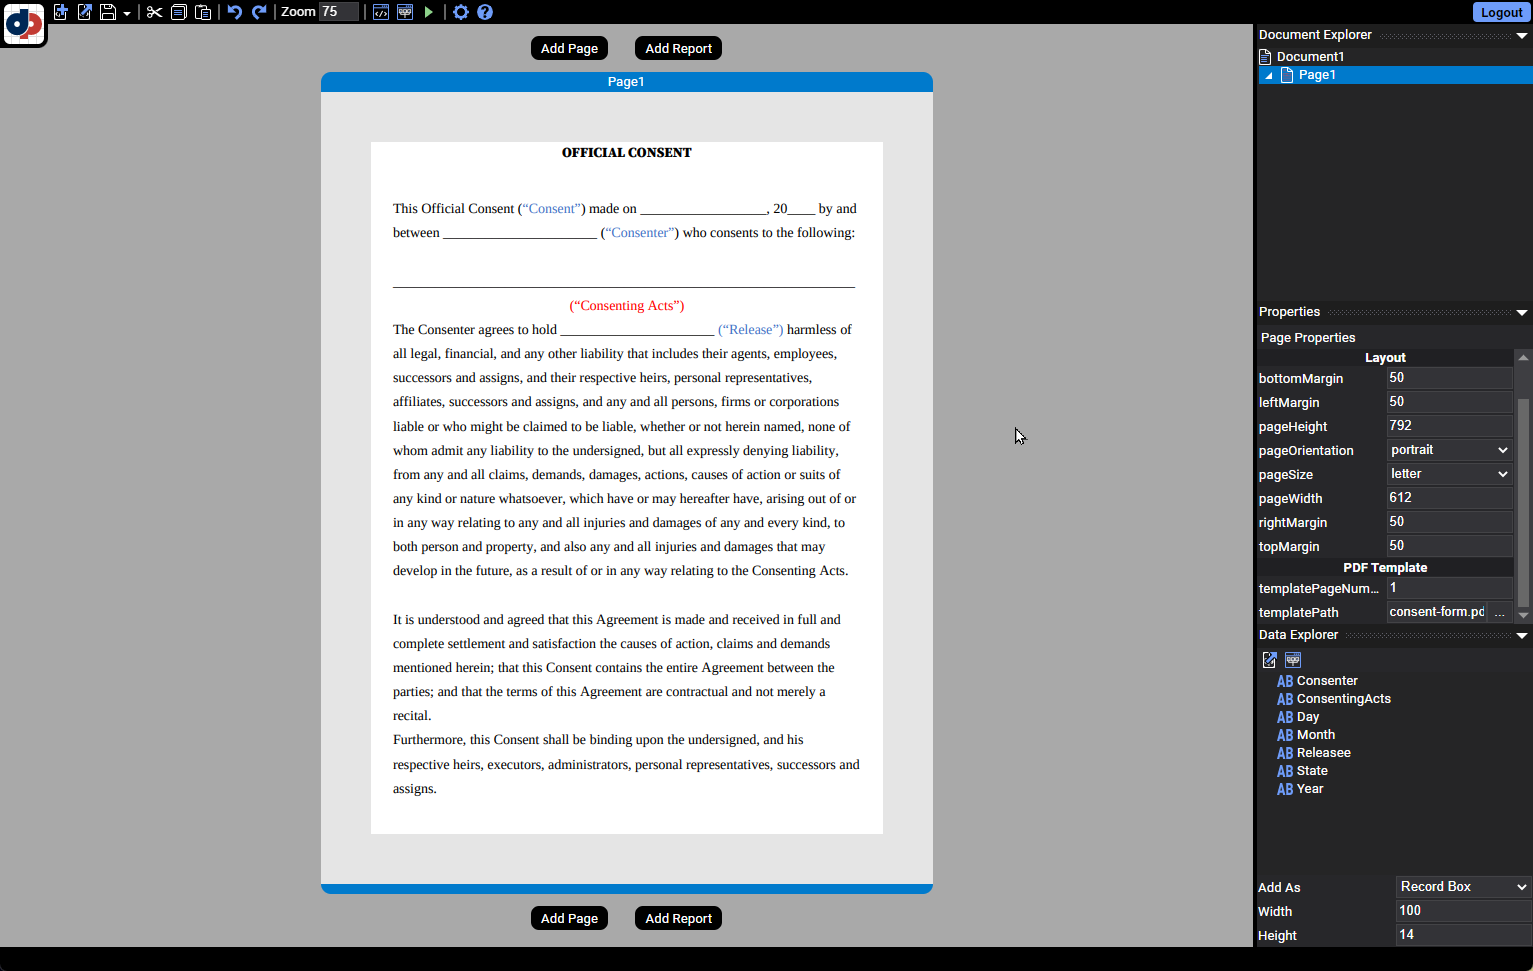
Figure 7. Adding a PDF template to a Page.
Add Second Page
Notice the template was only added to the PDF document's first page. The PDF is actually a two-page form. This is because templatePageNumber was set to 1. But the original PDF contains two pages and so we must create a second page and add the PDF template to the second page.

Figure 8. The original PDF form used as a template.
- Create a new Page and add
consent-form.pdfas the template. Be certain to assign2as the templatePageNumber. This adds the PDF's second page to the new Page element.
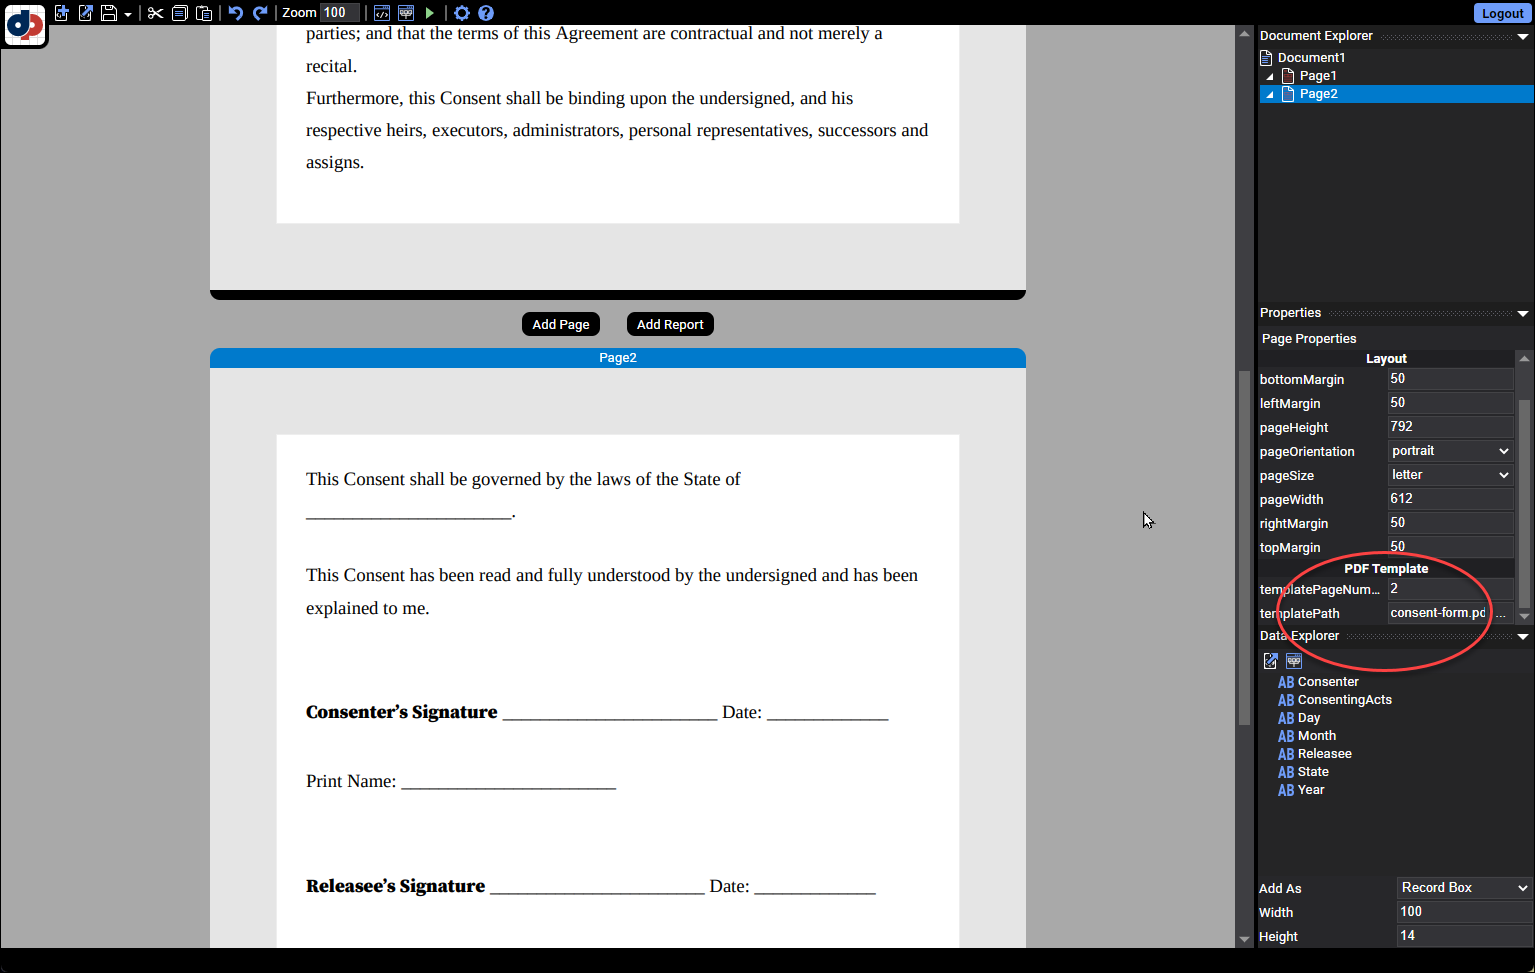
Figure 9. The second page added to a Page.
Add Elements to Template
Now that we have the template added to both pages, let's add the data to the template.
- Overlay the first blank line with a RecordArea and assign it the value
#Month#/#Day#.

Figure 10. A RecordArea added to the template.
DynamicPDF Designer uses "ColdFusion Style" syntax (# signs) to embed a data field in a RecordArea.
- Create a second RecordArea and assign it the value
#Right(Year,2)#.
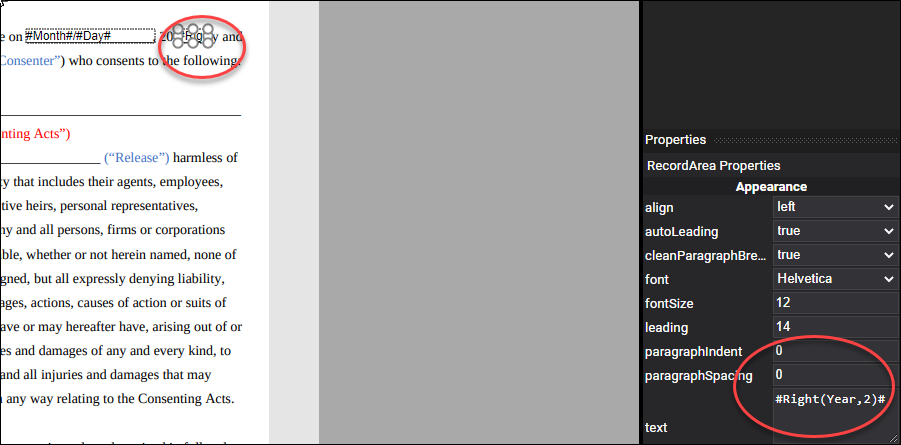
Figure 11. Adding the last two digits of year to the template.
- Add the
Releasee,ConsentingActs, andConsenterfields to the template as RecordBox elements.
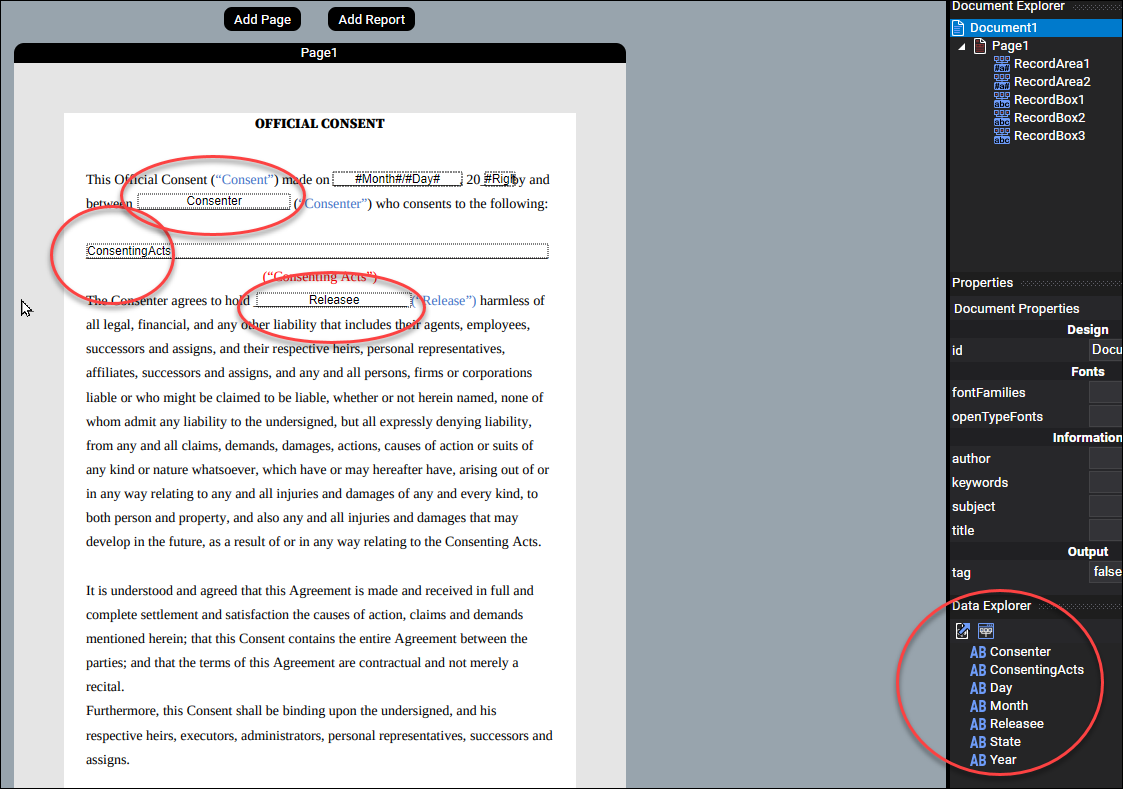
Figure 12. The Consenter, ConsentingActs, and Releasee fields added as RecordBox elements.
- Scroll to the second page and add the
State,Consenter, andReleaseefields as RecordBox elements. - Add two RecordArea elements and assign both the value
#Month#/#Day#/#Year#.

Figure 13. RecordBox elements and two RecordArea elements added to the second template page.
- Add two Image elements and rather than selecting an image, assign
ConsenterSignaturefield and theReleaseeSignaturefields respectively to each image element. - Resize the images to dimensions that appear correctly in the completed PDF.
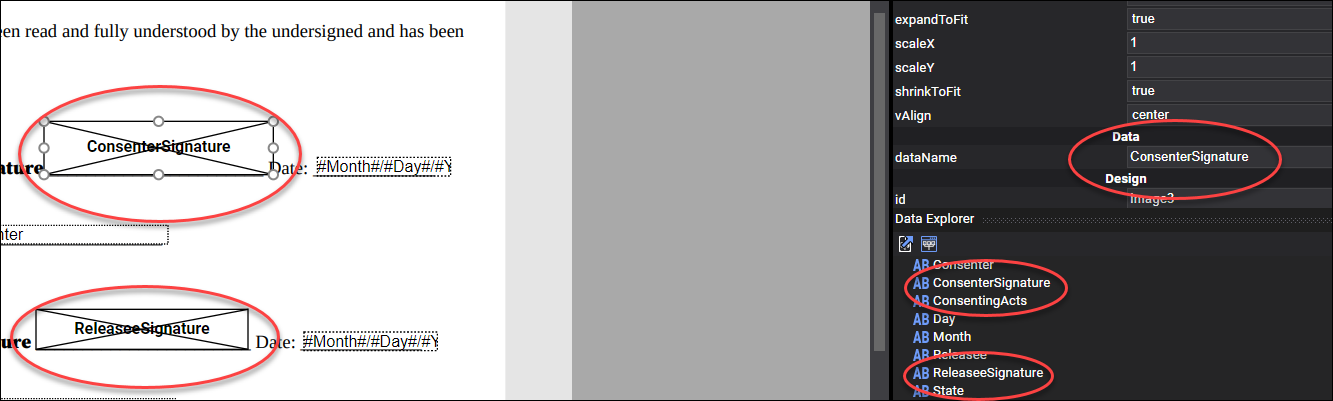
Figure 14. Assigning the ConsenterSignature and ReleaseeSignature JSON fields (base64 encoded images) to their respective Image elements.
- Click the Run Report button to generate the PDF and display it as a new browser tab.

Figure 15. The completed PDF.
Discussion
As this tutorial illustrates, using a PDF template to generate a page with completed form values is straightforward. We first created two pages, one for each page of the PDF we used as the template. We then overlayed the template with RecordBox, RecordArea, and Image elements that corresponded to the their associated JSON data fields. Moreover, we also used base64 encoded image strings in the JSON data to dynamically display images in the generated PDF.
In the next tutorial we expand on using templates with DLEX to create a dynamic report created from a pre-existing PDF template.