Create a Subreport
Use the Subreport element to add nested child reports to a parent report. Often you might need to create a report where the data is hierarchical.
Create nested reports using DynamicPDF Designer's Subreport feature. This tutorial teaches you how to add a Subreport to a report and create a PDF document.
This tutorial assumes you have already completed the Create a Report tutorial.
Sureports
Before beginning the tutorial, consider the following simple nested dataset example. Multiple states comprise the United States, while multiple cities comprise a state. In the following example, we list two states and three cities in each state.
- Maryland
- Baltimore
- Frederick
- Hagerstown
- Virginia
- Richmond
- Alexandria
- Lynchburg
This data is best represented as nested arrays, as illustrated in the following JSON document.
{
  "Country": "United States",
  "States": [
    {
      "State": "Maryland",
      "Cities": [
        {
          "City": "Baltimore"
        },
        {
          "City": "Frederick"
        },
        {
          "City": "Hagerstown"
        }
      ]
    },
    {
      "State": "Virginia",
      "Cities": [
        {
          "City": "Richmond"
        },
        {
          "City": "Alexandria"
        },
        {
          "City": "Lynchburg"
        }
      ]
    }
  ]
}
DynamicPDF Designer supports reports containing nested data through Subreports. You can nest multiple arrays to nest multiple Subreports. When creating a report with Subreports, each nested array is a Subreport. Each Subreport has a header, footer, and details section like a report.

Figure 1. Sections of a Report and Subreport.
We can summarize the sections of a Report and Subreport as follows.
- A Report's header and footer contain top-level data.
- A Report's details section contains data within an array; that data is repeated for each array element.
- A Report's details section can contain a Subreport.
- A Subreport's header and footer can contain top-level data and data from the previous level array.
- A Subreport's details can contain the data within the sub-array; that data is repeated for each sub-array element.
- A Subreport's details section contains another Subreport for array data within a sub-array.
- Subreports can be nested at as many levels as practical for a report.
You can omit a header and footer by simply not including any elements and setting its height to zero.
Required Resources
Before beginning this tutorial, you must add the creating-a-sub-report-designer samples folder to your cloud storage space in the File Manager.
- Login to the Portal and open the File Manager.
- Select the
samplesfolder and then click the Add Samples button. - Check the
creating-a-sub-report-designerproject to add the folder containing the resources needed for this tutorial. You should see the following files in the newly created folder.
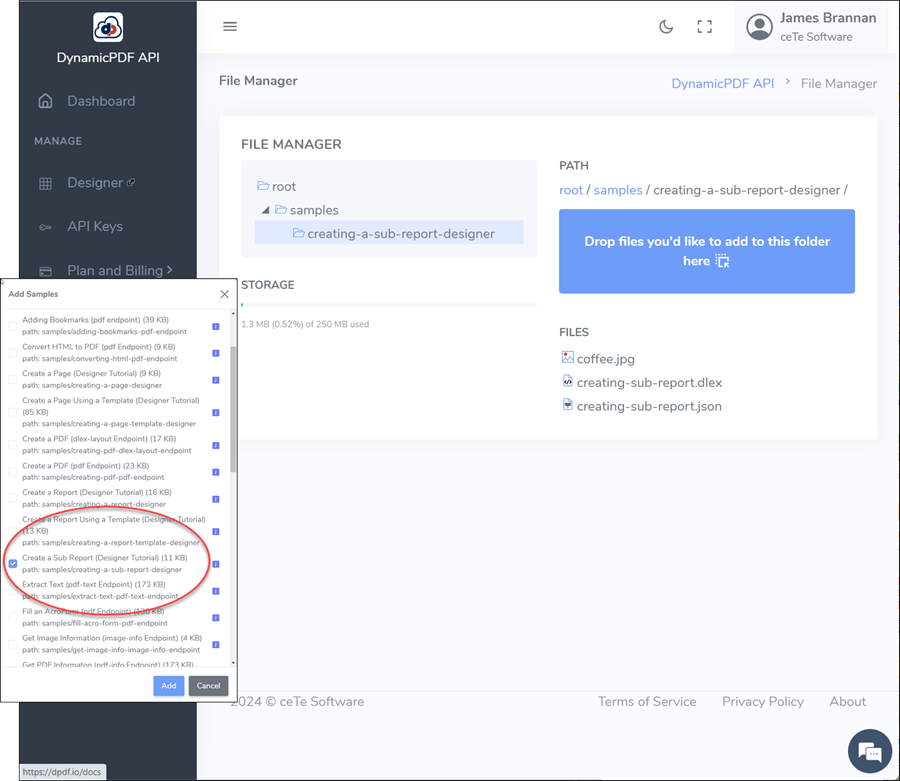
Figure 2. The creating-a-sub-report-designer folder in samples.
- If you plan on repeating the steps of this tutorial, then delete the DLEX and JSON files.
- Create a new blank DLEX file named
creating-sub-report.dlex.
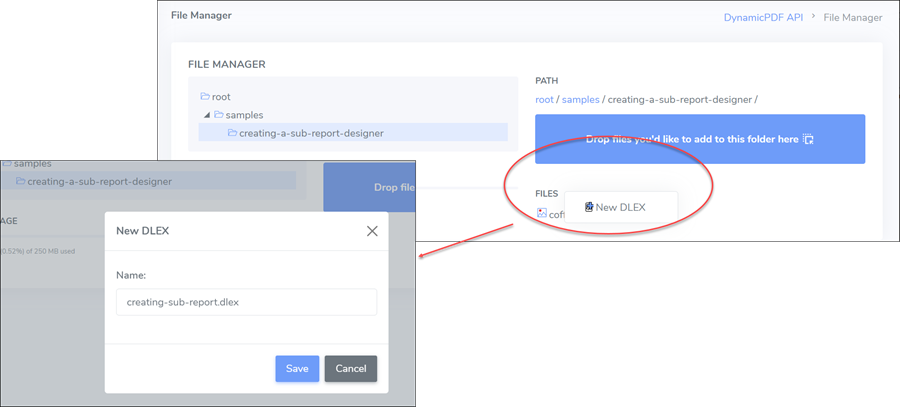
Figure 3. Creating a new DLEX template in the File Manager.
Add JSON Data
Assume the following JSON data. In this dataset Coffees is a top-level array that is repeated in a report's details section. Each Coffees object contains an embedded array named Varieties. As you will see below, Varieties is used for a Subreport within a report.
- In the
File Manager, double-clickcreating-a-sub-report.dlexto open it in Designer. - Select the Edit Layout Data button to open the Layout Data Editor.

Figure 4. The Edit Layout Data button.
{
  "ReportName": "Monthly Beverage Order List",
  "Date": "09/21/2021",
  "Author": "John Doe",
  "Coffees": [
    {
      "Type": "Arabica",
      "Description": "Arabica coffee originated in Ethiopia and comes from the arabica plant. Arabica is the world’s most popular coffee type.",
      "Varieties": [
        {
          "ProductID": 121,
           "Variety": "Blue Mountain",
          "Price": 13.99
        },
        {
          "ProductID": 568,
          "Variety": "Arusha",
          "Price": 7.99
        },
        {
          "ProductID": 120,
          "Variety": "Blue Mountain",
          "Price": 12.21
        }
      ]
    },
    {
      "Type": "Robusta",
      "Description": "Robusta coffee originated in Africa and comes from the beans of the canephora plant. Robusta coffee is bitter and is used primarily in instant coffee, espresso, and as a filler.",
      "Varieties": [
        {
          "ProductID": 235,
          "Variety": "Italian Espresso",
          "Price": 15.22
        },
        {
          "ProductID": 465,
          "Variety": "Italian Espresso",
          "Price": 19.22
        },
        {
          "ProductID": 335,
          "Variety": "Dark Blend",
          "Price": 10.22
        },
        {
          "ProductID": 455,
          "Variety": "Italian Espresso",
          "Price": 9.22
        }
      ]
    }
  ]
}
Note that DynamicPDF Designer requires every JSON data element has a field name.
- Add the JSON data listed above to the Layout Data Editor.

Figure 5. Adding data to the Layout Data Editor.
- Save the data as
creating-sub-report.json. - After saving, note the data elements displayed in the Data Explorer pane.

Figure 6. The JSON data elements displayed in the Data Explorer.
Create Report
Now let's add a report to our DLEX template.
- Click Add Report to create a new report.
- Assign
Coffeesas the report's dataName. Notice thatCoffeesis the top-level array and each element consists of an array ofVarieties.
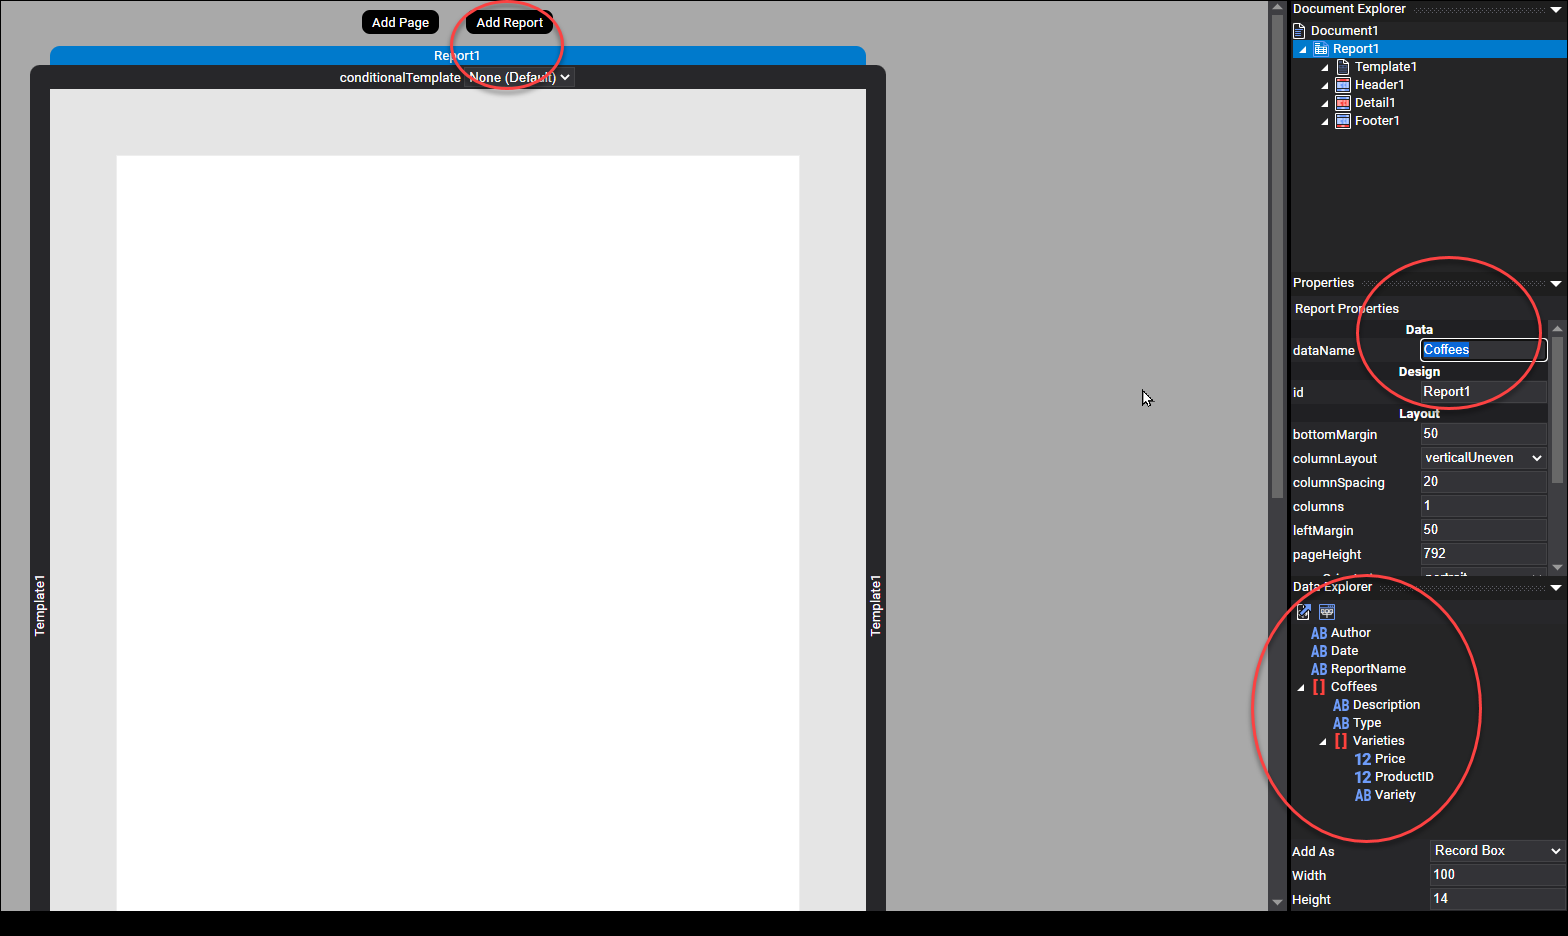
Figure 7. Adding a report to a DLEX template.
-
Add a RecordBox and assign
Typeas the dataName. -
Change its
fontSizeto 22. -
Assign the
xvalue as 5 andyvalue as 4. -
Add a line with the following values:
x1= 5,x2= 105,y1= 28, andy2= 28. -
Add a RecordBox and assign
Descriptionto the dataName. -
Set the
widthto 370,heightto 30,xto 5, andyto 34. -
Set
expandableto true. -
Add the
coffee.jpgas an Image element and resize to be adjacent to theDescriptionfield.

Figure 8. Assigning two fields to the report details section.
Generate PDF
- Generate the report and the PDF should appear similar to the following.

Figure 9. PDF generated from a report.
Add Subreport
Now let's add a Subreport that holds the Varieties data.
- Add a Subreport to the details section by adding Add Subreport from the detail section's context menu.

Figure 10. Select Add Subreport from the Context menu.
Now, this is where it gets tricky and trial-and-error is important when laying out the Subreport.
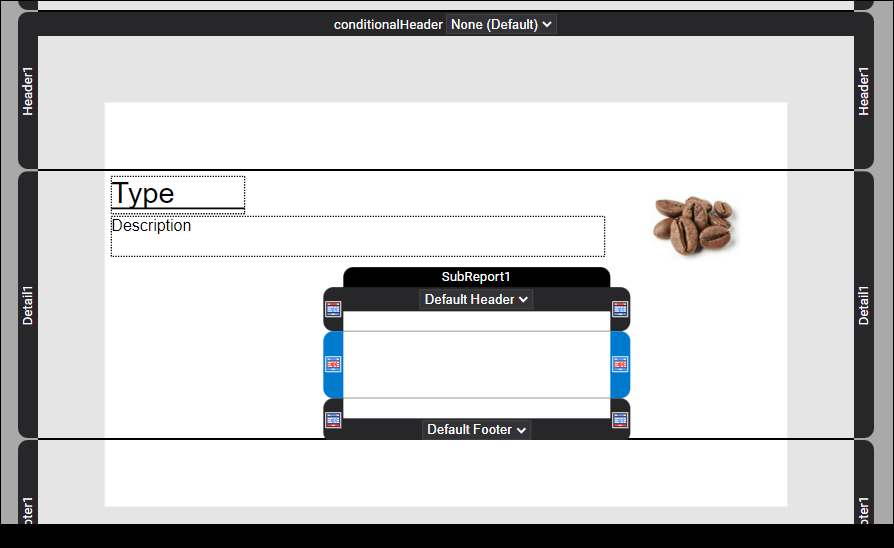
Figure 11. Adding a Subreport to the details section of a report.
- Resize the detail section of the main report to have a
widthof 150. Again, this is only so we can easily work with the Subreport. - Select the Subreport by selecting SubReport1 and add
Varietiesas the dataName. - Select the details section of the Subreport and resize its height to 50.
- Add a RecordBox and a RecordArea to the details section of the Subreport.
- Assign
Varietyto the RecordBox and the text:$#Price#to the RecordArea. - Assign the values of 5, and 110 for
x, and 5 for bothyvalues.
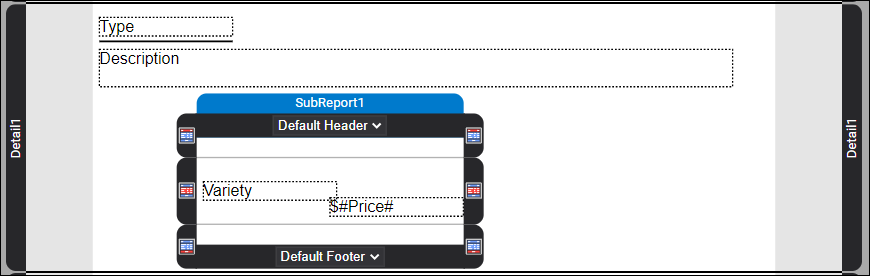
Figure 12. Adding a ReportBox and ReportArea to a Subreport's details.
Resize Subreport
Now, when designing your own report, as mentioned above, assigning the appropriate layout values for a report takes some trial and error. However, here simply copy the values in the following steps.
- Set the Subreport's header
heightto 25. - Add two labels to the header and assign the text: "Variety and Price".
- Set the first label's
xvalue as 5 and second label's value as 110. Set bothyvalues as 5. - Add a line with the following values:
x1= 5,x2= 210,y1= 22, andy2= 22. - Set the Subreport's
xvalue to 0,yvalue to 75, andwidthas 250. - Set the details section
heightto 25. - Change the Subreport's
xvalue to 0 andyvalue to 75. - Set the RecordBox and RecordArea
yvalues to 5, the RecordBox element'sxvalue to 5 and RecordArea element'sxvalue to 110. - Set the
alignmentfor the price Label and RecordBox to right aligned. - Change the Subreport's footer
heightto zero.
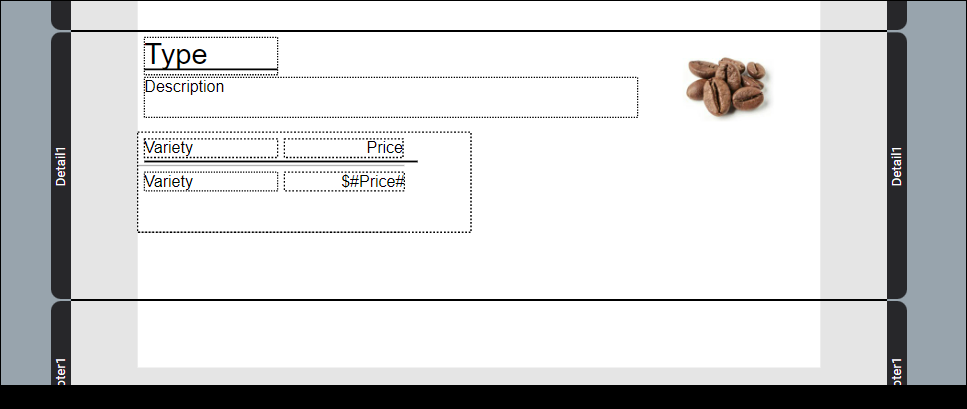
Figure 13. Formatted Subreport added to a report's details section.
- Generate the report and notice that the report details repeats for each coffee and then each Subreport repeats for each variety. Then each variety is repeated.

Figure 14. Generating a report with a Subreport.
Discussion
You can nest as many Subreports in a Report as necessary within reason; however, each Subreport must reference a data array within the previous level data array. In this tutorial, we created a simple report with one level of nested data as a Subreport. As the steps above illustrate, at first, formatting a Subreport can be tricky and involve trial and error. However, after creating a couple reports with Subreports, creating Subreports - including formatting - becomes intuitive.