Instructions Overview
The final truth on how to create an instructions document should always be the schema; however, the DynamicPDF API also provides several client libraries to make creating instructions for the pdf endpoint easier.
Refer to Instructions Schema Diagram to review the JSON schema.
Each library has its respected object model to support creating an instructions document for the pdf endpoint.
This page discusses the instructions document portion of the client libraries. Refer to the Users Guide Overview, or the readme on each client library's GitHub page for more details on using the client library with the DynamicPDF API's endpoints.
This Users Guide page discusses using the pdf endpoint with the endpoint's associated instructions document. Refer to the Users Guide page on the other DynamicPDF API endpoints for more information on using the other endpoints such as dlex-layout or pdf-text.
pdf Endpoint
Recall that the pdf endpoint uses a JSON instructions document to create the processing instructions for this endpoint. The instructions document allows creating a PDF from scratch, converting images to PDF, processing a dlex document, and then merging the results of the various tasks into a combined PDF.
Refer to the pdf endpoint for instructions on using the endpoint. Here, discussion is limited to creating instructions for the pdf endpoint to process.
Examples Using pdf Endpoint
All code snippets presented here are also available as complete working examples on DynamicPDF's GitHub site. To find the relevant example code, look for a top-level class named InstructionsExample or UsersGuidePdfInstructions to find the relevant code. For convenience, the following lists each example's GitHub project.
| API Sample Projects | Namespace/Class | GitHub Location |
|---|---|---|
| C# | UsersGuidePdfInstructions namespace | https://github.com/dynamicpdf-api/dotnet-client-examples/blob/main/DynamicPdfClientLibraryExamples/Examples/InstructionsExample.cs |
| Java | InstructionsExamples.java | https://github.com/dynamicpdf-api/java-client-examples/blob/main/src/main/java/com/dynamicpdf/api/examples/instructions/InstructionsExamples.java |
| Node.js | InstructionsExample.js | https://github.com/dynamicpdf-api/nodejs-client-examples/blob/main/InstructionsExample.js |
| PHP | InstructionsExample.php | https://github.com/dynamicpdf-api/php-client-examples/blob/main/InstructionsExample.php |
| Go | pdf-instructions-example.go | https://github.com/dynamicpdf-api/go-client-examples/blob/main/pdf-instructions-example.go |
| Python | InstructionsExample.py | https://github.com/dynamicpdf-api/python-client-examples/blob/main/InstructionsExample.py |
| Ruby | InstructionsExample.rb | https://github.com/dynamicpdf-api/ruby-client-examples/blob/main/InstructionsExample.rb |
Each code example listed below is a method in the file listed above.
Although you can construct the instructions document as a JSON document which you then pass to the pdf endpoint, the DynamicPDF API also provides several client libraries you can use to create an instructions document. In the remainder of this Users Guide page, each section illustrates creating instructions documents performing various tasks. It lists the client library code and and also lists the resultant JSON instructions document.
Top Level Instructions
An instructions document's top-level elements describe a PDF's metadata. You can specify a PDF's author, title, keywords, fonts, creator, producer and other data pertinent to the PDF as a whole.
The DynamicPDF API free pricing tier ignores the producer metadata property. You must upgrade to one of the paid pricing tiers for your PDFs to display this property (see: Pricing).
JSON
The following JSON code snippet illustrates using top-level instructions in an instructions JSON document.
{
  "fonts":[
    {
      "name":"courier"
    }
  ],
  "author":"John Doe",
  "title":"Sample PDF",
  "subject":"topLevel document metadata",
  "creator":"John Creator",
  "keywords":"dynamicpdf api example pdf java instructions",
  "flattenAllFormFields":false,
  "retainSignatureFormFields":false,
  "inputs":[
    {
      "pageWidth":1008.0,
      "pageHeight":612.0,
      "type":"page"
    },
    {
      "pageWidth":1008.0,
      "pageHeight":612.0,
      "elements":[
        {
          "placement":"topRight",
          "fontSize":24.0,
          "text":"1",
          "type":"pageNumbering",
          "font":"courier",
          "color":"Red"
        }
      ],
      "type":"page"
    }
  ]
}
Client APIs
If you choose to use one of DynamicPDF's client-libraries, then you can create the instructions document programmatically. The following code snippet illustrates adding top-level metadata to a simple blank PDF. For all languages, the steps are the same.
- Create a new
pdfinstance. - Add a
PageInputinstance to thepdfinstance by using theAddPagemethod. Here, we don't do anything with the createdPageInputand so we do not get a reference to the instance. - Add the top-level metadata to the
Pdfinstance.
- C# (.NET)
- Java
- Node.js
- PHP
- Go
- Python
- Ruby
public static Pdf TopLevelMetaData() {
    Pdf pdf = new Pdf();
    pdf.AddPage(1008, 612);
    pdf.Author = "John Doe";
    pdf.Keywords ="dynamicpdf api example pdf java instructions";
    pdf.Creator = "John Creator";
    pdf.Subject = "topLevel document metadata";
    pdf.Title = "Sample PDF";
    return pdf;
}
static async TopLevelMetaData(apiKey, basePath) {
    var pdf = new Pdf();
    pdf.addPage(1008, 612);
    pdf.author = "John Doe";
    pdf.keywords = "dynamicpdf api example pdf java instructions";
    pdf.creator = "John Creator";
    pdf.subject = "topLevel document metadata";
    pdf.title = "Sample PDF";
    await this.ProcessAndSave(pdf, apiKey, basePath, "json-top-level-metadata-output.pdf");
}
public static Pdf TopLevelMetaData() {
	Pdf pdf = new Pdf();
	pdf.addPage(1008, 612);
	pdf.setAuthor("John Doe");
	pdf.setKeywords("dynamicpdf api example pdf java instructions");
	pdf.setCreator("John Creator");
	pdf.setSubject("topLevel document metadata");
	pdf.setTitle("Sample PDF");
	return pdf;
}
public static function TopLevelMetaData() {
	$pdf = new Pdf();
	$pdf->AddPage(1008, 612);
	$pdf->Author = "John Doe";
	$pdf->Keywords = "dynamicpdf api example pdf java instructions";
	$pdf->Creator = "John Creator";
	$pdf->Subject = "topLevel document metadata";
	$pdf->Title = "Sample PDF";
    return $pdf;
}
func topLevelMetadata(key string, baseUrl string) *endpoint.Pdf {
	tlm := endpoint.NewPdf()
	tlm.Endpoint.BaseUrl = baseUrl
	tlm.Endpoint.ApiKey = key

	pageInput := input.NewPage()
	tlm.Author = "John Doe"
	tlm.Creator = "John Creator"
	tlm.Keywords = "dynamicpdf api example pdf java instructions"
	tlm.Title = "Sample PDF"
	pageInput.PageHeight = 612
	pageInput.PageWidth = 1008

	tlm.Inputs = append(tlm.Inputs, pageInput)

	return tlm
}
def ug_top_level_metadata():
    pdf = Pdf()
    pdf.add_page(1008, 612)
    pdf.author = "John Doe"
    pdf.keywords ="dynamicpdf api example pdf java instructions"
    pdf.creator = "John Creator"
    pdf.subject = "topLevel document metadata"
    pdf.title = "Sample PDF"
    return pdf
  def self.top_level_metadata(_base_path)
    pdf = Pdf.new
    pdf.add_page(1008, 612)
    pdf.author = 'John Doe'
    pdf.keywords = 'dynamicpdf api example pdf ruby instructions'
    pdf.creator = 'John Creator'
    pdf.subject = 'topLevel document metadata'
    pdf.title = 'Sample PDF'
    pdf
  end
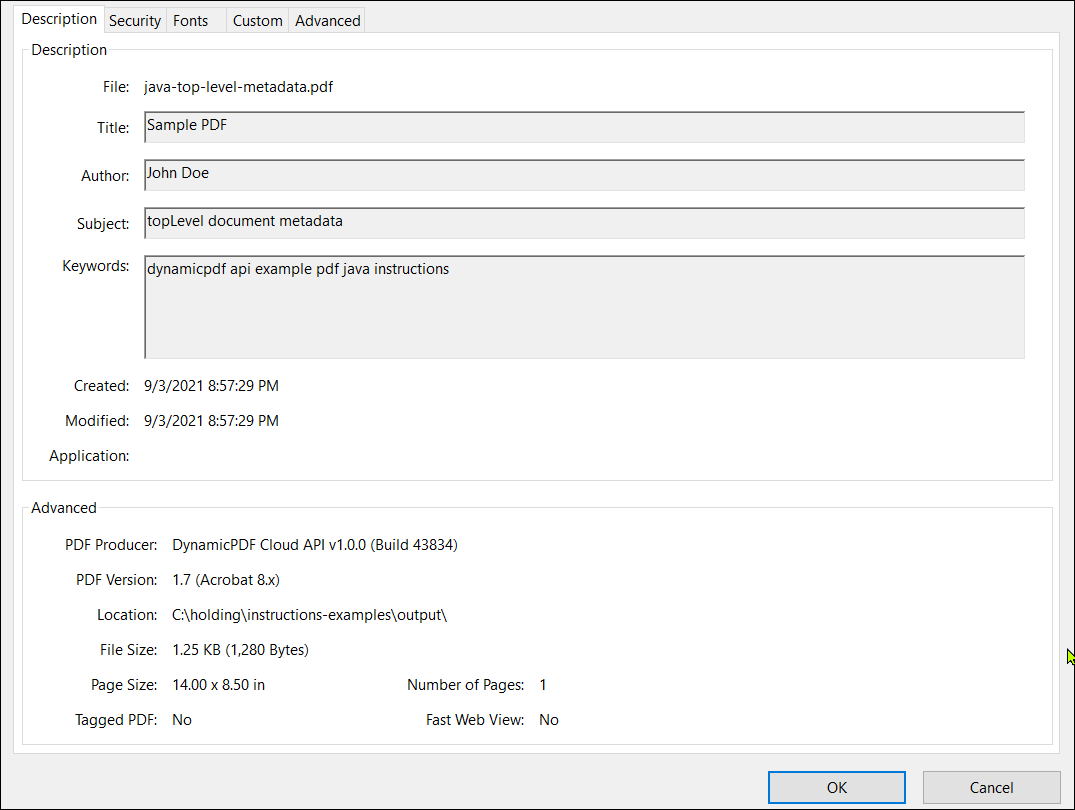
Figure 1. Metadata added to resulting PDF.
Remember, refer to the relevant GitHub project - referenced above - for a complete example.
Fonts
The fonts array in the instructions schema allows adding one or more fonts to your instructions document; the following example illustrates adding a font to a newly created PDF. The example also demonstrates how to add a resource from your local system and a resource in your samples/shared folder in the DynamicPDF API File Manager.
DynamicPDF API also supports Google Fonts.
JSON
{
  "fonts":[
    {
      "name":"helvetica"
    },
    {
      "name":"559985a7-e574-4d10-9efd-97a6751c584c",
      "resourceName":"samples/shared/font/Calibri.otf"
    },
    {
      "name":"6b3eaf86-adc3-43a0-b6eb-0f9b81cf8afa",
      "resourceName":"b39256c9-f50c-49ea-85e5-3608798c8633.ttf"
    }
  ],
  "author":"CeteSoftware",
  "creator":"DynmaicPDF Cloud Api",
  "flattenAllFormFields":false,
  "retainSignatureFormFields":false,
  "inputs":[
    {
      "pageWidth":1008.0,
      "pageHeight":612.0,
      "elements":[
        {
          "placement":"topRight",
          "fontSize":42.0,
          "text":"A",
          "type":"pageNumbering",
          "font":"helvetica",
          "color":"Red"
        },
        {
          "placement":"topLeft",
          "fontSize":32.0,
          "text":"B",
          "type":"pageNumbering",
          "font":"559985a7-e574-4d10-9efd-97a6751c584c",
          "color":"DarkOrange"
        },
        {
          "placement":"topCenter",
          "fontSize":42.0,
          "text":"C",
          "type":"pageNumbering",
          "font":"6b3eaf86-adc3-43a0-b6eb-0f9b81cf8afa",
          "color":"Green"
        }
      ],
      "type":"page"
    }
  ]
}
If using the html endpoint, use css to format html. The following code demonstrates.
pdf.AddHtml("<p style='color:red;font-family:verdana;font-size:30px'>Hello DynamicPDF API</html>");
Client APIs
The Client API's represent Fonts with the Fonts class and supports built-in fonts, fonts loaded from a file, or Google fonts.
The following example illustrates adding fonts to a PDF. The processing steps below are the same for all four languages.
- Create a new
Pdfinstance and add a new page and get a reference to the createdPdfInputinstance. - Create a
PageNumberingElementinstance to add the text, "A", to the top-right. - Create a second
PageNumberingElementinstance and add the text, "B", to the top-left. - Then create a new
Fontinstance and pass the path to the font from the File Manager. - Add the font to the second
PageNumberingElementinstance. - Repeat for a third
PageNumberingElementinstance, only use a local system font. - Add the three
PageNumberingElementinstances to thePageInputinstance'sElementscollection.
- C# (.NET)
- Java
- Node.js
- PHP
- Go
- Python
- Ruby
public static Pdf FontsExample(String basePath)
{
	Pdf pdf = new Pdf();
	PageInput pageInput = pdf.AddPage(1008, 612);
	PageNumberingElement pageNumberingElement = new PageNumberingElement("A", ElementPlacement.TopRight);
	pageNumberingElement.Color = RgbColor.Red;
	pageNumberingElement.Font = Font.Helvetica;
	pageNumberingElement.FontSize = 42;
	String cloudResourceName = "samples/fonts-example/Calibri.otf";
	PageNumberingElement pageNumberingElementTwo = new PageNumberingElement("B", ElementPlacement.TopLeft);
	pageNumberingElementTwo.Color = RgbColor.DarkOrange;
	pageNumberingElementTwo.Font = new Font(cloudResourceName);
	pageNumberingElementTwo.FontSize = 32;

	String filePathFont = basePath + "cnr.otf";
	PageNumberingElement pageNumberingElementThree = new PageNumberingElement("C", ElementPlacement.TopCenter);
	pageNumberingElementThree.Color = RgbColor.Green;
	pageNumberingElementThree.Font = Font.FromFile(filePathFont);
	pageNumberingElementThree.FontSize = 42;
	pageInput.Elements.Add(pageNumberingElement);
    pageInput.Elements.Add(pageNumberingElementTwo);
	pageInput.Elements.Add(pageNumberingElementThree);
	return pdf;
}
See the GoogleFontsExample in the dotnet-client-examples GitHub project for an example using Google Fonts.
PageNumberingElement pageNumberingElementTwo = new PageNumberingElement("Test", ElementPlacement.TopLeft);
pageNumberingElementTwo.Color = RgbColor.DarkOrange;
pageNumberingElementTwo.Font =  Font.Google("Borel", false, false);
pageNumberingElementTwo.FontSize = 42;

    static async FontsExample(apiKey, basePath) {
        var pdf = new Pdf();
        var pageInput = pdf.AddPage(1008, 612);
        var pageNumberingElement = new PageNumberingElement("A", elementPlacement.TOPRIGHT);
        pageNumberingElement.color = RgbColor.red;
        pageNumberingElement.font = Font.helvetica;
        pageNumberingElement.fontSize = 42;

        var cloudResourceName = "samples/fonts-example/Calibri.otf";
        var pageNumberingElementTwo = new PageNumberingElement("B", elementPlacement.TOPLEFT);
        pageNumberingElementTwo.color = RgbColor.DarkOrange;
        pageNumberingElementTwo.font = new Font(cloudResourceName);
        pageNumberingElementTwo.fontSize = 32;

        var filePathFont = basePath + "cnr.otf";
        var pageNumberingElementThree = new PageNumberingElement("C", ElementPlacement.TOPCENTER);
        pageNumberingElementThree.color = RgbColor.green;
        pageNumberingElementThree.font = Font.fromFile(filePathFont);
        pageNumberingElementThree.fontSize = 42;

        pageInput.elements.push(pageNumberingElement);
        pageInput.elements.push(pageNumberingElementTwo);
        pageInput.elements.push(pageNumberingElementThree);
        await this.ProcessAndSave(pdf, apiKey, basePath, "json-font-output.pdf");
    }
public static Pdf FontsExample(String basePath) {
	Pdf pdf = new Pdf();
    PageInput pageInput = pdf.addPage(1008, 612);
	PageNumberingElement pageNumberingElement = new PageNumberingElement("A", elementPlacement.TOPRIGHT);
	pageNumberingElement.setColor(RgbColor.getRed());
	pageNumberingElement.setFont(Font.getHelvetica());
	pageNumberingElement.setFontSize(42);

	String cloudResourceName = "samples/fonts-example/Calibri.otf";
	PageNumberingElement pageNumberingElementTwo = new PageNumberingElement("B", elementPlacement.TOPLEFT);
	pageNumberingElementTwo.setColor(RgbColor.getDarkOrange());
	pageNumberingElementTwo.setFont(new Font(cloudResourceName));
	pageNumberingElementTwo.setFontSize(32);

    String filePathFont = basePath + "/cnr.otf";
	PageNumberingElement pageNumberingElementThree = new PageNumberingElement("C", elementPlacement.TOPCENTER);
	pageNumberingElementThree.setColor(RgbColor.getGreen());
	pageNumberingElementThree.setFont( Font.fromFile(filePathFont));
	pageNumberingElementThree.setFontSize(42);
	pageInput.getElements().add(pageNumberingElement);
	pageInput.getElements().add(pageNumberingElementTwo);
	pageInput.getElements().add(pageNumberingElementThree);

    return pdf;
}
See the GoogleFontsExample in the java-client-examples GitHub project for an example using Google Fonts.
PageNumberingElement pageNumberingElement = new PageNumberingElement("Test", ElementPlacement.TOPRIGHT);
pageNumberingElement.setColor(RgbColor.getRed());
pageNumberingElement.setFont(Font.google("Borel", false, false));
pageNumberingElement.setFontSize(42);
pageInput.getElements().add(pageNumberingElement);
public static function FontsExample() {
	$pdf = new Pdf();
	$pageInput = $pdf->AddPage(1008, 612);
	$pageNumberingElement =	new PageNumberingElement("A", ElementPlacement::TopRight);
	$pageNumberingElement->Color = RgbColor::Red();
	$pageNumberingElement->Font = Font::Helvetica();
	$pageNumberingElement->FontSize = 42;
	$cloudResourceName = "samples/fonts-example/Calibri.otf";
	$pageNumberingElementTwo = new PageNumberingElement("B", ElementPlacement::TopLeft);
	$pageNumberingElementTwo->Color = RgbColor::DarkOrange();
	$pageNumberingElementTwo->Font = new Font($cloudResourceName);
	$pageNumberingElementTwo->FontSize = 32;

	$filePathFont = InstructionsExample::$BasePath . "cnr.otf";
	$pageNumberingElementThree = new PageNumberingElement("C", ElementPlacement::TopCenter);
	$pageNumberingElementThree->Color = RgbColor::Green();
	$pageNumberingElementThree->Font = Font::FromFile($filePathFont);
	$pageNumberingElementThree->FontSize = 42;

	array_push($pageInput->Elements, $pageNumberingElement);
	array_push($pageInput->Elements, $pageNumberingElementTwo);
	array_push($pageInput->Elements, $pageNumberingElementThree);

	return $pdf;
}
func fontsExample(key string, baseUrl string) *endpoint.Pdf {
	fe := endpoint.NewPdf()
	fe.Endpoint.BaseUrl = baseUrl
	fe.Endpoint.ApiKey = key

	pageInput := input.NewPage()
	pageNumber := element.NewPageNumberingElement("A", "TopLeft", 0, 0)
	pageNumber.SetFontSize(42)
	pageNumber.SetFont(font.HelveticaBoldOblique())

	pageColor := color.NewRgbColorDefault().Red()
	pageNumber.SetColor(pageColor.Color)

	pageNumberingElementTwo := element.NewPageNumberingElement("B", "TopRight", 0, 0)
	pageNumberingElementTwo.SetColor(color.NewRgbColorDefault().DarkGreen().Color)
	myFont := font.NewFontResource("c:/temp/fonts-example/cnr.otf", "cnr.otf")
	pageNumberingElementTwo.SetFont(*myFont)
	pageNumberingElementTwo.SetFontSize(32)

	pageInput.Elements = append(pageInput.Elements, pageNumber)
	pageInput.Elements = append(pageInput.Elements, pageNumberingElementTwo)
	fe.Inputs = append(fe.Inputs, pageInput)
	return fe
}
See the googleFontsExample method in the go-client-examples GitHub project for an example using Google Fonts.
pageInput := input.NewPage()
pageNumber := element.NewPageNumberingElement("Test", "TopLeft", 0, 0)
pageNumber.SetFontSize(42)
pageNumber.TextFont()
pageNumber.SetFont(*font.Google("Borel"))
def ug_fonts_example(basePath):
    pdf = Pdf()
    pageInput = pdf.add_page(1008, 612)
    pageNumberingElement = PageNumberingElement("A", ElementPlacement.TopRight)
    pageNumberingElement.color = RgbColor.red()
    pageNumberingElement.font = Font.courier()
    pageNumberingElement.font_size = 42


    cloudResourceName = "samples/users-guide-resources/Calibri.otf"
    pageNumberingElementTwo = PageNumberingElement("B", ElementPlacement.TopLeft)
    pageNumberingElementTwo.color = RgbColor.dark_orange()
    pageNumberingElementTwo.font = Font(cloudResourceName)
    pageNumberingElementTwo.fontSize = 32

    pageNumberingElementThree = PageNumberingElement("C", ElementPlacement.TopCenter)
    pageNumberingElementThree.color = RgbColor.green()
    pageNumberingElementThree.font = Font.from_file(basePath + "cnr.otf")
    pageNumberingElementThree.fontSize = 42

    pageInput.elements.append(pageNumberingElement)
    pageInput.elements.append(pageNumberingElementTwo)
    pageInput.elements.append(pageNumberingElementThree)

    return pdf
   def self.fonts_example(base_path)
    pdf = Pdf.new
    page = pdf.add_page(1008, 612)

    element1 = PageNumberingElement.new('A', ElementPlacement::TOP_RIGHT)
    element1.color = RgbColor.red
    element1.font(Font.helvetica)
    element1.font_size = 42
    page.elements << element1

    cloud_font = 'samples/users-guide-resources/Calibri.otf'
    element2 = PageNumberingElement.new('B', ElementPlacement::TOP_LEFT)
    element2.color = RgbColor.dark_orange

    element2.font(Font.new(cloud_font))
    element2.font_size = 32
    page.elements << element2

    local_font = "#{base_path}cnr.otf"
    element3 = PageNumberingElement.new('C', ElementPlacement::TOP_CENTER)
    element3.color = RgbColor.green
    font = Font.from_file(local_font)
    element3.font(font)
    element3.font_size = 42
    page.elements << element3

    pdf
  end0
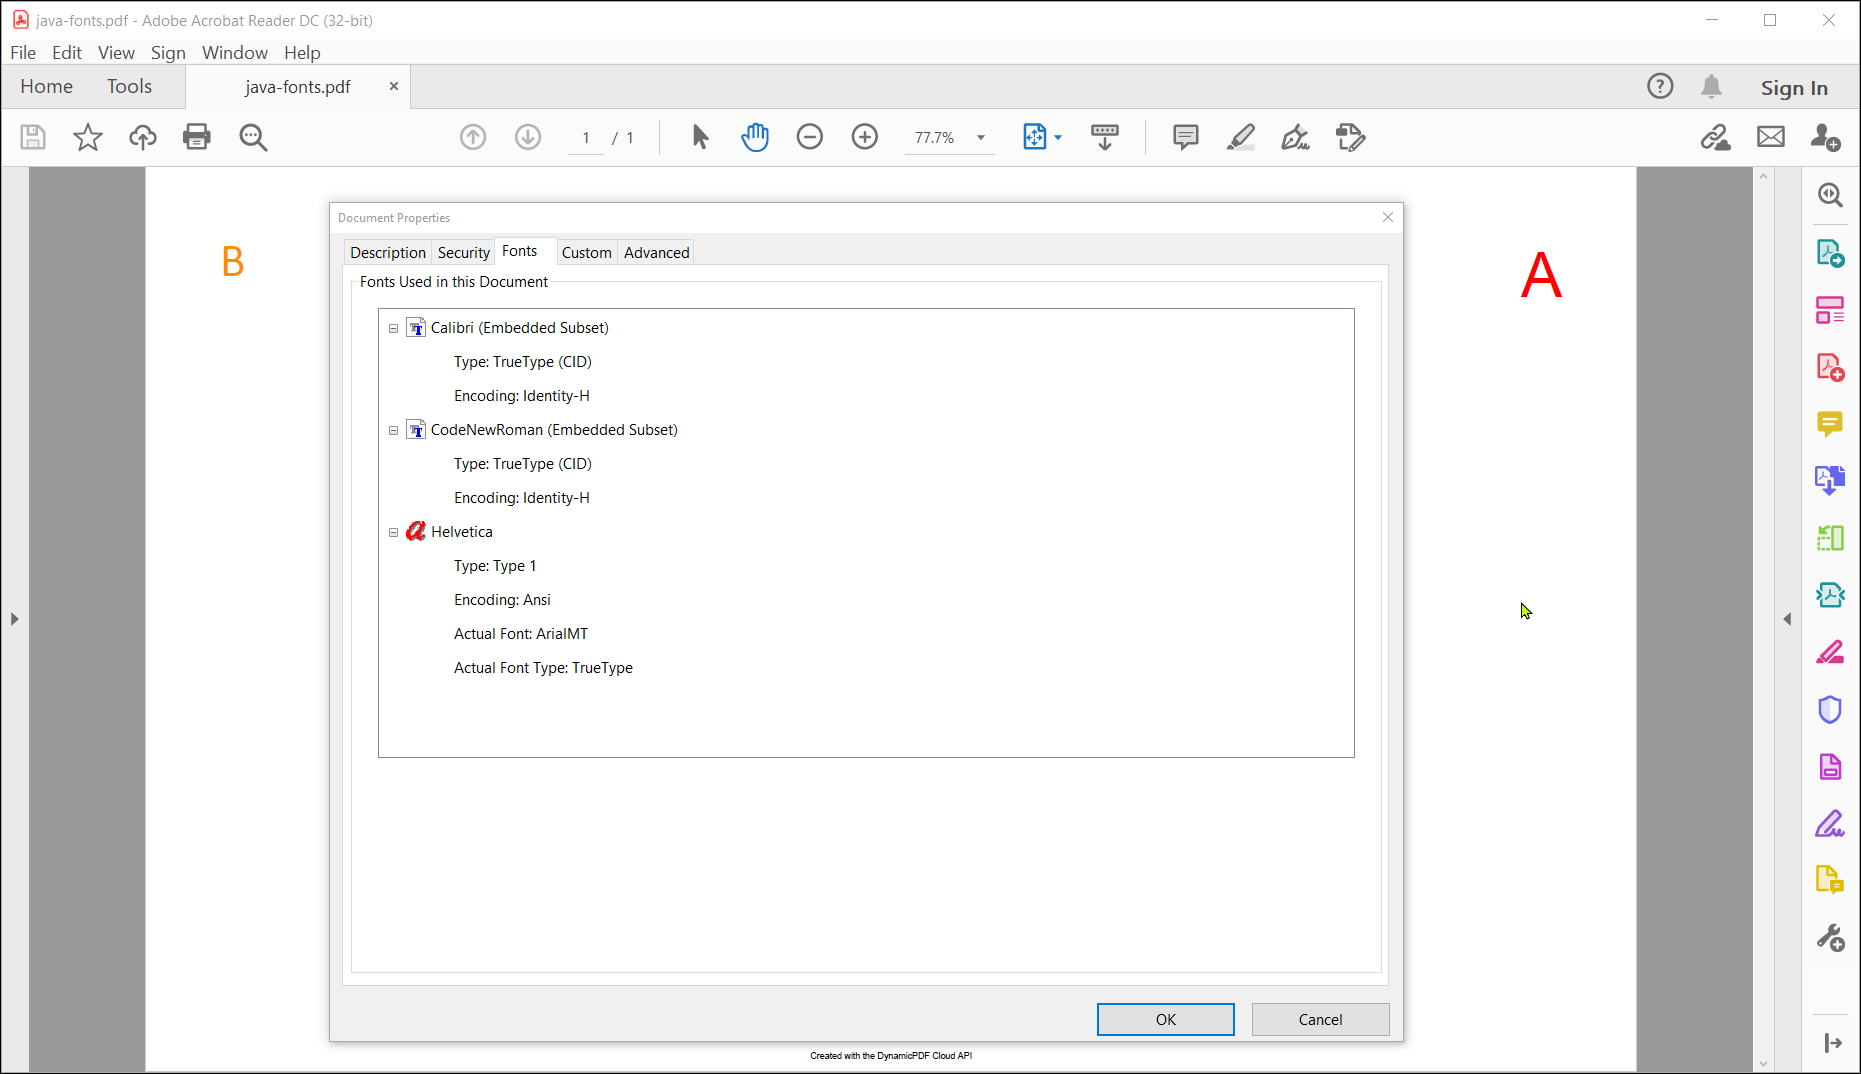
Figure 2. Resultant PDF with added fonts.
Security
The security schema element is useful for adding security to a generated PDF. The following example illustrates adding a username and password to a PDF.
Refer to the documentation outlining security in the JSON schema (JSON Instructions Schema - Security).
JSON
{
  "author":"CeteSoftware",
  "creator":"DynamicPDF API",
  "security":{
    "userPassword":"myuser",
    "ownerPassword":"mypassword",
    "allowCopy":false,
    "allowEdit":true,
    "allowPrint":false,
    "allowUpdateAnnotsAndFields":true,
    "allowAccessibility":true,
    "allowFormFilling":false,
    "allowHighResolutionPrinting":true,
    "allowDocumentAssembly":false,
    "type":"aes256"
  },
  "flattenAllFormFields":false,
  "retainSignatureFormFields":false,
  "inputs":[
    {
      "resourceName":"95154d87-d423-4061-b678-b8a6d01e8eac.pdf",
      "type":"pdf"
    }
  ]
}
Client APIs
The following example illustrates adding security to a PDF. The processing steps below are the same for all four languages.
- Create a new
Pdfinstance and addDocumentA.pdffrom local system as aPdfResourceinstance. - Add the
PdfResourceinstance to thePdfinstance. - Create a new
Aes256Securityinstance and set its username and password in the constructor.
- C# (.NET)
- Java
- Node.js
- PHP
- Go
- Python
- Ruby
public static Pdf SecurityExample(String basePath) {
	Pdf pdf = new Pdf();
	PdfResource pdfResource = new PdfResource(basePath + "DocumentA.pdf");
	pdf.AddPdf(pdfResource);
	Aes256Security sec = new Aes256Security("myuser", "mypassword");
	sec.AllowCopy = false;
	sec.AllowPrint = false;
	pdf.Security = sec;
	return pdf;
}
static async SecurityExample(apiKey, basePath) {
	var fileResource = basePath + "DocumentB.pdf";
    var userName = "myuser";
    var passWord = "mypassword";
    var pdf = new Pdf();
    var pdfResource = new PdfResource(fileResource);
    pdf.addPdf(pdfResource);
    var sec = new Aes256Security(userName, passWord);
    sec.allowCopy = false;
    sec.allowPrint = false;
    pdf.security = sec;
    await this.ProcessAndSave(pdf, apiKey, "json-SecurityExample-output.pdf");
}
public static Pdf SecurityExample(String basePath) {
	String fileResource = basePath + "/DocumentB.pdf";
	String userName = "myuser";
	String passWord = "mypassword";
	Pdf pdf = new Pdf();
	PdfResource pdfResource = new PdfResource(fileResource);
	pdf.addPdf(pdfResource);
	Aes256Security sec = new Aes256Security(userName, passWord);
	sec.setAllowCopy(false);
	sec.setAllowPrint(false);
	pdf.setSecurity(sec);
	return pdf;
}
public static function SecurityExample() {
	$fileResource = InstructionsExample::$BasePath . "DocumentB.pdf";
	$userName = "myuser";
	$passWord = "mypassword";
	$pdf = new Pdf();
	$pdfResource = new PdfResource($fileResource);
	$pdf->AddPdf($pdfResource);
	$sec = new Aes256Security($userName, $passWord);
	$sec->AllowCopy = false;
	$sec->AllowPrint = false;
	$pdf->Security = $sec;
	return $pdf;
}
func securityExample(key string, baseUrl string) *endpoint.Pdf {
	secPdf := endpoint.NewPdf()
	secRes := resource.NewPdfResourceWithResourcePath("c:/temp/dynamicpdf-api-samples/DocumentA.pdf", "DocumentA.pdf")
	secInput := input.NewPdfWithResource(secRes)
	secPdf.Endpoint.BaseUrl = baseUrl
	secPdf.Endpoint.ApiKey = key
	security := endpoint.NewAes128Security("user", "owner")
	secPdf.Security = endpoint.Security(security.Security)
	secPdf.Inputs = append(secPdf.Inputs, secInput)
	return secPdf;
}
def ug_security_example(documentPath):
    fileResource = documentPath + "DocumentB.pdf"
    userName = "myuser"
    passWord = "mypassword"
    pdf = Pdf()
    resource = PdfResource(fileResource)
    pdf.add_pdf(resource)
    sec = Aes256Security(userName, passWord)
    sec.allow_copy = False
    sec.allow_print = False
    pdf.security = sec
    return pdf
def self.security_example(base_path)
    pdf = Pdf.new
    pdf.add_pdf(PdfResource.new("#{base_path}DocumentB.pdf"))
    security = Aes256Security.new('myuser', 'mypassword')
    security.allow_copy = false
    security.allow_print = false
    pdf.security = security
    pdf
end

Figure 3. Resultant PDF with added password protection.
Inputs
All instructions documents must have an inputs array containing one or more input elements. As discussed in the schema section (cloud-api-schema-pdf) of the Users Guide, the valid input types are page, pdf, image, html, word, excel and dlex.
| input Documentation | |
|---|---|
| page | |
| image | |
| html | |
| dlex | |
excel | |
word |
Use the input type's Resource sub-class (for example ImageResource, PdfResource, etc.) to obtain resources from your local system as a file, byte array, or stream. Use the relative path to the resource in your DynamicPDF cloud Storage to load the resource from the cloud. Examples are provided throughout this page and also the pdf Inputs page.
page
Use a page element to create a single PDF page where you can add additional content using elements from the elements element. Note that what is returned is a PageInput instance. After obtaining a reference to the PageInput instance you can perform further processing tasks on the class.
If creating a complex PDF, consider using Designer to create a DLEX rather than trying to build a PDF using code.
pdf
Use a pdf element to add a PDF to your instructions set. For all client library languages you perform the following steps to add a PDF to a Pdf instance. If the PDF you wish to add resides on the cloud in the File Manager, then you add the PDF directly to the parent Pdf instance. If you add the PDF from your local system, then you first create a PdfResource instance and add the instance to the Pdf instance.
html
Use a html element to add HTML to your instructions set. For all client library languages you perform the following steps to add an HTML document or string to a Pdf instance. The html input only accepts HTML as string data; you cannot specify a URL or file path.
DynamicPDF API fully supports HTML 5 and CSS but does not support JavaScript. A basePath must be a public resource available via HTTP.
Refer to the HTML Input type documentation and the using the HTML input type with the API client libraries(HtmlInput) for more information.
image
The image input type instructs the finished PDF to convert the image to a PDF and then merge it with any other inputs. Each added image is its own PDF page. The DynamicPDF API supports the following nine common image types.
| File Type | Description |
|---|---|
| JPEG | JPEGs are handled natively through a highly efficient pass through process. |
| PNG | PNGs are handled natively. If the PNG does not have an alpha channel (transparency), it uses a highly efficient pass through process. If the PNG does have an alpha channel it is parsed and reformatted for inclusion in a PDF document. |
| BMP | BMPs are converted to a bitmap for inclusion in a PDF document. |
| EMF | EMFs are converted to a bitmap for inclusion in a PDF document. |
| WMF | WMFs are converted to a bitmap for inclusion in a PDF document. |
| EXIF | EXIFs are handled natively through a highly efficient pass through process. |
| JPEG 2000 | JPEG 2000s are handled natively through a highly efficient pass through process. |
| GIF | GIFs are handled natively, but are parsed and reformatted for inclusion in a PDF document. |
| TIFF | TIFFs are handled natively and most types of TIFFs (LZW being the exception) use a highly efficient pass through process. Multi-page Tiffs are supported, allowing access to any page in a TIFF document. |
word
The word input type instructs the finished PDF to convert the Word document to a PDF and then merge it with any other inputs.
See Word in Json Instructions Schema for more information on the word input type and see Inputs - Word topic for code examples.
excel
The excel input type instructs the finished PDF to convert the Excel document to a PDF and then merge it with any other inputs.
See Excel in Json Instructions Schema for more information on the excel input type and see Inputs - Excel topic for code examples.
dlex
The dlex type adds a DLEX file to the instructions and processes the file to create a PDF.
PageInput - Elements
A pageInput is for creating a new single-page PDF. A pageInput supports the following element types.
pageNumberingtextimagelinerectangle- and barcodes.
The template elements topic below has details on the properties of each of the element types.
Refer to the Add Text, Images, Lines, and Rectangles to PDFs solution for an example adding several elements to a page.
Inputs - Merging
There is no input type for merging as the instruction to merge one or more documents is implicit by including more than one input element. The following examples illustrate how to merge one or more inputs into a new PDF. The example also illustrates adding merge options to a PDF, where the same PDF is merged but the first instance removes the PDF's annotations.
When using the pdf endpoint to create processing instructions, you combine one or more elements in the inputs array to merge each input's results into a merged PDF. Refer to the Users Guide schema page for more information on merging (instructions schema).
Inputs are merged in the order in which they are received in the instructions JSON.
JSON
{
  "author": "CeteSoftware",
  "creator": "DynamicPDF API",
  "inputs": [
    {
      "type": "pdf",
      "resourceName": "DocumentA.pdf",
    },
    {
      "type": "image",
      "align": "center",
      "vAlign": "center",
      "resourceName": "dynamicpdflogo.png",
    },
    {
      "type": "pdf",
      "resourceName": "DocumentB.pdf",
    }
  ]
}
Client APIs
The following illustrates merging a PDF, an image, and then another PDF together to form a combined PDF. As the example illustrates, merging three inputs to form a combined PDF is straightforward. You can combine any input type from the inputs array to form a new PDF.
In the following example, all client API languages have the same processing steps.
- Create a new
Pdfinstance. - Create a new
PdfResourceinstance, a newImageResourceinstance, and a newPdfResourceinstance that specify the three local files. - Add the three resources to the
Pdfinstance to combine them into a merged PDF.
- C# (.NET)
- Java
- Node.js
- PHP
- Go
- Python
- Ruby
public static Pdf MergeExample(String basePath) {
	Pdf pdf = new Pdf();
	PdfResource resourceA = new PdfResource(basePath + "DocumentA.pdf");
	ImageResource imageResource = new ImageResource(basePath + "dynamicpdfLogo.png");
	PdfResource resourceB = new PdfResource(basePath + "DocumentB.pdf");
	pdf.AddPdf(resourceA);
	pdf.AddImage(imageResource);
	pdf.AddPdf(resourceB);
	return pdf;
}
static async MergeExample(apiKey, basePath) {
	var pdf = new Pdf();
    pdf.addPdf(new PdfResource(basePath + "DocumentA.pdf"));
    var imageResource = new ImageResource(basePath + "dynamicpdfLogo.png");
    pdf.addImage(imageResource);
    pdf.addPdf(new PdfResource(basePath + "DocumentB.pdf"));
    await this.ProcessAndSave(pdf, apiKey, basePath, "json-merge-example-output.pdf");
}
public static Pdf MergeExample(String basePath) {
	Pdf pdf = new Pdf();
	PdfResource resourceA = new PdfResource(basePath + "DocumentA.pdf");
	ImageResource imageResource = new ImageResource(basePath + "dynamicpdfLogo.png");
	PdfResource resourceB = new PdfResource(basePath + "DocumentB.pdf");
	pdf.addPdf(resourceA);
	pdf.addImage(imageResource);
	pdf.addPdf(resourceB);
	return pdf;
}
public static function MergeExample() {
	$pdf = new Pdf();
	$pdf->AddPdf(InstructionsExample::$BasePath . "Documenta.pdf");
	$pdf->AddImage(InstructionsExample::$BasePath . "dynamicpdfLogo.png");
	$pdf->AddPdf(InstructionsExample::$BasePath . "DocumentB.pdf");
	return $pdf;
}
func mergeExample(key string, baseUrl string) *endpoint.Pdf {
	pr := endpoint.NewPdf()
	mergeOption := input.NewMergeOptions()
	prInput := input.NewPdfWithCloudPath("example/DocumentB.pdf", mergeOption)
	pr.Inputs = append(pr.Inputs, prInput)
	imageResource := resource.NewImageResourceWithResourcePath("C:/temp/dynamicpdf-api-samples/image-info/getting-started.png", "getting-started.png")
	prImage.AddImage(imageResource)
	pdfResource := resource.NewPdfResourceWithResourcePath("c:/temp/dynamicpdf-api-samples/DocumentA.pdf", "DocumentA.pdf")
	prInput2 := input.NewPdfWithResource(pdfResource)
	pr.Inputs = append(pr.Inputs, prInput2)
	pr.Endpoint.BaseUrl = baseUrl
	pr.Endpoint.ApiKey = key
	return pr
}
def ug_merge_pdfs(documentPath):
    pdf=Pdf()
    resourceOne = PdfResource(documentPath + "DocumentA.pdf")
    pdf.add_pdf(resourceOne)
    pdf.add_image("samples/get-image-info-image-info-endpoint/dynamicpdfLogo.png")
    resourceTwo = PdfResource(documentPath + "DocumentB.pdf")
    pdf.add_pdf(resourceTwo)
    return pdf
  def self.merge_example(base_path)
    pdf = Pdf.new
    pdf.add_pdf(PdfResource.new("#{base_path}DocumentA.pdf"))
    pdf.add_image(ImageResource.new("#{base_path}DPDFLogo.png"))
    pdf.add_pdf(PdfResource.new("#{base_path}DocumentB.pdf"))
    pdf
  end

Figure 4. A PDF, followed by an image, and then followed by another PDF combined to form a merged PDF.
Form Fields
A PDF can be a form with form fields that the end user completes and then saves as a new completed PDF document. You can complete a PDF form programmatically by using the pdf input type combined with processing instructions for the PDF's embedded form fields.
You can also flatten the form fields in a PDF, remove form fields, and retain signature fields. Refer to the following documentation topic on the instructions schema for more information on forms (pdf instructions - form fields).
The following example illustrates.
JSON
{
  "inputs": [
    {
      "type": "pdf",
      "resourceName": "simple-form-fill.pdf"
    }
  ],
  "formFields": [
    {
      "name": "nameField",
      "value": "DynamicPDF"
    },
    {
      "name": "descriptionField",
      "value": "RealTime Pdf's. Real FAST!"
    }
  ],
  "outlines": []
}
Client APIs
The following example illustrates a simple PDF document with two form fields where the values are entered programmatically and then saved to a new PDF. For all four client API languages, the processing steps are the same.
- Create a new
Pdfinstance. - Add the PDF from local system to a new
PdfResourceinstance. - Add values to the PDF's two form fields as new
FormFieldinstances. - Add the
FormFieldinstances to the new PDF with the completed form field values.
- C# (.NET)
- Java
- Node.js
- PHP
- Go
- Python
- Ruby
public static Pdf FormFieldsExample(String basePath) {
	Pdf pdf = new Pdf();
	pdf.AddPdf(new PdfResource(basePath + "simple-form-fill.pdf"));
	FormField formField = new FormField("nameField", "DynamicPdf");
	FormField formField2 = new FormField("descriptionField", "RealTime Pdf's. Real FAST!");
	pdf.FormFields.Add(formField);
	pdf.FormFields.Add(formField2);
	return pdf;
}
static async FormFieldsExample(apiKey, basePath) {
	var pdf = new Pdf();
    pdf.addPdf(new PdfResource(basePath + "simple-form-fill.pdf"));
    var formField = new FormField("nameField", "DynamicPdf");
    var formField2 = new FormField("descriptionField", "RealTime Pdf's. Real FAST!");

    pdf.formFields.push(formField);
    pdf.formFields.push(formField2);
    await this.ProcessAndSave(pdf, apiKey, basePath, "json-FormFieldsExample-output.pdf");
}
public static Pdf FormFieldsExample(String basePath) {
	Pdf pdf = new Pdf();
	pdf.addPdf(new PdfResource(basePath + "simple-form-fill.pdf"));
	FormField formField = new FormField("nameField", "DynamicPdf");
	FormField formField2 = new FormField("descriptionField", "RealTime Pdf's. Real FAST!");
	pdf.getFormFields().add(formField);
	pdf.getFormFields().add(formField2);
	return pdf;
}
public static function FormFieldsExample() {
	$pdf = new Pdf();
    $pdf->AddPdf("samples/shared/pdf/simple-form-fill.pdf");
    $formField = new FormField("nameField", "DynamicPDF");
    $formField2 = new FormField("descriptionField", "DynamicPDF CloudAPI. RealTime PDFs, Real FAST!");
    array_push($pdf->FormFields, $formField);
    array_push($pdf->FormFields, $formField2);
	return $pdf;
}
func acroFormExample(key string, baseUrl string) *endpoint.Pdf {
	pdfAcro := endpoint.NewPdf()
	pdfResource := resource.NewPdfResourceWithResourcePath("C:/temp/users-guide-samples/simple-form-fill.pdf", "simple-form.pdf")
	pdfInput := input.NewPdfWithResource(pdfResource)
	pdfAcro.Inputs = append(pdfAcro.Inputs, pdfInput)

	field1 := endpoint.NewFormFieldWithValue("nameField", "DynamicPdf")
	pdfAcro.FormFields = append(pdfAcro.FormFields, *field1)
	field2 := endpoint.NewFormFieldWithValue("descriptionField", "RealRTime Pdf's. Real FAST!")
	pdfAcro.FormFields = append(pdfAcro.FormFields, *field2)

	pdfAcro.Endpoint.ApiKey = key
	pdfAcro.Endpoint.BaseUrl = baseUrl

	return pdfAcro
}
def ug_acro_form_example():
    pdf=Pdf()
    pdf.add_pdf("samples/users-guide-resources/simple-form-fill.pdf");
    formField = FormField("nameField", "DynamicPDF");
    formField2 = FormField("descriptionField", "DynamicPDF CloudAPI. RealTime PDFs, Real FAST!");
    pdf.form_fields.append(formField)
    pdf.form_fields.append(formField2)
    return pdf
  def self.form_fields_example(base_path)
    pdf = Pdf.new
    pdf.add_pdf(PdfResource.new("#{base_path}simple-form-fill.pdf"))
    pdf.form_fields << FormField.new('nameField', 'DynamicPDF')
    pdf.form_fields << FormField.new('descriptionField', 'DynamicPDF CloudAPI. RealTime PDFs, Real FAST!')
    pdf
  end
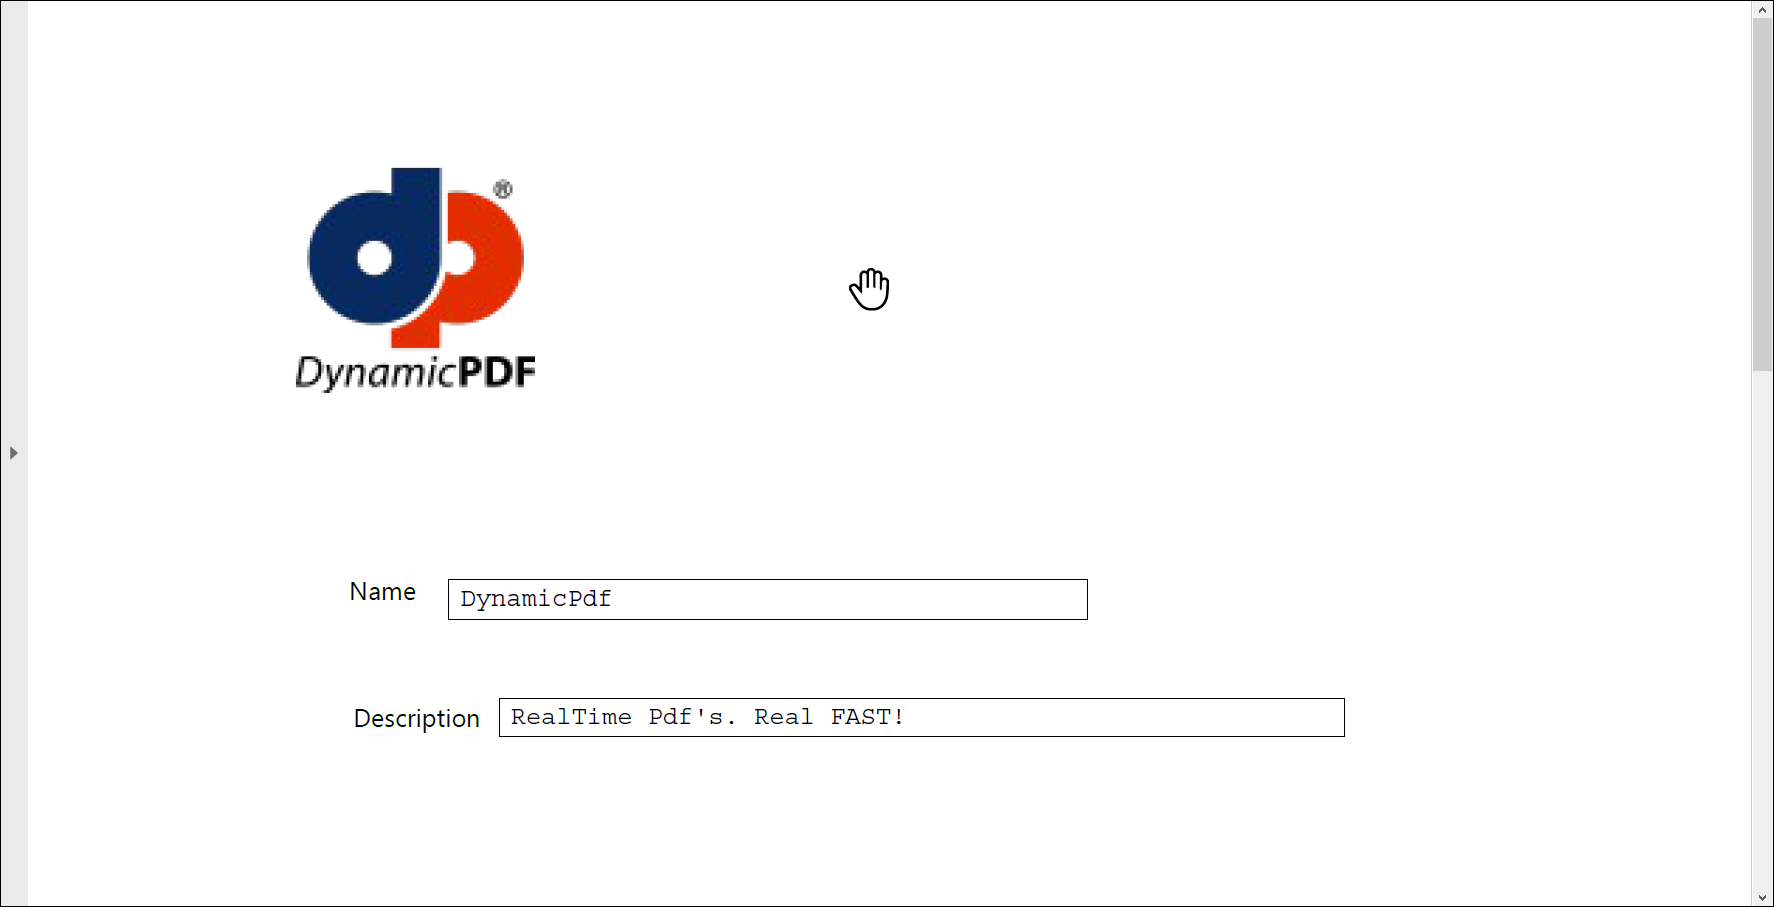
Figure 5. PDF form with form field values entered programmatically.
Outlines
You add bookmarks/outline to a PDF using the outlines array in the processing instructions.
Refer to the Outlines topic on JSON Instructions Schema documentation page for the properties associated with the outlines array.
The following two examples illustrate creating a new PDF and adding an outline and then adding an outline to an existing PDF. The first example illustrates a creating an outline from scratch while the second example works with a pre-existing outline.
Creating New Page with Outline
The following example shows creating a PDF using the page element and adding an outline from scratch.
JSON
{
  "author":"John Doe",
  "title":"New Outline Sample Pdf",
  "creator":"DynamicPDF API",
  "flattenAllFormFields":false,
  "retainSignatureFormFields":false,
  "inputs":[
    {
      "id":"1f2c5e25-9814-4e42-a934-b45b56748b04",
      "elements":[
        {
          "placement":"topCenter",
          "text":"Hello World 1",
          "type":"text"
        }
      ],
      "type":"page"
    },
    {
      "id":"4d1227c1-598e-456f-a67d-0b6f3c7b607f",
      "elements":[
        {
          "placement":"topCenter",
          "text":"Hello World 2",
          "type":"text"
        }
      ],
      "type":"page"
    },
    {
      "id":"a8c0d4ff-2a1f-48e6-95d0-2170354e7477",
      "elements":[
        {
          "placement":"topCenter",
          "text":"Hello World 3",
          "type":"text"
        }
      ],
      "type":"page"
    }
  ],
  "outlines":[
    {
      "text":"Root Outline",
      "expanded":false,
      "children":[
        {
          "text":"Page 1",
          "expanded":false,
          "linkTo":{
            "pageOffset":0,
            "pageZoom":"fitPage",
            "inputID":"1f2c5e25-9814-4e42-a934-b45b56748b04"
          }
        },
        {
          "text":"Page 2",
          "expanded":false,
          "linkTo":{
            "pageOffset":0,
            "pageZoom":"fitPage",
            "inputID":"4d1227c1-598e-456f-a67d-0b6f3c7b607f"
          }
        },
        {
          "text":"Page 3",
          "expanded":false,
          "linkTo":{
            "pageOffset":0,
            "pageZoom":"fitPage",
            "inputID":"a8c0d4ff-2a1f-48e6-95d0-2170354e7477"
          }
        }
      ]
    }
  ]
}
Client APIs
The processing steps are the same for all four client API language.
- Create a new
Pdfinstance. - Create a new
Textelement instance and add it to the first page. - Create a second page and add text to the page.
- Add a third page and add text to the page.
Now that we have three new PDFs to be merged (the three new pages) let's create the outline.
- Create a new
Outlineinstance and create the top-level outline bookmark (the root element). - Get a reference to the
Outlineinstance'sChildrencollection and add three more bookmarks. Note that each bookmark refers to the newly created page (PDF to merge).
- C# (.NET)
- Java
- Node.js
- PHP
- Go
- Python
- Ruby
public static Pdf AddOutlinesForNewPdf() {
    Pdf pdf = new Pdf();
	PageInput pageInput = pdf.AddPage();
	TextElement element = new TextElement("Hello World 1", ElementPlacement.TopCenter);
	pageInput.Elements.Add(element);
	PageInput pageInput1 = pdf.AddPage();
	TextElement element1 = new TextElement("Hello World 2", ElementPlacement.TopCenter);
	pageInput1.Elements.Add(element1);
	PageInput pageInput2 = pdf.AddPage();
	TextElement element2 = new TextElement("Hello World 3", ElementPlacement.TopCenter);
	pageInput2.Elements.Add(element2);
	Outline rootOutline = pdf.Outlines.Add("Root Outline");
	rootOutline.Children.Add("Page 1", pageInput);
	rootOutline.Children.Add("Page 2", pageInput1);
	rootOutline.Children.Add("Page 3", pageInput2);
	return pdf;
}
static async AddOutlinesForNewPdf(apiKey, basePath) {
	var pdf = new Pdf();
    pdf.author = "John Doe";
    pdf.title = "Sample Pdf";

    var pageInput = pdf.AddPage();
    var element = new TextElement("Hello World 1", elementPlacement.TopCenter);
    pageInput.Elements.push(element);

    var pageInput1 = pdf.addPage();
    var element1 = new TextElement("Hello World 2", elementPlacement.TopCenter);
    pageInput1.Elements.push(element1);

    var pageInput2 = pdf.addPage();
    var element2 = new TextElement("Hello World 3", ElementPlacement.TopCenter);
    pageInput2.elements.push(element2);

    var rootOutline = pdf.outlines.add("Root Outline");
    rootOutline.children.add("Page 1", pageInput);
    rootOutline.children.add("Page 2", pageInput1);
    rootOutline.children.add("Page 3", pageInput2);
    await this.ProcessAndSave(pdf, apiKey, basePath, "json-AddOutlinesForNewPdf-output.pdf");
}
public static Pdf AddOutlinesForNewPdf() {
	Pdf pdf = new Pdf();
	pdf.setAuthor("John Doe");
	pdf.setTitle("New Outline Sample Pdf");

	PageInput pageInput = pdf.addPage();
	TextElement element = new TextElement("Hello World 1", ElementPlacement.TOPCENTER);
	pageInput.getElements().add(element);

    PageInput pageInput1 = pdf.addPage();
	TextElement element1 = new TextElement("Hello World 2", ElementPlacement.TOPCENTER);
	pageInput1.getElements().add(element1);

	PageInput pageInput2 = pdf.addPage();
	TextElement element2 = new TextElement("Hello World 3", ElementPlacement.TOPCENTER);
	pageInput2.getElements().add(element2);

	Outline rootOutline = pdf.getOutlines().add("Root Outline");

	rootOutline.getChildren().add("Page 1", pageInput);
	rootOutline.getChildren().add("Page 2", pageInput1);
	rootOutline.getChildren().add("Page 3", pageInput2);
	return pdf;
}
public static function AddOutlinesForNewPdf()
	{
		$pdf = new Pdf();
		$pdf->Author = "John Doe";
		$pdf->Title = "Sample Pdf";

		$pageInput = $pdf->AddPage();
		$element = new TextElement("Hello World 1", ElementPlacement::TopCenter);
		array_push($pageInput->Elements, $element);

		$pageInput1 = $pdf->AddPage();
		$element1 = new TextElement("Hello World 2", ElementPlacement::TopCenter);
		array_push($pageInput1->Elements, $element1);

		$pageInput2 = $pdf->AddPage();
		$element2 = new TextElement("Hello World 3", ElementPlacement::TopCenter);
		array_push($pageInput2->Elements, $element2);

		$rootOutline = $pdf->Outlines->Add("Root Outline");

		$rootOutline->Children->Add("Page 1", $pageInput);
		$rootOutline->Children->Add("Page 2", $pageInput1);
		$rootOutline->Children->Add("Page 3", $pageInput2);

		return $pdf;
	}
func outlineExample() *endpoint.Pdf {

	pdfOut := endpoint.NewPdf()

	pageInputOne := pdfOut.AddPage()
	textOne := element.NewText("Hello World 1", element.BottomCenter, 250, 0)
	pageInputOne.Elements = append(pageInputOne.Elements, textOne)

	pdfOut.Inputs = append(pdfOut.Inputs, pageInputOne)

	pageInputTwo := pdfOut.AddPage()
	textTwo := element.NewText("Hello World 2", element.BottomCenter, 250, 0)
	pageInputTwo.Elements = append(pageInputTwo.Elements, textTwo)

	pageInputThree := pdfOut.AddPage()
	textThree := element.NewText("Hello World 3", element.BottomCenter, 250, 0)
	pageInputThree.Elements = append(pageInputThree.Elements, textThree)

	outline := pdfOut.Outlines.Add("Root Outline")
	outline.Expanded = true

	out := outline.Children()

	out.AddWithInputValue("Page 1", pageInputOne.Input, 0, endpoint.FitPage)
	out.AddWithInputValue("Page 2", pageInputTwo.Input, 0, endpoint.FitPage)
	out.AddWithInputValue("Page 3", pageInputOne.Input, 0, endpoint.FitPage)

	return pdfOut
}
def ug_add_outlines_for_new_pdf():
    pdf = Pdf()
    pdf.author = "John Doe"
    pdf.title = "Sample Pdf"
    pageInput = pdf.add_page()
    element = TextElement("Hello World 1", ElementPlacement.TopCenter)
    pageInput.elements.append(element)
    pageInput1 = pdf.add_page()
    element1 = TextElement("Hello World 2", ElementPlacement.TopCenter)
    pageInput2 = pdf.add_page()
    element2 = TextElement("Hello World 3", ElementPlacement.TopCenter)
    pageInput2.elements.append(element2)
    rootOutline = pdf.outlines.add("Root Outline")
    rootOutline.children.add("Page 1", pageInput)
    rootOutline.children.add("Page 2", pageInput1)
    rootOutline.children.add("Page 3", pageInput2)
    return pdf
  def self.add_outlines_for_new_pdf(_base_path)
    pdf = Pdf.new
    pdf.author = 'John Doe'
    pdf.title = 'Sample Pdf'

    page1 = pdf.add_page
    page1.elements << TextElement.new('Hello World 1', ElementPlacement::TOP_CENTER)

    page2 = pdf.add_page
    page2.elements << TextElement.new('Hello World 2', ElementPlacement::TOP_CENTER)

    page3 = pdf.add_page
    page3.elements << TextElement.new('Hello World 3', ElementPlacement::TOP_CENTER)

    root_outline = pdf.out_lines.add('Root Outline')
    root_outline.children.add('Page 1', page1)
    root_outline.children.add('Page 2', page2)
    root_outline.children.add('Page 3', page3)

    pdf
  end
The finished PDF contains an outline consisting of the root outline, followed by the three new bookmarks. Each bookmark links to the newly created PDF that was merged to the final PDF.
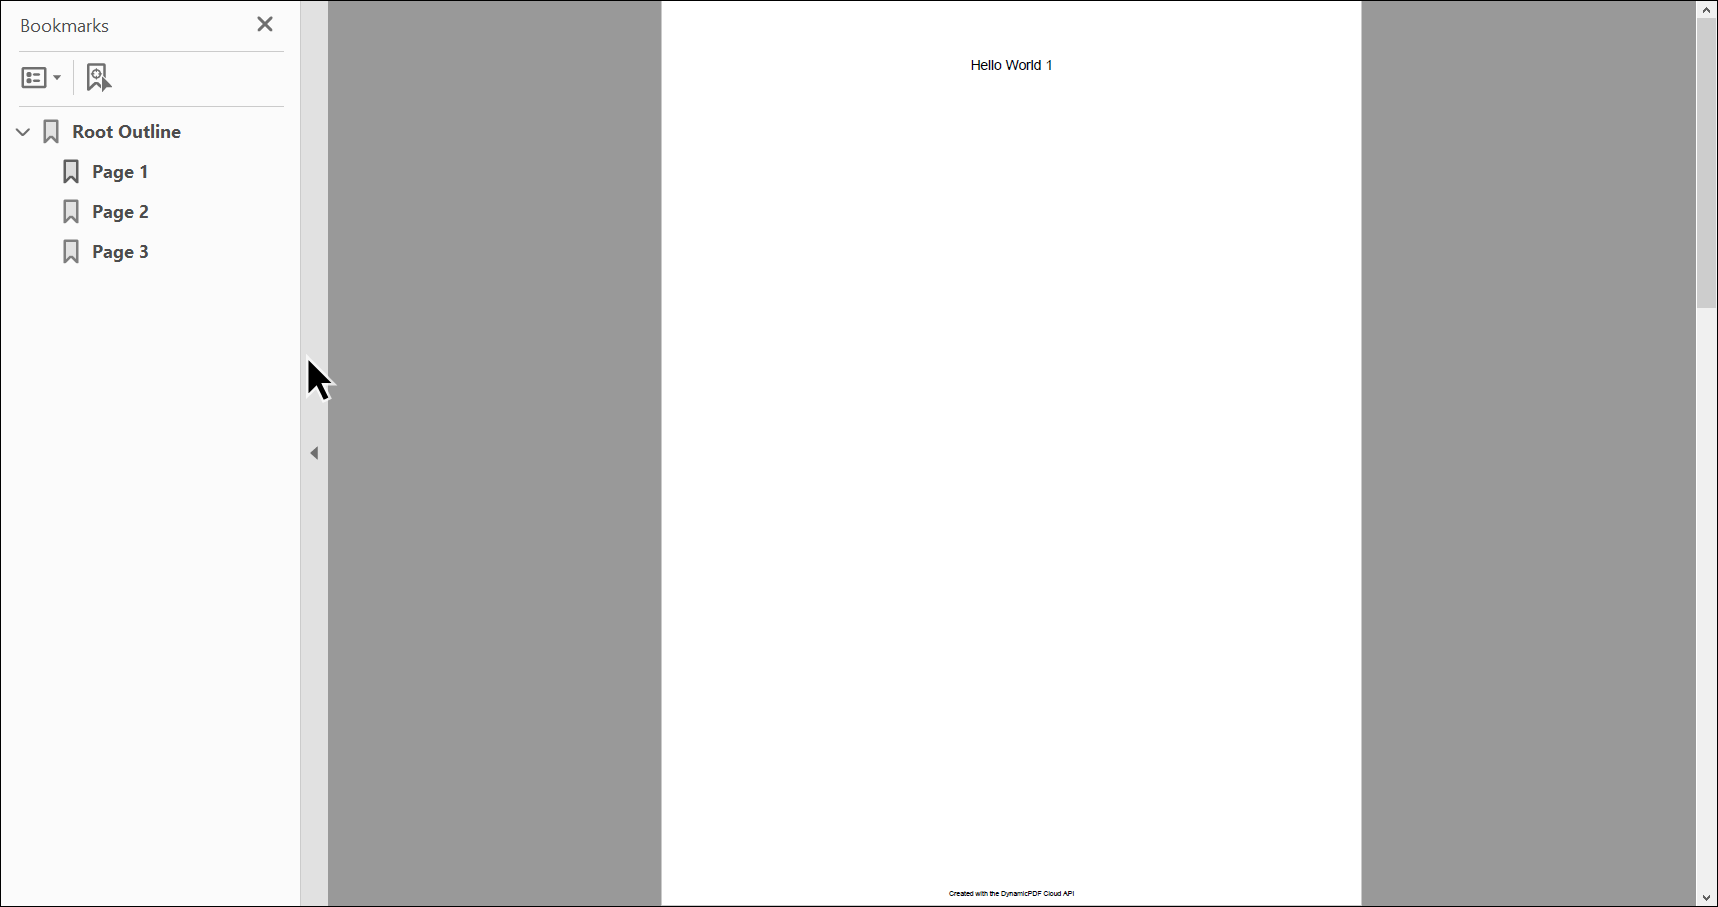
Figure 6. PDF with added outline.
Add Outline to Existing PDF
The following example illustrates merging existing PDFs and adding an outline.
JSON
{
  "author":"John Doe",
  "title":"Existing Pdf Example",
  "creator":"DynmaicPDF Cloud Api",
  "flattenAllFormFields":false,
  "retainSignatureFormFields":false,
  "inputs":[
    {
      "resourceName":"7c131f14-3148-47c9-b28b-349f4562b004.pdf",
      "id":"AllPageElements",
      "mergeOptions":{
        "outlines":false
      },
      "type":"pdf"
    },
    {
      "resourceName":"7c131f14-3148-47c9-b28b-349f4562b004.pdf",
      "id":"AllPageElements",
      "mergeOptions":{
        "outlines":false
      },
      "type":"pdf"
    },
    {
      "resourceName":"3a161f25-db1b-449b-a7af-7dfdb6ad152d.pdf",
      "id":"outlineDoc1",
      "mergeOptions":{
        "outlines":false
      },
      "type":"pdf"
    },
    {
      "resourceName":"3a161f25-db1b-449b-a7af-7dfdb6ad152d.pdf",
      "id":"outlineDoc1",
      "mergeOptions":{
        "outlines":false
      },
      "type":"pdf"
    }
  ],
  "outlines":[
    {
      "text":"Imported Outline",
      "expanded":true,
      "children":[
        {
          "expanded":false,
          "fromInputID":"AllPageElements"
        },
        {
          "expanded":false,
          "fromInputID":"outlineDoc1"
        }
      ]
    }
  ]
}
Client APIs
- C# (.NET)
- Java
- Node.js
- PHP
- Go
- Python
- Ruby
public static Pdf AddOutlinesExistingPdf(String basePath) {

    Pdf pdf = new Pdf();
	PdfResource resource = new PdfResource(basePath + "AllPageElements.pdf");
	PdfInput input = pdf.AddPdf(resource);
	input.Id = "AllPageElements";
	pdf.Inputs.Add(input);

	PdfResource resource1 = new PdfResource(basePath + "OutlineExisting.pdf");
	PdfInput input1 = pdf.AddPdf(resource1);
	input1.Id = "outlineDoc1";
	pdf.Inputs.Add(input1);

	Outline rootOutline = pdf.Outlines.Add("Imported Outline");
	rootOutline.Expanded = true;
    rootOutline.Children.AddPdfOutlines(input);
	rootOutline.Children.AddPdfOutlines(input1);
	return pdf;
}
static async AddOutlinesExistingPdf(apiKey, basePath) {
	var pdf = new Pdf();
    pdf.author = "John Doe";
    pdf.title = "Existing Pdf Example";

    var resource = new PdfResource(basePath + "AllPageElements.pdf");
    var input = pdf.addPdf(resource);
    input.id = "AllPageElements";

    var resource1 = new PdfResource(basePath + "OutlineExisting.pdf");
    var input1 = pdf.addPdf(resource1);
    input1.id = "outlineDoc1";

    var rootOutline = pdf.outlines.add("Imported Outline");
    rootOutline.expanded = true;

    rootOutline.children.addPdfOutlines(input);
    rootOutline.children.addPdfOutlines(input1);

    await this.ProcessAndSave(pdf, apiKey, basePath, "json-AddOutlinesExisting-output.pdf");
}
public static Pdf AddOutlinesExistingPdf(String basePath) {
	Pdf pdf = new Pdf();
	pdfResource resource = new PdfResource(basePath + "AllPageElements.pdf");
	PdfInput input = pdf.addPdf(resource);
	input.setId("AllPageElements");
	pdf.getInputs().add(input);

	PdfResource resource1 = new PdfResource(basePath + "OutlineExisting.pdf");
	PdfInput input1 = pdf.addPdf(resource1);
	input1.setId("outlineDoc1");
	pdf.getInputs().add(input1);

	Outline rootOutline = pdf.getOutlines().add("Imported Outline");
	rootOutline.setExpanded(true);
	rootOutline.getChildren().addPdfOutlines(input);
	rootOutline.getChildren().addPdfOutlines(input1);
	return pdf;
}
public static function AddOutlinesExistingPdf() {
	$pdf = new Pdf();
	$pdf->Author = "John Doe";
	$pdf->Title = "Existing Pdf Example";
	$resource = new PdfResource(InstructionsExample::$BasePath . "AllPageElements.pdf");
	$input = $pdf->AddPdf($resource);
	$input->Id = "AllPageElements";
	array_push($pdf->Inputs, $input);
    $resource1 = new PdfResource(InstructionsExample::$BasePath . "OutlineExisting.pdf");
	$input1 = $pdf->AddPdf($resource1);
	$input1->Id = "outlineDoc1";
	array_push($pdf->Inputs, $input1);

	$rootOutline = $pdf->Outlines->Add("Imported Outline");
	$rootOutline->Expanded = true;
	$rootOutline->Children->AddPdfOutlines($input);
	$rootOutline->Children->AddPdfOutlines($input1);
	return $pdf;
}
func addOutlinesExistingPdf(basePath string) *endpoint.Pdf {

    pdfOut := endpoint.NewPdf()
    pdfOut.Author = "John Doe"
    pdfOut.Title = "Existing Pdf Example"

    var resource1 = resource.NewPdfResourceWithResourcePath(basePath + "AllPageElements.pdf", "AllPageElements.pdf");
    var input1 = pdfOut.AddPdf(resource1, input.NewMergeOptions());
    input1.SetId("AllPageElements")

    var resource2 = resource.NewPdfResourceWithResourcePath(basePath + "OutlineExisting.pdf", "OutlineExisting.pdf");
    var input2 = pdfOut.AddPdf(resource2, input.NewMergeOptions());
    input2.SetId("outlineDoc1");

    var rootOutline = pdfOut.Outlines.Add("Imported Outline");
    rootOutline.Expanded = true;

	out := rootOutline.Children()
	out.AddPdfOutlines(*input1)
	out.AddPdfOutlines(*input2)

	return pdfOut
}
def ug_add_outlines_existing_pdf(documentPath):
    pdf = Pdf()
    pdf.author = "John Doe"
    pdf.title = "Sample Pdf"
    resource = PdfResource(documentPath + "AllPageElements.pdf")
    input = pdf.add_pdf(resource)
    input.id = "AllPageElements"
    resource1 = PdfResource(documentPath + "OutlineExisting.pdf")
    input1 = pdf.add_pdf(resource1)
    input1.id = "outlineDoc1"

    rootOutline = pdf.outlines.add("Imported Outline")
    rootOutline.expanded = True
    rootOutline.children.add(input)
    rootOutline.children.add(input1)
    return pdf
  def self.add_outlines_existing_pdf(base_path)
    pdf = Pdf.new
    pdf.author = 'John Doe'
    pdf.title = 'Existing Pdf Example'

    input1 = pdf.add_pdf(PdfResource.new("#{base_path}AllPageElements.pdf"))
    input1.id = 'AllPageElements'

    input2 = pdf.add_pdf(PdfResource.new("#{base_path}OutlineExisting.pdf"))
    input2.id = 'outlineDoc1'

    root_outline = pdf.out_lines.add('Imported Outline')
    root_outline.expanded = true
    root_outline.children.add_pdf_outlines(input1)
    root_outline.children.add_pdf_outlines(input2)

    pdf
  end
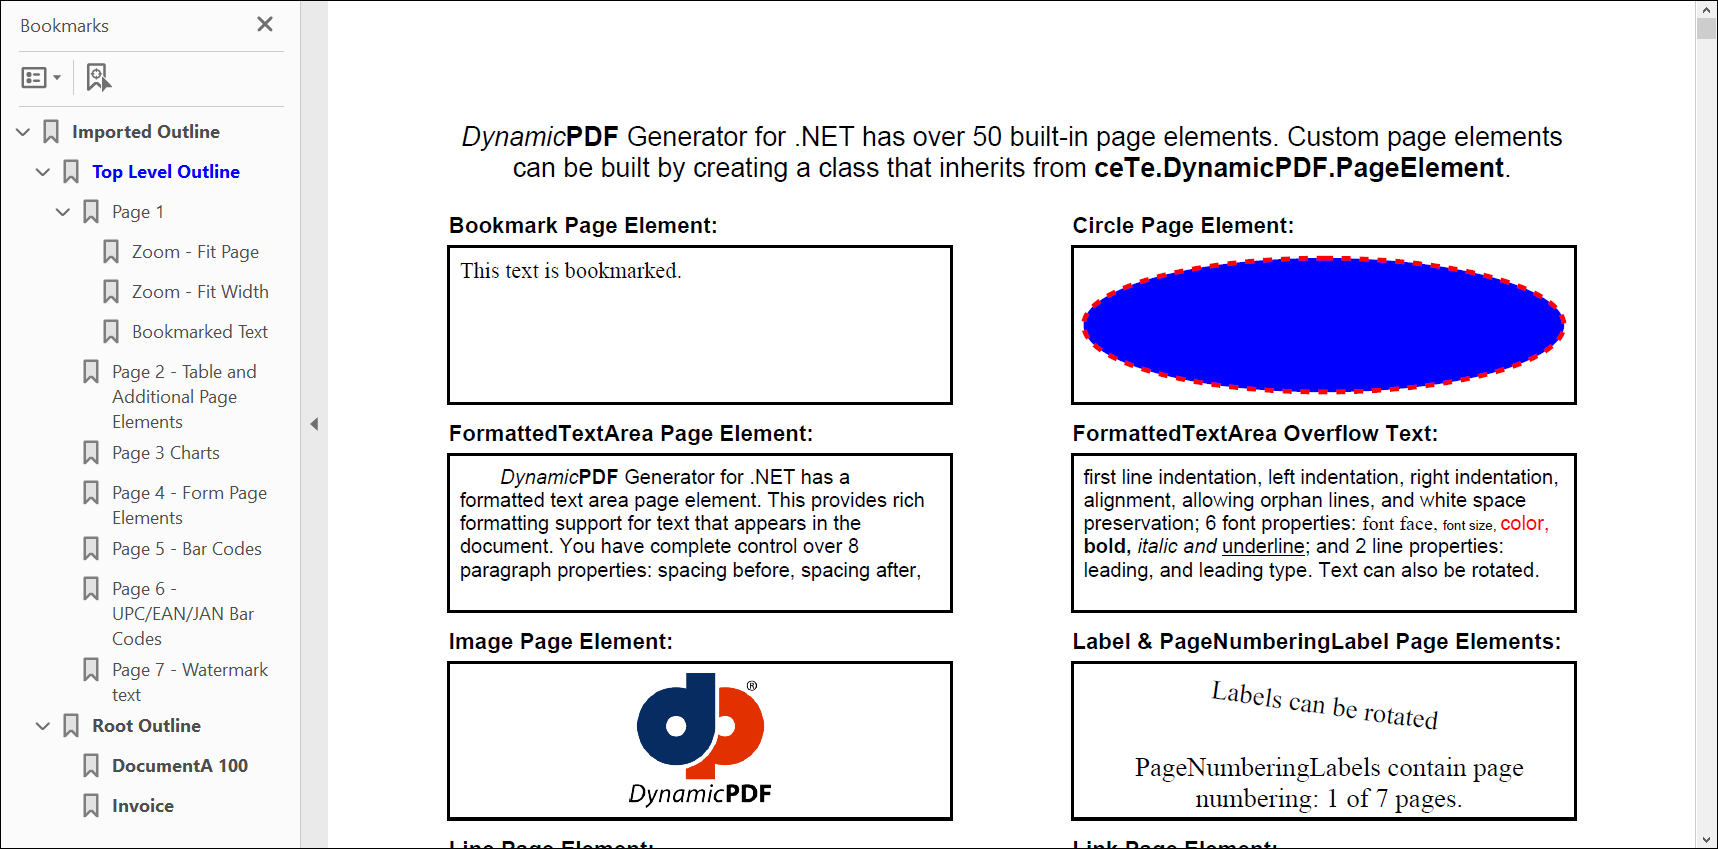
Figure 7. Resultant PDF with an existing outline.
Templates
Use the templates array to add one or more templates to a resulting PDF document. The following example illustrates a simple template created by adding text that is centered at the top of a PDF.
Json
{
  "templates": [
    {
      "id": "Temp1",
      "elements": [
        {
          "type": "text",
          "text": "Hello World",
          "placement": "topCenter",
          "xOffset": 0.0,
          "yOffset": 0.0
        }
      ]
    }
  ],
  "inputs": [
    {
      "type": "pdf",
      "templateId": "Temp1",
      "resourceName": "DocumentA.pdf"
    }
  ],
  "formFields": []
}
Client APIs
- C# (.NET)
- Java
- Node.js
- PHP
- Go
- Python
- Ruby
public static Pdf TemplateExample(String basePath) {
    Pdf pdf = new Pdf();
	PdfResource resource = new PdfResource(basePath + "/DocumentA.pdf");
	PdfInput input = new PdfInput(resource);
	pdf.Inputs.Add(input);

    Template template = new Template("Temp1");
	TextElement element = new TextElement("Hello World", ElementPlacement.TopCenter);
	template.Elements.Add(element);
	input.Template = template;
	return pdf;
}
static async TemplateExample(apiKey, basePath) {
    var pdf = new Pdf();
    pdf.author = "John User";
    pdf.title = "Template Example One";
    var resource = new PdfResource(basePath + "DocumentA.pdf");
    var input = new PdfInput(resource);
    pdf.inputs.push(input);

    var template = new Template("Temp1");
    var element = new TextElement("Hello World", elementPlacement.TopCenter);
    template.elements.push(element);
    input.template = template;
    await this.ProcessAndSave(pdf, apiKey, basePath, "json-TemplateExample-output.pdf");
}
public static Pdf TemplateExample(String basePath) {
	Pdf pdf = new Pdf();
	pdf.setAuthor("John User");
	pdf.setTitle("Template Example");
	PdfResource resource = new PdfResource(basePath + "/DocumentA.pdf");
	PdfInput input = new PdfInput(resource);
	pdf.getInputs().add(input);

	Template template = new Template("Temp1");
	TextElement element = new TextElement("Hello World", ElementPlacement.TOPCENTER);
	template.getElements().add(element);
	input.setTemplate(template);
	return pdf;
}
public static function TemplateExample() {
	$pdf = new Pdf();
	$pdf->Author = "John User";
	$pdf->Title = "Template Example One";
	$resource = new PdfResource(InstructionsExample::$BasePath . "DocumentA.pdf");
	$input = new PdfInput($resource);
	array_push($pdf->Inputs, $input);

	$template = new Template("Temp1");
	$element = new TextElement("Hello World", ElementPlacement::TopCenter);
	array_push($template->Elements, $element);
	$input->Template = $template;
	return $pdf;
}
func templateExample(basePath string) *endpoint.Pdf {
	pdfTemp := endpoint.NewPdf()
	pdfResource := resource.NewPdfResourceWithResourcePath(basePath+"DocumentA.pdf", "DocumentA.pdf")
	pdfInput1 := input.NewPdfWithResource(pdfResource)
	temp := element.NewTemplate()
	txt := element.NewText("Hello World", element.TopCenter, 20, 10)
	txt.SetColor(color.NewRgbColorDefault().Red().Color)
	txt.SetFontSize(32)
	temp.Elements = append(temp.Elements, txt)
	pdfInput1.SetTemplate(temp)
	pdfTemp.Inputs = append(pdfTemp.Inputs, pdfInput1)
	return pdfTemp
}
def ug_template_example(documentPath):
    pdf = Pdf()
    resource = PdfResource(documentPath + "DocumentA.pdf")
    input = pdf.add_pdf(resource)

    template = Template("Temp1")
    element = TextElement("Hello World", ElementPlacement.TopCenter)
    template.elements.append(element)
    input.template = template
    return pdf
  def self.template_example(base_path)
    pdf = Pdf.new
    pdf.author = 'John User'
    pdf.title = 'Template Example One'

    input = PdfInput.new(PdfResource.new("#{base_path}DocumentA.pdf"))
    pdf.inputs << input

    template = Template.new('Temp1')
    template.elements << TextElement.new('Hello World', ElementPlacement::TOP_CENTER)
    pdf.templates['Temp1'] = template
    input._template_id = 'Temp1'

    pdf
  end

Figure 8. PDF with an added template.
Template Elements
Add one or more elements when creating a template. The Following elements are supported.
- PageNumbering
- Text
- Image
- Rectangle
- Line
- Barcode
Refer to the Add Text, Images, Lines, and Rectangles to Existing PDFs solution for an example adding several elements to a template.
The following properties are shared by all elements.
| Property | Type | ||
|---|---|---|---|
type | pageNumbering, text, image, rectangle, line | (see barcodes for barcode types) | |
placement | topLeft, topCenter, topRight, bottomLeft, bottomCenter, bottomRight | REQUIRED | |
xOffset | number | ||
yOffset | number | ||
color | (see colors) | ||
font | (see fonts) | ||
fontSize | number | ||
text | string | REQUIRED | |
evenPages | boolean | ||
oddPages | boolean |
Page Numbering
The pageNumbering element type adds numbers to pages. Use the following tokens within the text of a pageNumbering element and the tokens are replaced with the appropriate value when the PDF is created. Surround elements with the %% character.
| TOKEN | EXAMPLE | DESCRIPTION |
|---|---|---|
| CP | %%CP%% | Current page. The default numbering style is numeric. The current page can be offset using the is offset by the page property. |
| TP | %%TP%% | Total pages. The default numbering style is numeric. The total pages can be offset using the is offset by the pageTotalOffset property. |
Image
| Property | Type | ||
|---|---|---|---|
resourceName | string | REQUIRED | The resource file name or path of the image. Resides in cloud environment or uploaded as resource. |
maxWidth | number | ||
maxHeight | number | ||
scaleX | number | ||
scaleY | number |
Text
The text element type adds text to a template.
Rectangle
The rectangle element adds a rectangle to a template.
| Property | Type | |
|---|---|---|
width | number | REQUIRED |
height | number | REQUIRED |
cornerRadius | number | |
borderWidth | number | |
borderStyle | dash, dashLarge, dashSmall, dots, solid | |
borderColor | (see colors) | |
fillColor | (see colors) |
Line
The line element type adds a line to a template.
| Property | Type | |
|---|---|---|
y2Offset | number | REQUIRED |
x2Offset | number | REQUIRED |
lineStyle | dash, dashLarge, dashSmall, dots, solid |
Barcode
You can add a barcode to a PDF by adding a barcode element to a template. Supported barcodes include linear, two-dimensional, and postal barcodes.
You can also add barcodes to a PDF using our graphical editor, the DynamicPDF Designer.
Linear Barcodes
- Codabar
- Code 128
- Code 2 of 5
- Code 3 of 9 & extended 3 of 9
- Code 11
- Code 93 & extended 93
- EAN/JAN 13
- EAN/JAN 13 Supplement 2
- EAN/JAN 13 Supplement 5
- EAN 14/GTIN-14
- EAN/JAN 8
- EAN/JAN 8 Supplement 2
- EAN/JAN 8 Supplement 5
- GS1 Databar (RSS)
- IATA 2 of 5
- Interleaved 2 of 5
- ISBN
- ISBN Supplement 2
- ISBN Supplement 5
- ISMN
- ISMN Supplement 2
- ISMN Supplement 5
- ISSN
- ISSN Supplement 2
- ISSN Supplement 5
- ITF 14
- MSI Barcode (Modified Plessey)
- Stacked GS1 Databar
- UPC Version A
- UPC Version A Supplement 2
- UPC Version A Supplement 5
- UPC Version E
- UPC Version E Supplement 2
- UPC Version E Supplement 5
Two-Dimensional Barcodes
- Aztec
- Data Matrix Barcode
- MacroPDF417
- PDF417
- QR Code
Postal Barcodes
- Australia Post
- Deutsche Post Identcode
- Deutsche Post Leitcode
- Intelligent Mail Barcode
- KIX (Dutch KIX, Royal TNT Post Kix)
- Postnet
- RM4SCC (Royal Mail) Barcode
- Singapore Post
JSON
{
  "templates": [
    {
      "id": "Temp1",
      "elements": [
        {
          "type": "aztecBarcode",
          "valueType": "string",
          "value": "Hello World",
          "placement": "topCenter",
          "xOffset": 0.0,
          "yOffset": 500.0
        }
      ]
    }
  ],
  "author": "CeteSoftware",
  "creator": "DynamicPDF API",
  "inputs": [
    {
      "type": "pdf",
      "templateId": "Temp1",
      "resourceName": "DocumentA.pdf"
    }
  ]
}
Client APIs
- C# (.NET)
- Java
- Node.js
- PHP
- Go
- Python
- Ruby
public static Pdf BarcodeExample(String basePath) {
	Pdf pdf = new Pdf();
	PdfResource resource = new PdfResource(basePath + "/DocumentA.pdf");
	PdfInput input = new PdfInput(resource);
	pdf.Inputs.Add(input);

    Template template = new Template("Temp1");
	AztecBarcodeElement element = new AztecBarcodeElement("Hello Barcode", ElementPlacement.TopCenter, 0, 500);
	template.Elements.Add(element);
	input.Template = template;
	return pdf;
}
static async BarcodeExample(apiKey, basePath) {
	var pdf = new Pdf();
    pdf.author = "John Doe";
    pdf.title = "Barcode Example";
    var resource = new PdfResource(basePath + "DocumentA.pdf");
    var input = new PdfInput(resource);
    pdf.inputs.push(input);
    var template = new Template("Temp1");
    var element = new AztecBarcodeElement("Hello World", elementPlacement.TopCenter, 0, 500);
    template.elements.push(element);
    input.template = template;
    await this.ProcessAndSave(pdf, apiKey, basePath, "json-Barcode-Example-output.pdf");
}
public static Pdf BarcodeExample(String basePath) {

    Pdf pdf = new Pdf();
	pdf.setAuthor("John Doe");
	pdf.setTitle("Barcode Example");

	PdfResource resource = new PdfResource(basePath + "/DocumentA.pdf");
	PdfInput input = new PdfInput(resource);
	pdf.getInputs().add(input);

	Template template = new Template("Temp1");

	AztecBarcodeElement element = new AztecBarcodeElement("Hello World", ElementPlacement.TOPCENTER, 0, 500);
	template.getElements().add(element);
	input.setTemplate(template);
	return pdf;
}
public static function BarcodeExample() {
	$pdf = new Pdf();
	$pdf->Author = "John Doe";
	$pdf->Title = "Barcode Example";

	$resource = new PdfResource(InstructionsExample::$BasePath . "DocumentA.pdf");
	$input = new PdfInput($resource);
	array_push($pdf->Inputs, $input);

	$template = new Template("Temp1");
	$element = new AztecBarcodeElement("Hello World", ElementPlacement::TopCenter, 0, 500);
	array_push($template->Elements, $element);
	$input->Template = $template;
	return $pdf;
}
func barcodeExample(key string, baseUrl string) *endpoint.Pdf {
	barcodePdf := endpoint.NewPdf()
	barcodePdf.Endpoint.BaseUrl = baseUrl
	barcodePdf.Endpoint.ApiKey = key

	barcode := element.NewAztecBarcodeElement("Hello World", element.BottomRight, 50.0, 50.0)
	barcode.SetSymbolSize(element.R105xC105)
	barcode.SetXDimension(2)
	barcode.XOffset = 0
	barcode.YOffset = 10
	pdfInput := input.NewPage()
	pdfInput.Elements = append(pdfInput.Elements, barcode)
	barcodePdf.Inputs = append(barcodePdf.Inputs, pdfInput)

	return barcodePdf
}
def ug_barcode_example(documentPath):
    pdf = Pdf()
    resource = PdfResource(documentPath + "DocumentA.pdf")
    input = pdf.add_pdf(resource)
    template = Template("Temp1")
    element = AztecBarcodeElement("Hello World", ElementPlacement.TopCenter, 0, 500)
    template.elements.append(element)
    input.template = template
    return pdf
  def self.barcode_example(base_path)
    pdf = Pdf.new
    pdf.author = 'John Doe'
    pdf.title = 'Barcode Example'

    input = PdfInput.new(PdfResource.new("#{base_path}DocumentA.pdf"))
    pdf.inputs << input

    template = Template.new('Temp1')
    barcode = AztecBarcodeElement.new('Hello World', ElementPlacement::TOP_CENTER, 0, 500)
    template.elements << barcode
    pdf.templates['Temp1'] = template
    input._template_id = 'Temp1'


    pdf
  end
Figure 9. PDF with an added barcode.
The DynamicPdf API allows creating complex instructions documents, and there are many subtle nuances in each of the client libraries. For questions, be certain to contact us at support@dynamicpdf.com. But if you do, please be certain to provide relevant source code of what you are trying to accomplish.
![]()